Overview
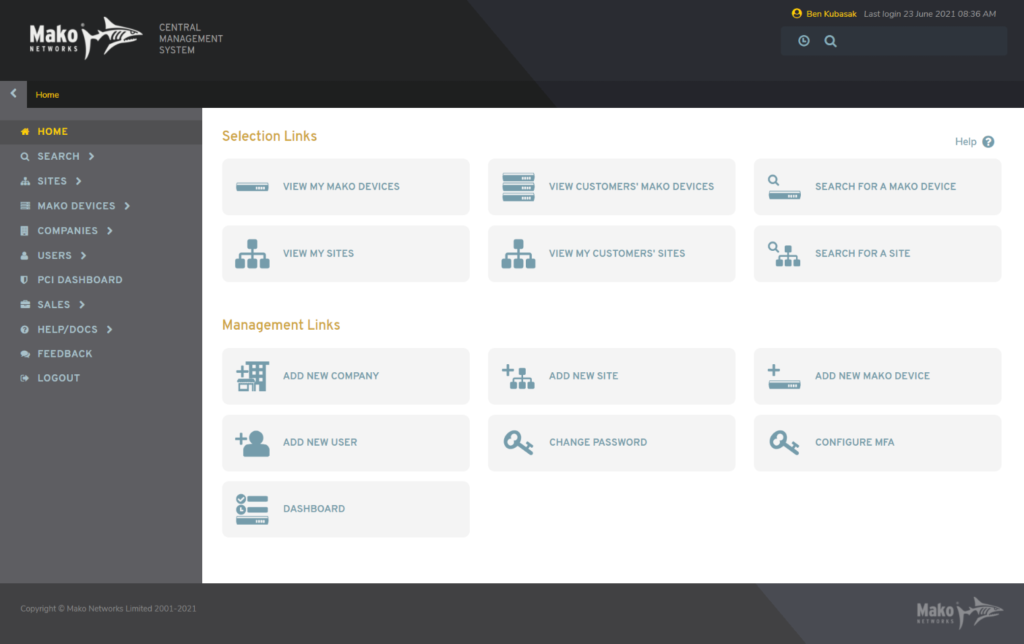
Figure 1. Example Home Page
Upon successfully logging into the Mako Central Management System (CMS) you will arrive at the Home page (Fig. 1). What displays here depends in part on your specific user account and the selected Mako device.
If you only have one Mako device, it is selected by default. If you have multiple Mako devices, you will need to select a Mako in order to manage it.
Header

Figure 2. Example Header
Home Link
Click the Mako Networks logo at the left side of the header (Fig 2.) to return to the Home page from anywhere in the Mako CMS.
User Information

Figure 3. Example User Information
Your name and last login date and time appear at the right side of the header (Fig. 3).
Selection Information
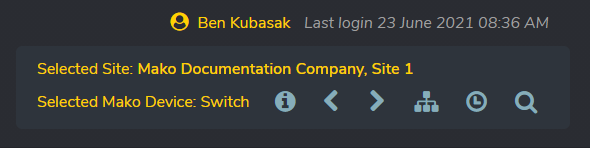
Figure 4. Example Selected Mako Information
On most pages in the Mako CMS, the name of the selected Site and/or selected Mako device display below your user information in the header (Fig. 4).

Figure 5. Example Selected Company Information in Header
On certain pages, the selected Company and/or other information (selected User, Enterprise Template, etc.) will display in the header instead of the selected Site or selected Mako device information (Fig. 5). This indicates that you are on a page for managing the selected Company (or other entity).
More Information
The “i” icon button opens an information summary for the selected Mako device in a new window.
Notes
An optional notes icon button is only present if there are custom notes saved for the selected entity. Clicking this will take you to the appropriate Notes page for the selected entity: Company Notes, Site Notes, or Mako Notes.
Previous Mako and Next Mako
You may see left/right arrow icons if you have multiple Mako devices available to manage. Use the left arrow icon button to select the previous Mako device in your list of available devices. Use the right arrow icon button to select the next Mako device in your list of available devices. This is helpful for changing the selected device without leaving the current page.
Site Summary
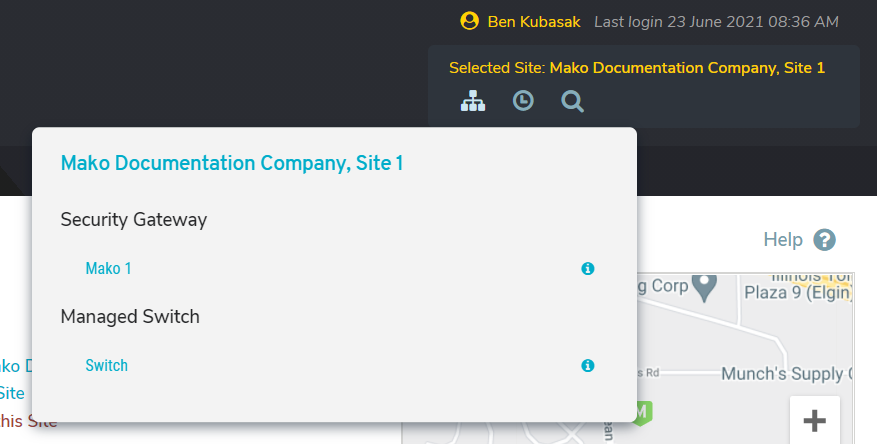
Figure 6. Example Site Summary Panel
Clicking the network icon opens the Site Summary panel (Fig. 6), which displays a summary of the selected Site. Click the Company Name and Site Name link to go to the selected Site’s Home page. All Mako devices related to the Site are listed, grouped by device type. Click the Mako Name link for a Mako device to select it for management. Click the “i” icon link for a Mako device to open its information summary in a new window.
History
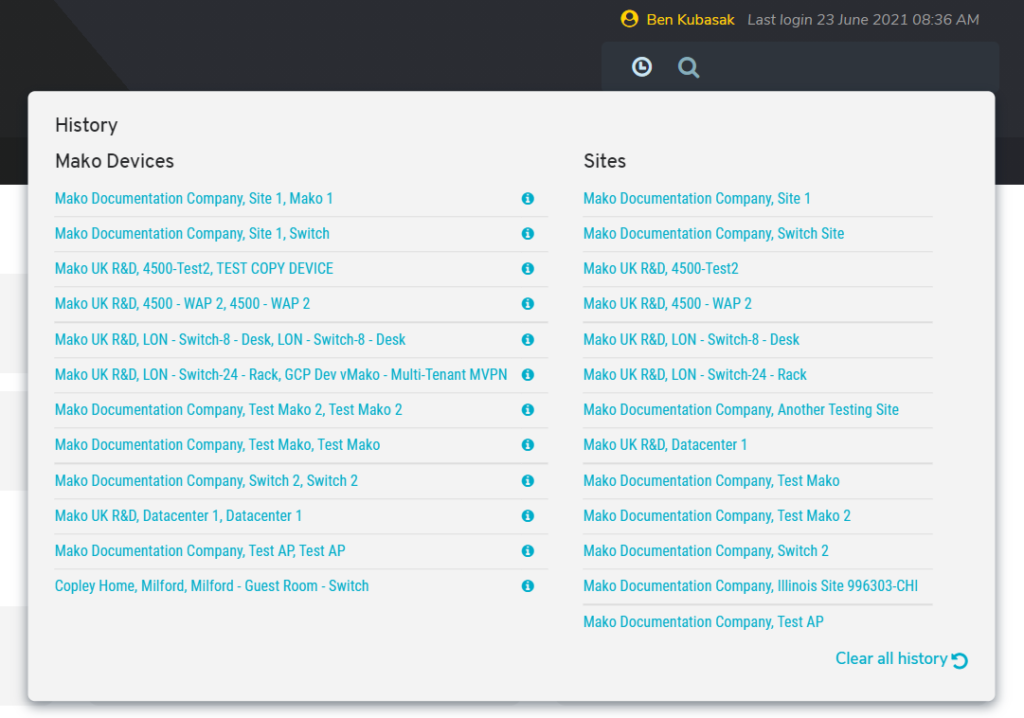
Figure 7. Example History Panel
Clicking the clock icon opens the History panel (Fig. 7), which displays a history list of your recently selected Mako devices and Sites.
Click the Mako Name link for a Mako device to select it for management. Click the “i” icon link for a Mako device to open its information summary in a new window.
Click the Site Name link for a Site to select it for management.
Use the “Clear all history” button to clear these lists, if desired.
Search
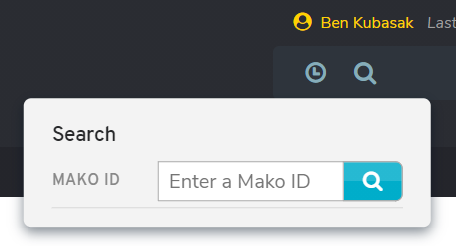
Figure 8. Example Search Panel
Another way to select a Mako device is by clicking the magnifying glass icon to open the Search panel (Fig. 8), entering a Mako ID (Global ID or MAC), and clicking the search button. See the Search Makos documentation for more details.
Breadcrumb Links
![]()
Figure 9. Example Breadcrumb Links
A series of breadcrumb links appear at the bottom of the header (Fig. 9). These links illustrate the navigation path to the content currently being viewed and provide an alternate way to visit other content in that path.
Top-level content such as the Home page will only display the current location, but as you drill down to deeper content this feature becomes more useful.
Left Navigation Menu
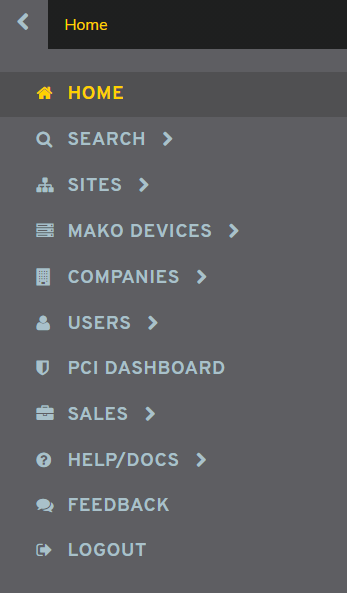
Figure 10. Example Left Navigation Menu
The primary Mako CMS navigation menu (Fig. 10) appears to the left of the main content area on interior Mako CMS pages. The arrow icon button to the left of the breadcrumb links toggles the navigation menu panel between open and closed positions.
Home
Click the Home link to return to the Home page.
Search
The Search section provides links to several search features throughout the Mako CMS: Search Sites, Search Mako Devices, Search Companies, and Search Users.
Selected Mako Device
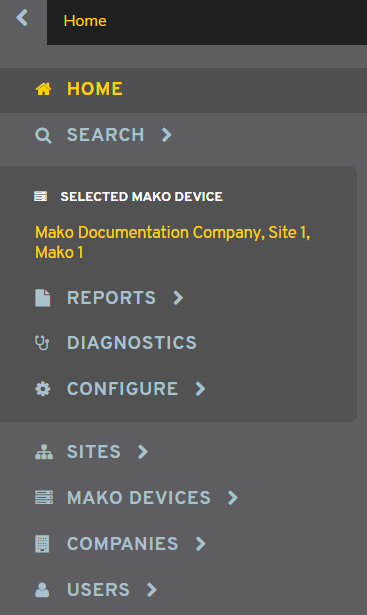
Figure 11. Example Left Navigation Menu with Mako Device Selected
If you have selected a Mako Device to manage, you will see a special menu panel (Fig. 11) with the following three sections. These will only appear in the left navigation of the Mako CMS when you have a Mako Device selected.
Reports
In the Reports section you can analyze data related to the selected Mako. You can also manage your Licenses here.
Diagnostics
In the Diagnostics section you can send commands to troubleshoot the selected Mako.
Configure
The Configure section is where you can configure settings for the selected Mako. Many of these settings can also be inherited from Enterprise Templates or other Company settings.
Sites
The Sites section is where you can view your Sites or select a Site to manage.
Mako Devices
The Mako Devices section is where you can view your Mako devices or select a Mako device to manage.
Companies
The Companies section is where you can view your Companies or select a Company to manage.
Users
The Users section is where you can view your Users or select a User to manage.
PCI Dashboard
The PCI Dashboard provides advanced visualization options for reviewing the PCI status of your Mako devices.
Help/Docs
Use the Help/Docs section to contact Mako Networks for assistance or to review documentation.
Feedback
Use the Feedback form to provide feedback regarding your use of the Mako CMS. Choose a category, enter your comments and your contact information, then click the “Submit” button.
Logout
Click the Logout link to end your current Mako CMS session.
Dashboard
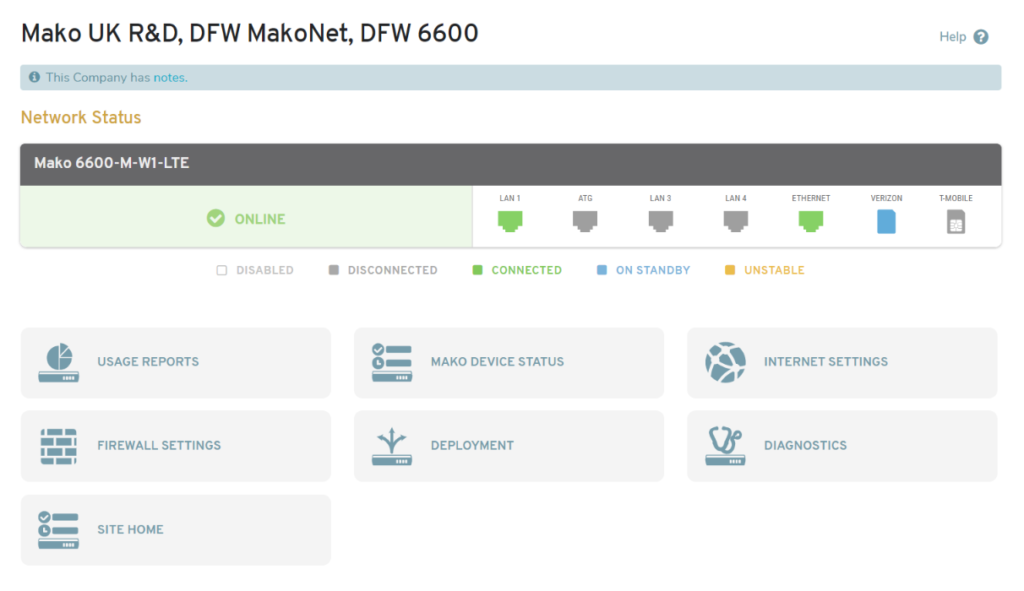
Figure 12. Example Dashboard with Mako Device Selected
The main content area of the Home page is known as the dashboard (Fig. 12).
Selected Mako Name
The name of the selected Mako device displays at the top of the dashboard, if applicable. The related Company Name and Site Name are also shown.
Dynamic Messages
Dynamic messages appear in the dashboard when appropriate. For example, after logging in you might see a message stating that your default Mako device has been selected automatically.
Quick Links
Lists of links to the Mako CMS pages that you are likely to use most frequently display in the dashboard.
Network Status
A visual representation of the network status of the selected Mako device displays in the dashboard, if applicable. This includes the Mako model name, a general status message, and the status of each port.

Figure 13. Example Network Status for a Managed Switch
The appearance of the network status display will depend on the type of Mako device selected. For example, a managed switch will not have any WAN ports to display (Fig. 13).