Overview
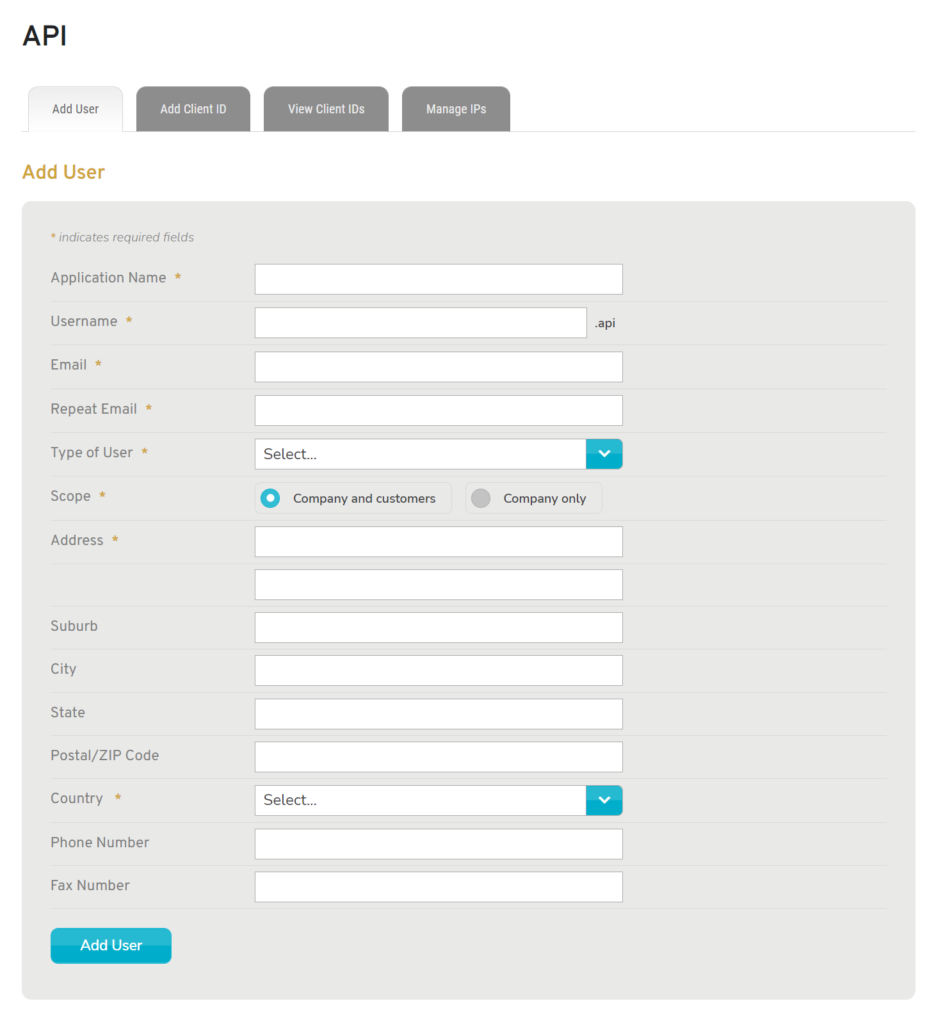
Figure 1. Example API Page
Mako Networks provides an Application Programming Interface (API) that can be used to integrate the Mako Central Management System (CMS) with external systems, such as data analytics platforms and custom business applications.
A detailed API specification for developers is available by request from Mako Support.
The API page allows you to manage the selected company’s API user accounts, credentials, and IP restrictions required for client applications to access the API.
Add User
Use the form on the Add User tab to add a new API user for the selected company. API users are developer accounts used to generate IP-restricted credentials that allow the developer’s client applications to communicate securely with the API.
API users can only be edited or deleted by contacting Mako Support.
Application Name
Enter an informative, memorable, and unique name for this API user. It might include the name of an application development vendor or the type of applications to be developed.
Username
Enter an informative, memorable, and unique username for this API user.
The value entered here will have “.api” appended automatically to form the full username.
The full username will be used as a root when generating Client IDs.
Email / Repeat Email
Enter and confirm a valid email address to use for this API user.
Type of User
Choose the type of this API user to restrict the Mako CMS data available to the account.
Scope
Choose whether or not this API user will be available to customers of the selected company.
Address
Enter the street address for this API user’s address. Line 1 is required and Line 2 is optional.
Suburb (Optional)
Enter the suburb for this API user’s address, if desired.
City
Enter the city for this API user’s address.
State
Choose the state for this API user’s address.
Postal / ZIP Code
Enter the postal code for this API user’s address.
Country
Choose the country for this API user’s address.
Phone Number
Enter a phone number for this API user.
Fax Number (Optional)
Enter a fax number for this API user, if desired.
Add Button
Click the “Add User” button to create a new API user account with these settings.
Add Client ID
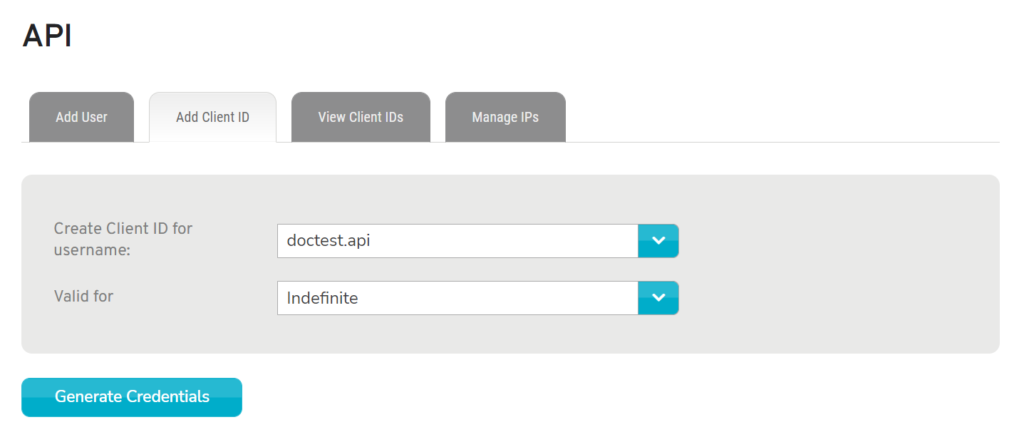
Figure 2. Add Client ID Tab
Use the form on the Add Client ID tab to generate new Client ID / Client Secret pairs to use as API credentials for API users’ client applications.
A unique Client ID / Client Secret pair is required for each client application that will access the API.
Do not share these API credentials with anyone outside the client application development team.
You must create at least one API user before generating Client IDs.
Username
Choose the username of the API user whose client application will use this Client ID and Client Secret.
Duration
Choose how long this Client ID and Client Secret will be valid.
The Client ID and Client Secret will automatically expire after the duration specified, unless “Indefinitely” is selected.
If a client application is using these credentials, it will immediately stop functioning when the credentials expire.
Generate Credentials Button
 Figure 3. Example Add Client ID Result
Click the “Generate Credentials” button to use these settings to generate a new Client ID and Client Secret pair for the specified API user.
Client ID
For the Client ID, the credential generation process uses the full username of the API user as a root and appends a unique stem value.
Think of this as your client application’s username for accessing the API. Keep it private to prevent unauthorized use.
Client Secret
For the Client Secret, the credential generation process provides a unique key value.
Think of this as your client application’s password for accessing the API. Keep it private to prevent unauthorized use.
The Client Secret value will never be displayed again after you leave this page. Share it immediately with the appropriate client application development personnel via a secure communication process.
View Client IDs
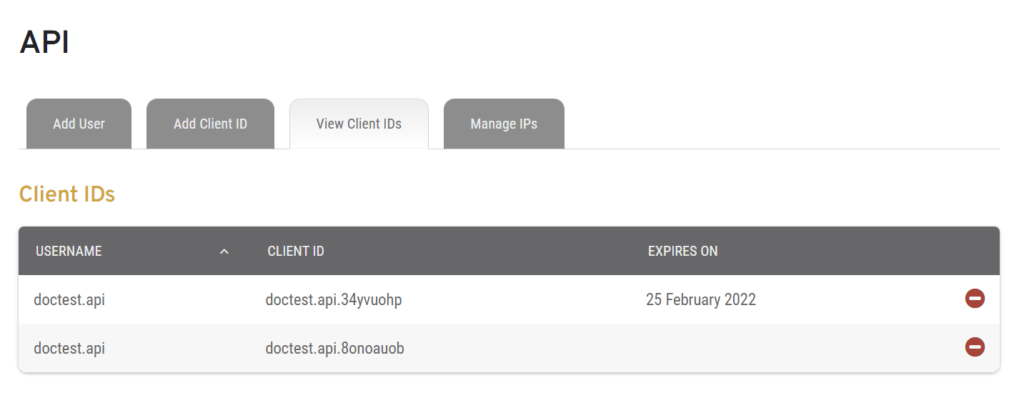
Figure 4. Example View Client IDs Tab
The View Client IDs tab displays a sortable list of the selected company’s Client IDs.
Columns
- Username – username of the API user for whom the API credentials were generated
- Client ID – Client ID of the API credentials
- Expires On – expiration date of the API credentials
- [Delete] – delete icon button
Actions
Delete Client ID
Click an existing Client ID item’s minus icon button to delete the Client ID item. You will be asked to confirm this action.
If a client application is using these credentials, it will immediately stop functioning when the credentials are deleted.
Manage IPs
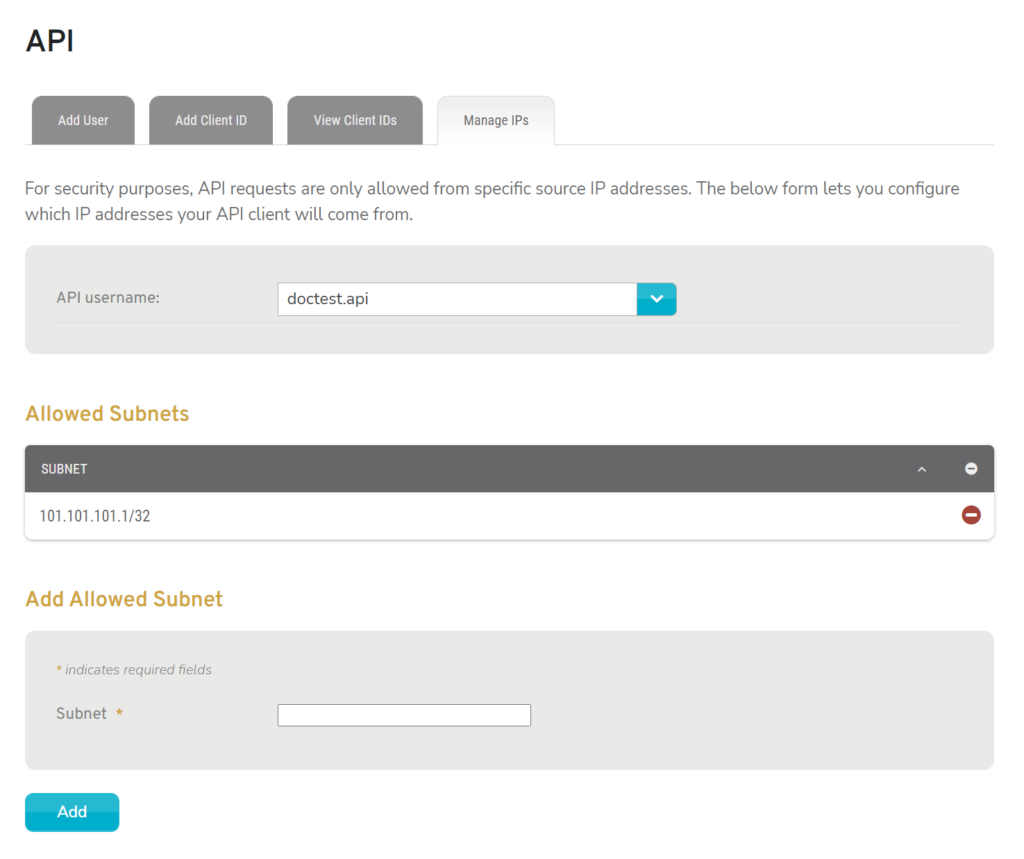
Figure 5. Example Manage IPs Tab
The Manage IPs tab allows you to specify the IP addresses and subnets that your client applications will use to communicate with the API.
For security purposes, all access to the API is denied by default. Your client applications will only function when communicating via IP addresses allowed here.
You must create at least one API user before managing IP addresses and subnets.
View Allowed Subnets
The Manage IPs tab displays a sortable list of the selected API user’s allowed IP addresses and subnets.
Filters
API User
Choose the API user account to manage its allowed IP addresses and subnets.
Columns
- Subnet – allowed IP address or subnet
- [Delete] – delete icon button
Actions
Delete Allowed Subnet
Click an existing Subnet item’s minus icon button to delete the Subnet item. You will be asked to confirm this action.
If a client application is only allowed API access by this item, it will immediately stop functioning when the item is deleted.
Add Allowed Subnet
Use the form on the Manage IPs tab to add a new allowed IP address or subnet for the selected API user.
Subnet
Enter the IP address or subnet value to allow for the selected API user.
Add Button
Click the “Add” button to create a new Subnet item with these settings.