Overview
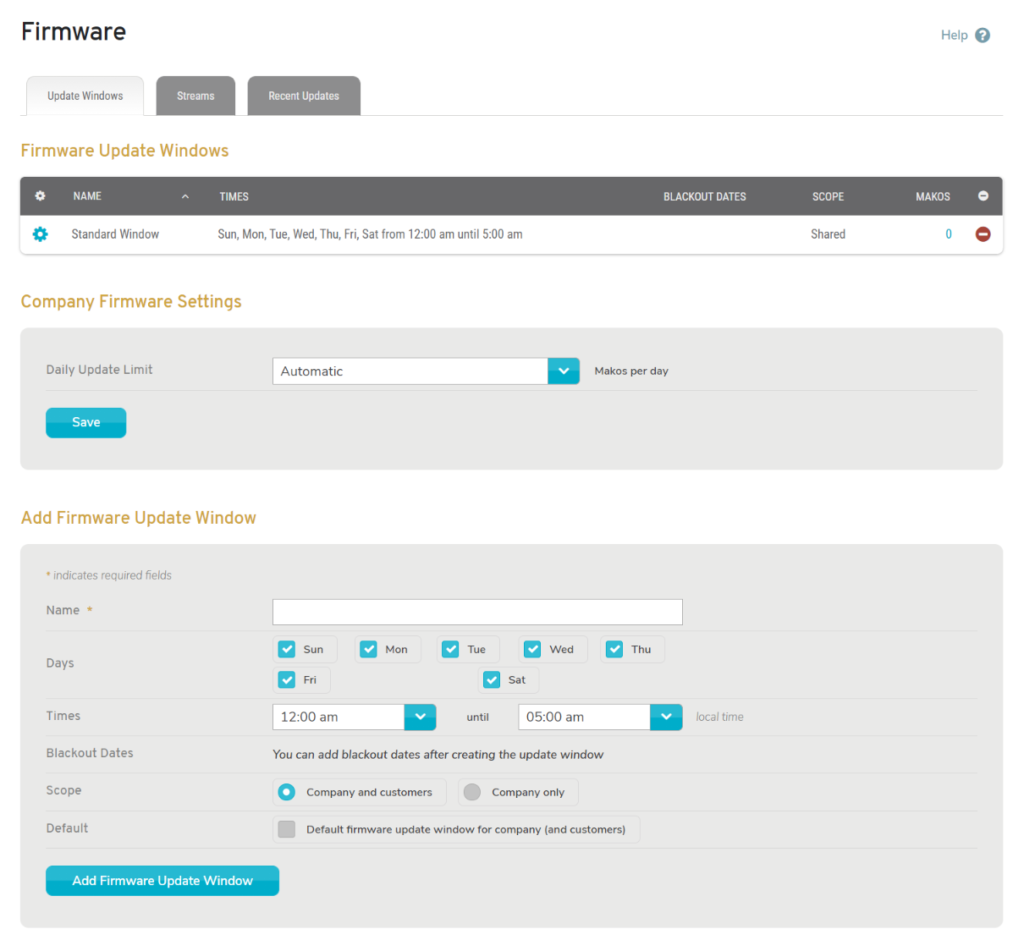
Figure 1. Example Firmware Page
The Firmware page (Fig. 1) allows you to manage firmware settings and firmware update windows for the selected company. You can also bulk migrate the company’s Makos to a new firmware stream.
Update Windows
Click the Update Windows tab (Fig. 1) to manage firmware settings and firmware update windows.
View Update Windows

Figure 2. Example Update Window List
Use the Update Window list (Fig. 2) to view and manage existing firmware update windows.
Columns
- [Edit] – edit button
- Name – update window identifier
- Times – days of the week and time ranges when firmware updates are allowed
- Blackout Dates – dates of the year when firmware updates are disallowed
- Scope – whether or not the update window is shared with other companies
- Makos – number of subscribed Makos and a link to search for those Makos
- [Delete] – delete button
Actions
Mako Search
Click an Update Window’s numeral link in the Makos column to open search results for its subscribed Makos in a new window.
Edit Update Window
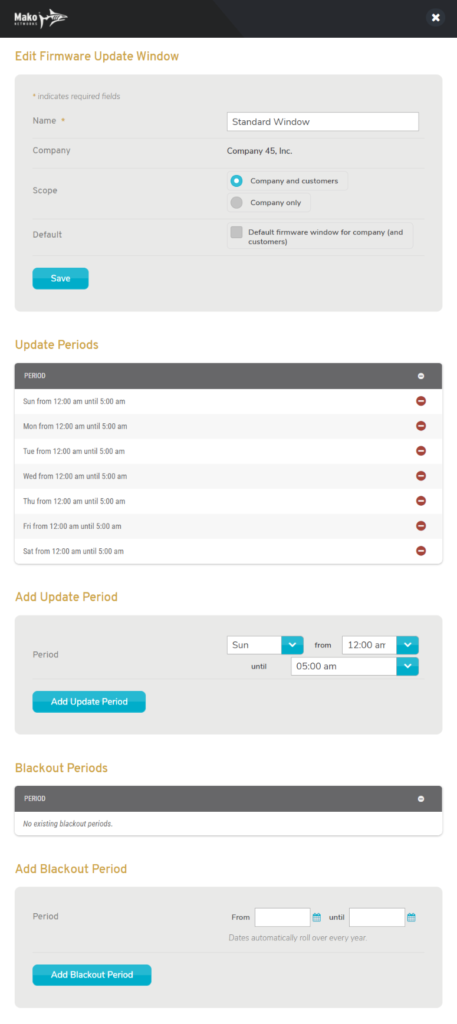
Figure 3. Edit Update Window Page
To edit an Update Window, click its gear icon button. This will open the Edit Update Window page (Fig. 3) in a new window. The page has three parts, which are described below.
Edit Update Window Details
Make any desired changes to this information, then click the “Save” button.
Manage Update Periods
The Days and Times provided when creating the Update Window are initially used to generate the update period list shown here.
You can add a new update period by choosing a day of the week, start time, and end time using the fields at the bottom of the list then clicking the “Add Update Period” button.
You can delete an existing update period by clicking its minus icon button.
Manage Blackout Periods
You can add a new blackout period by choosing a start date and end date using the fields at the bottom of the list then clicking the “Add Blackout Period” button. These date ranges are automatically applied to each year going forward, so make blackout periods broad enough to account for any annual date shifting of an event.
You can delete an existing blackout period by clicking its minus icon button.
Delete Update Window
To delete an Update Window, click its minus icon button. This will open a confirmation panel asking you to confirm the deletion. If you are certain you want to delete the Update Window, click the “OK” button.
Edit Firmware Settings
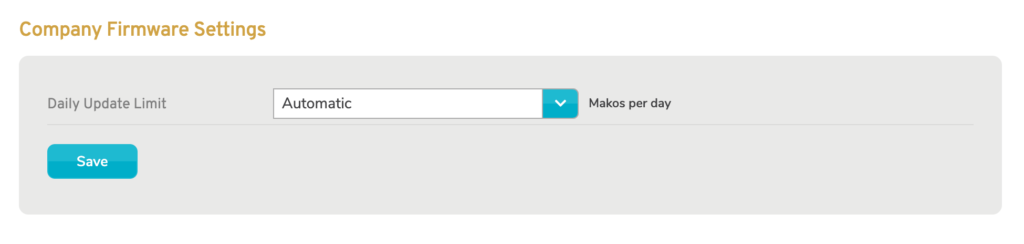
Figure 4. Company Firmware Settings Form
Use the Company Firmware Settings form (Fig. 4) to edit firmware settings for the selected company.
Daily Update Limit
Choose the number of Makos per day that are allowed to be updated during a firmware release.
Save Button
Click the “Save” button to save any changes made here.
Add Update Window
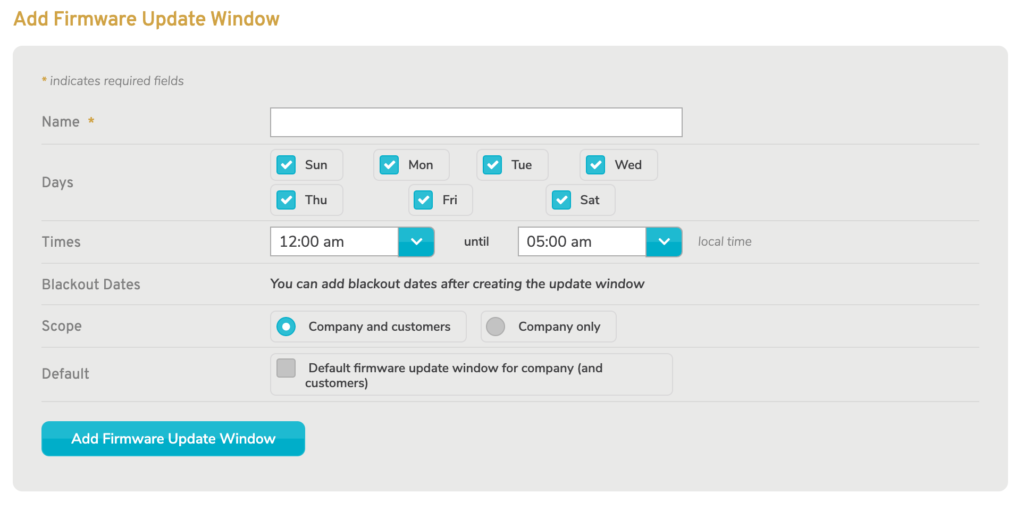
Figure 5. Add Update Window Form
Use the Add Update Window form (Fig. 5) to add a new firmware update window.
Name
Enter an informative, memorable, and unique name for the Update Window.
Days
Choose the days of the week when firmware updates are allowed.
Times
Choose the start time and end time to define a time of day range when firmware updates are allowed.
Blackout Dates
You must edit the Update Window after it has been created if you want to add Blackout Dates. See the Edit Update Window documentation above for details.
Scope
Choose whether or not this Update Window will be available to customers of the selected company.
Default
Choose whether or not this is the default Update Window for the selected company (and its customers, if applicable). New Makos will use the default Update Window unless otherwise specified. Setting this Update Window as the default will change the previous default Update Window to no longer be the default.
Add Button
Click the “Add Firmware Update Window” button to create a new Update Window with these settings.
Streams
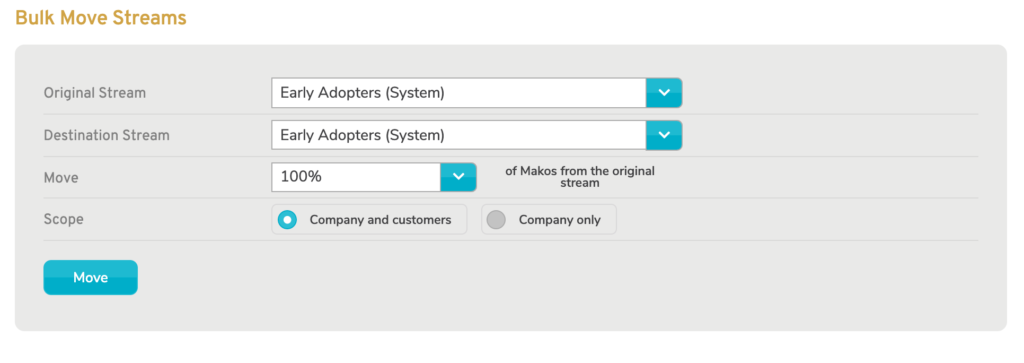
Figure 6. Streams Tab
Click the Streams tab (Fig. 6) to move the selected company’s Makos in bulk from one stream to another.
Bulk Move Streams
The Bulk Move Streams form (Fig. 6) allows you to move Makos in bulk from one stream to another.
Original Stream
Choose the stream FROM which you want to bulk move Makos.
Destination Stream
Choose the stream TO which you want to bulk move Makos.
Percent to Move
Choose the percent of Makos from the original stream to bulk move to the destination stream.
Scope
Choose whether or not this Update Window will be available to customers of the selected company.
Move Button
Click the “Move” button to initiate the automated bulk move process.
Recent Updates
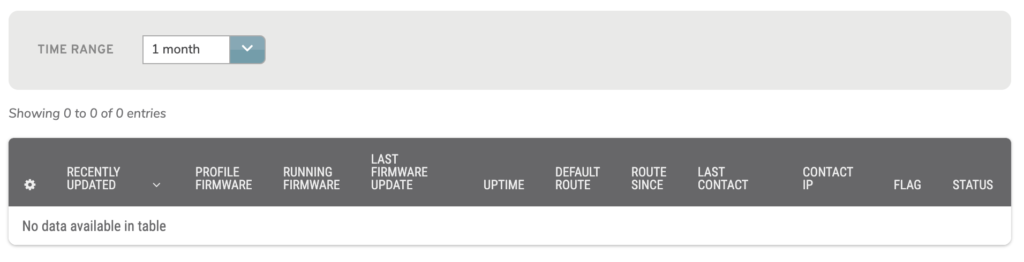
Figure 7. Recent Updates Tab
Click the Recent Updates tab (Fig. 7) to view a list of Makos that have been updated recently.
View Recent Updates
The Recent Updates list (Fig. 7) displays a list of Makos that have been updated recently.
Filter
Use the dropdown above the list to filter the results by date. Options range from one hour to one month of results. The default value is three days.
Columns
- [Select]
- Recently Updated [Mako]
- Profile Firmware
- Running Firmware
- Last Firmware Update
- Uptime
- Default Route
- Route Since
- Last Contact
- Contact IP
- Flag
- Status
Actions
Select a Mako
You can select a Mako to manage by clicking the gear icon button for that Mako. This will redirect you to the Home page.
View Mako Details
You can view a Mako’s details by clicking the icon link in the Status column for that Mako. The details will open in a new window.