This topic is ONLY relevant to security gateways. It is NOT relevant to managed switches.
Overview
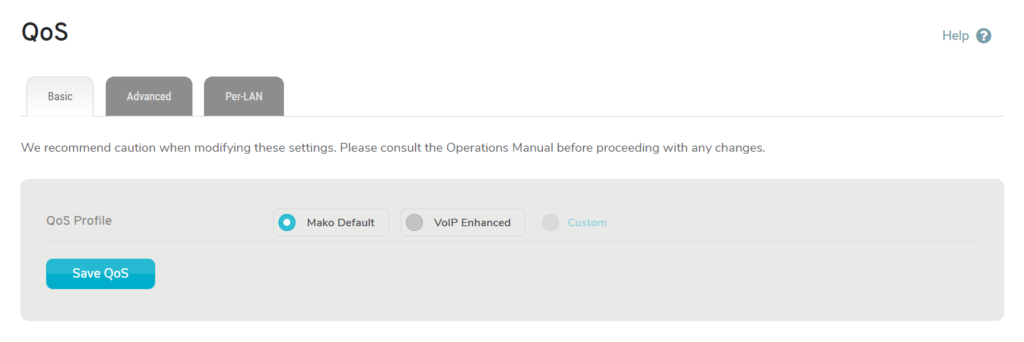
Figure 1. QoS Page
The QoS page (Fig. 1) allows you to manage Quality of Service (QoS) settings. QoS is a feature for assigning priorities to each different service type of traffic passing through your networks so that the most important traffic has the best access to available outbound WAN bandwidth.
For ethernet WANs, you must first set the WAN’s Plan Bandwidth for QoS to be effective. Otherwise, QoS will assume the interface speed is the full capacity, which can reduce performance. See the WAN documentation for details regarding how to set Plan Bandwidth.
Basic Settings
Use the QoS Profile form on the Basic Settings tab (Fig. 1) to choose one of two preconfigured QoS profiles, or click the “Custom” link to switch to the Advanced Settings tab and configure a custom QoS profile instead.
The “Mako Default” QoS profile treats most traffic as having equivalent priority. Low service port, Encapsulated Security Protocol (ESP), and User Datagram Protocol (UDP) traffic is given slightly higher priority than other traffic.
The “VoIP Enhanced” QoS profile increases the priority of traffic from Voice over Internet Protocol (VoIP) services.
Click the appropriate radio button of the desired preconfigured QoS profile, then click the “OK” button. You will be asked to confirm this profile change, as it will delete any custom profile settings made using the Advanced Settings tab. If you are certain you want to continue, click the “OK” button in the confirmation panel.
Advanced Settings
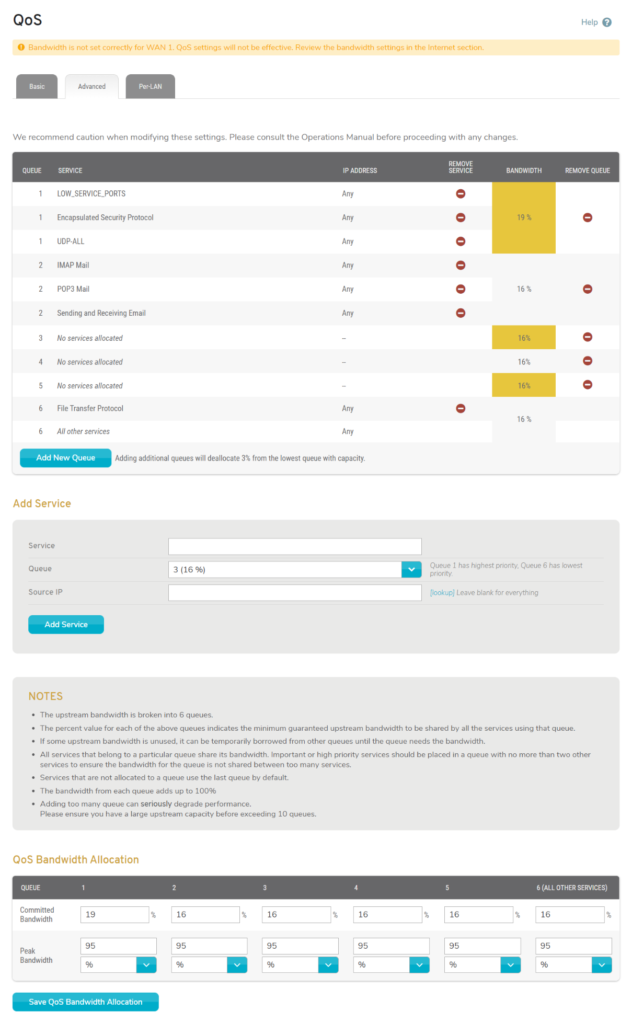
Figure 2. Advanced Settings Tab
Use the Advanced Settings tab (Fig. 2) to view the details of the QoS profile currently in use or to customize the QoS profile.
View Allocated Services
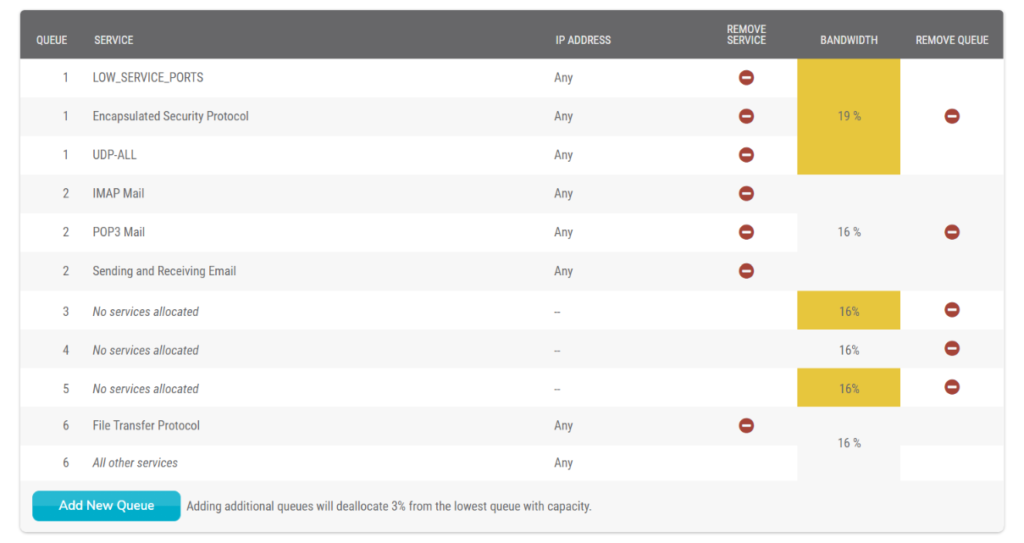
Figure 3. Example Allocated Services List
The Allocated Services list (Fig. 3) displays allocated service types grouped by bandwidth allocation queue.
Allocated service types are service types that have been explicitly assigned to a specific queue to determine their bandwidth allocation, as opposed to being included in the “All other services” catchall in the lowest queue in the list.
Each queue can have a different bandwidth allocation percentage, and the sum of percentage values for all queues should total 100%. See the Allocate Bandwidth documentation below for more details regarding queues.
Columns
- Service – name of allocated service type
- IP Address – source IP address of allocated service type traffic (typically “Any”)
- Queue – bandwidth allocation queue (typically 1-6)
- Remove Service – delete service button
- Bandwidth – bandwidth allocation percentage of the queue
- Remove Queue – delete queue button
Actions
Delete Service from Queue
To delete a service from a queue, click its minus icon button in the Remove Service column. Services are deleted from queues immediately without confirmation.
Delete Queue
To delete a queue, click its minus icon button in the Remove Queue column. You will be asked to confirm the deletion. If you are certain you want to delete the queue, click the “OK” button. Bandwidth previously allocated to the deleted queue will be reallocated to the lowest queue in the list. You may want to update bandwidth allocations after this.
Add Queue
To add a queue, click the “Add New Queue” button below the list. A new queue with a bandwidth allocation of 3% will appear at the bottom of the list. The 3% bandwidth allocation is reallocated from the lowest queue in the list with 3% available. You may want to update bandwidth allocations after this.
Add Service to Queue

Figure 4. Add Service to Queue Form
Use the Add Service to Queue form (Fig. 4) to allocate a service type to a specific bandwidth allocation queue.
Service
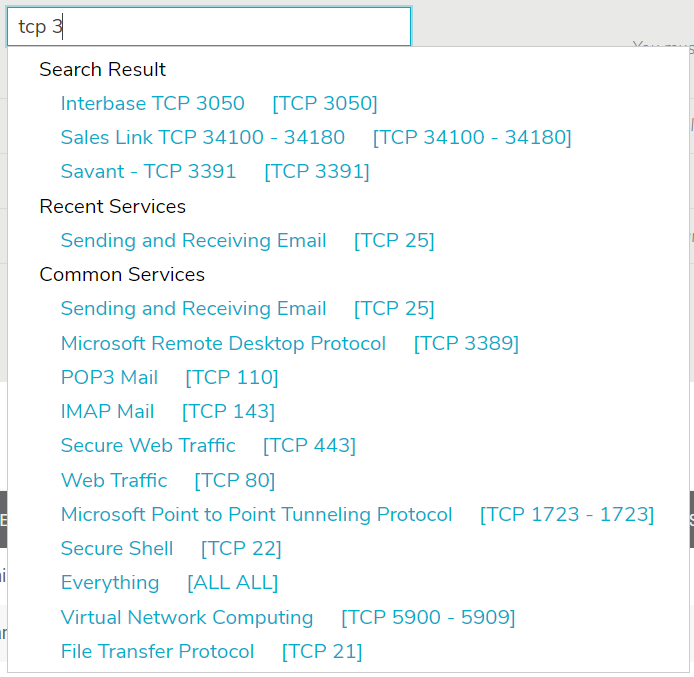
Figure 5. Example Service Type Selector
Use the service type selector (Fig. 5) to specify the service type to allocate. The service type selector will display a Search Results list as you type. Below the Search Results list, you will see lists of Recent Services (if any have been selected recently) and Common Services. If the desired service type is visible in one of these lists, click the service type to select it.
Queue
Choose the bandwidth allocation queue to which this service type should be allocated.
All service types allocated to a queue share the bandwidth allocated to that queue. Important or high-priority service types should be placed in a queue with no more than two other service types to ensure that the bandwidth is not shared among too many service types.
See the Allocate Bandwidth documentation below for more details regarding queues.
Source IP
Enter the source IP address of the device that should be affected by this allocation. Leave this field blank to affect traffic originating from any source.
As a convenience, you can click the “lookup” link to open a new window containing a list of devices registered on your network, then click the desired device to populate Source IP with the IP address of the device.
Add Button
Click the “Add Service” button to create a new service type allocation with these settings.
Allocate Bandwidth
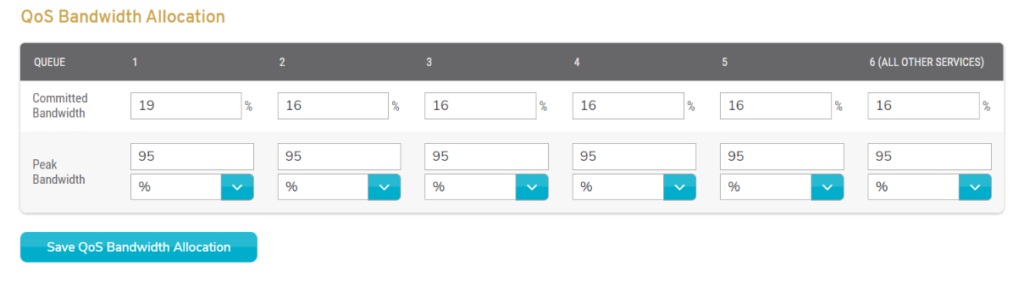
Figure 6. QoS Bandwidth Allocation Form
Use the QoS Bandwidth Allocation form (Fig. 6) to allocate upstream bandwidth to each queue. The preconfigured QoS profiles use six queues, but you can add and delete queues using the Allocated Services list (Fig. 3). Adding more queues can seriously degrade performance. Please ensure that you have a large upstream capacity before exceeding ten queues.
Queue
The Queue row displays the identifying number of each queue, from “1” to the maximum queue number (typically “6”). The last queue always includes a default allocation for “All other services.” Services not allocated to a specific queue use the last queue by default.
Committed Bandwidth
The Committed Bandwidth row contains percentage fields for each queue.
Enter percentage values for each queue that represent the minimum guaranteed upstream bandwidth to be shared by all services using that queue. The sum of percentage values for all queues should total 100%.
Peak Bandwidth
If upstream bandwidth is available, a lower priority queue can temporarily use more than its minimum allocation until a higher priority queue needs that bandwidth.
The Peak Bandwidth row contains Value fields and Unit dropdowns for restricting each queue in this situation.
Enter Values and choose Units for each queue that represent the maximum allowed upstream bandwidth to be shared by all services using that queue.
The options for each Unit field are: “%,” “Kilobits/second,” and “Megabits/second.”
Save Button
Click the “Save QoS Bandwidth Allocation” button to save any changes to the bandwidth allocation.
Per-LAN Settings
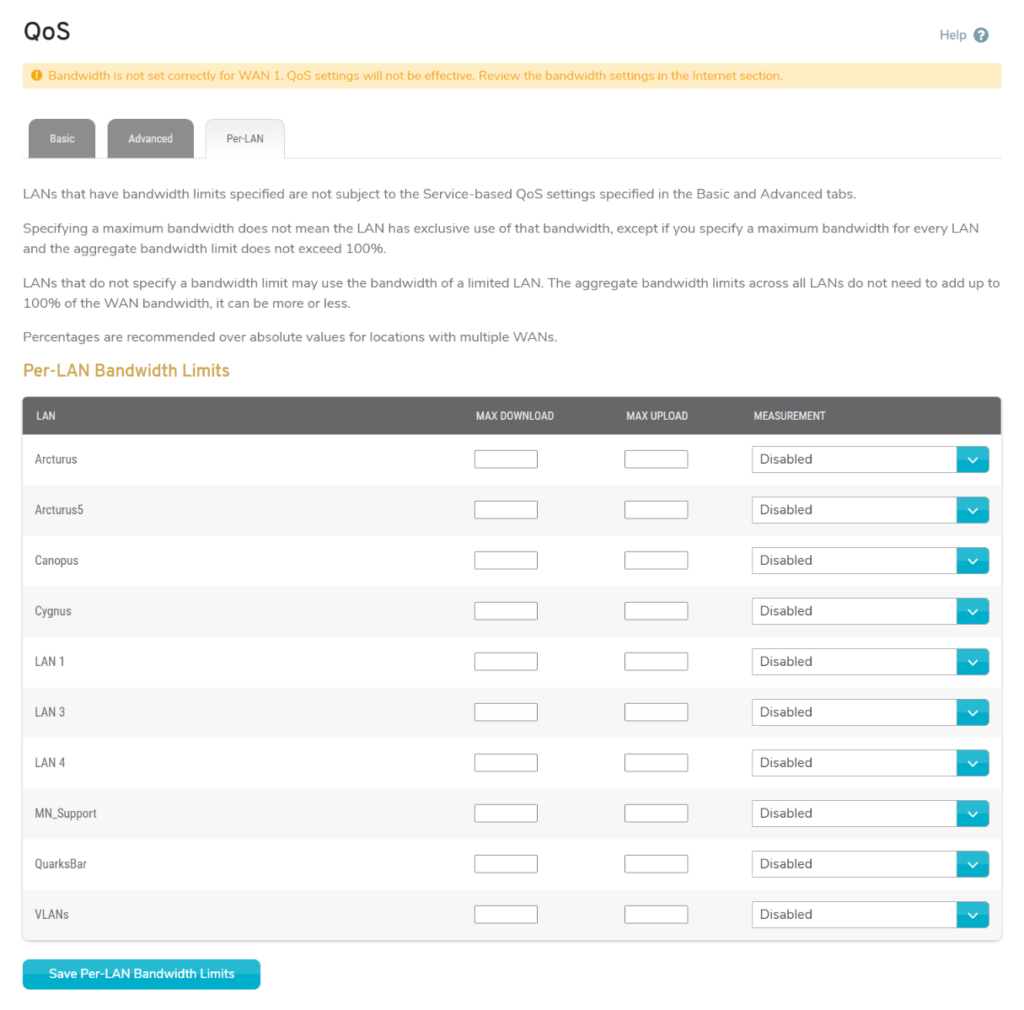
Figure 7. Per-LAN Settings Tab
You can use the Per-LAN Settings tab (Fig. 7) to implement QoS by limiting Bandwidth usage for each local area network (LAN) on the selected Mako. This is an alternative to using the Basic Settings and Advanced Settings for QoS. LANs that have bandwidth limits specified on this tab are not subject to the service-based QoS settings on the other tabs.
Limit Bandwidth
Use the Per-LAN Bandwidth Limits form (Fig. 7) to set limits for each available LAN.
Specifying a maximum bandwidth does not mean a LAN has exclusive use of that bandwidth, unless you specify a maximum bandwidth for every LAN and the aggregate bandwidth limit does not exceed 100%.
LANs that do not specify a bandwidth limit may use the bandwidth of a limited LAN. The aggregate bandwidth limits across all LANs do not need to add up to 100% of the WAN bandwidth, it can be more or less.
Max Download
Enter values for each network that represent the maximum allowed bandwidth usage for download traffic.
Max Upload
Enter values for each network that represent the maximum allowed bandwidth usage for upload traffic.
Measurement
Choose units for each network’s limits. The options are: “%,” “Kilobits/second,” and “Megabits/second.” Percentages are recommended over absolute values for locations with multiple WANs.
Save Button
Click the “Save Per-LAN Bandwidth Limits” button to save these settings.