This topic is ONLY relevant to security gateways. It is NOT relevant to managed switches.
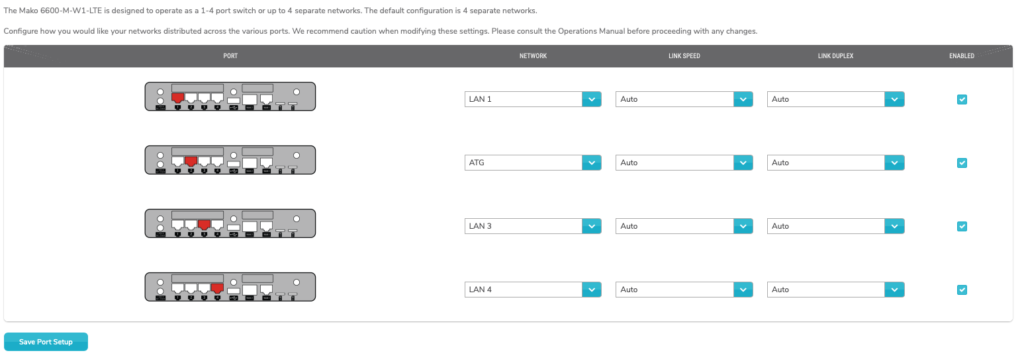
Figure 1. Example Port Setup Page
The Port Setup page (Fig. 1) allows you to specify how to distribute your networks across the LAN interfaces (ports) available on the selected Mako.
For most Mako models, the default configuration is four separate networks with each network using only one LAN port.
Each LAN port is displayed here with an image in the Port column illustrating the location of the port on the Mako device and a dropdown in the Network column for choosing the network to associate with the port.
Each Network dropdown contains options equal to the number of LAN ports available on the Mako, which will typically be LAN 1, LAN 2, LAN 3, and LAN 4, however this can vary depending on the model and settings of the Mako. For example, if you allocated a LAN port as an extra WAN port, then you will have one fewer LAN port available here.
Choose the desired network for each port using the Network dropdowns. You could leave the default settings for one port to each network, set more than one port to a network, or even set all ports to a single network.

Figure 2. Port Change Warning
After making any changes, click the “Save Port Setup” button. This will display the Port Change Warning confirmation dialog (Fig. 2).
The warning states that LANs that are affected by these changes will have their settings deleted, including the following:
- Firewall rules
- VPNs
- Static routes
- Network settings
- DHCP leases
If you are certain that you want to make these changes, click the “Change Port Setup” button.