This topic is ONLY relevant to security gateways. It is NOT relevant to managed switches.
Left Navigation
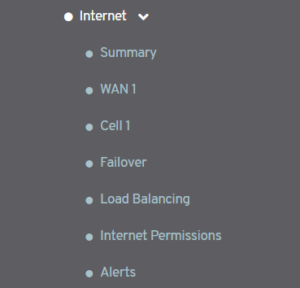
Figure 1. Example Internet Menu
The Configure section in the left navigation of the Central Management System (CMS) contains an Internet menu (Fig. 1). This menu contains items for managing each of the WAN and Cell Internet connections configured for the selected Mako.
In this example, we see “WAN 1” and “Cell 1” items. These items are listed in order of priority, as shown on the Summary page.
NOTE: the WAN and Cell management pages are similar but not identical. See the Cells documentation to manage a Cell connection.
WAN Page
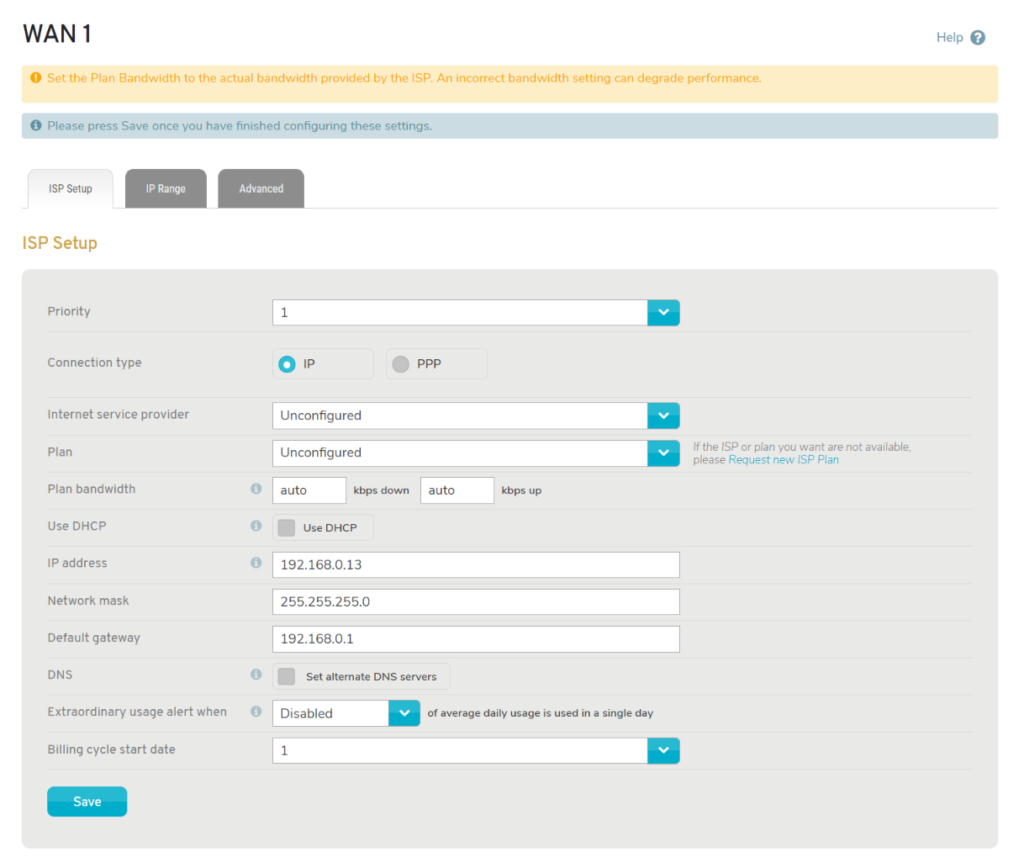
Figure 2. Example WAN Page
The WAN page (Fig. 2) contains three tabs of settings: ISP Setup, IP Range, and Advanced.
ISP Setup Tab
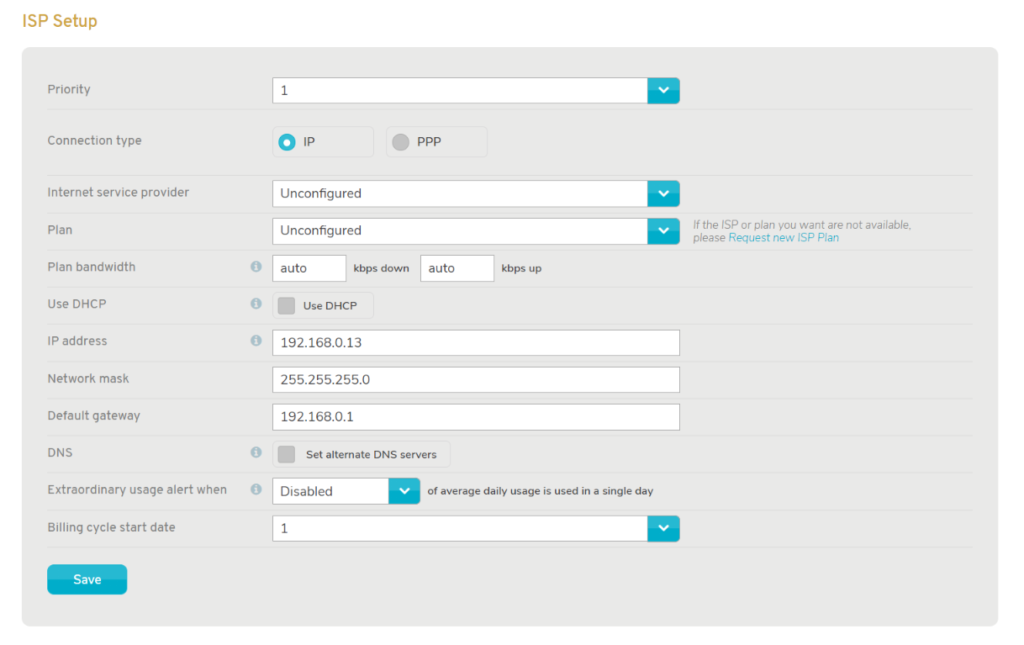
Figure 3. Example ISP Setup Tab
The ISP Setup tab (Fig. 3) allows you to configure the Internet Service Provider (ISP) details for this WAN connection.
Priority
Select an option from the Priority dropdown to set the order in which the Mako will use this connection as compared to other connections. This can also be managed on the Summary page.
If the first priority connection is unavailable, the Mako will switch to the next connection in the priority list, and so on, until it reaches an available connection.
Connection Type
Choose a Connection Type. For all cable connections and most Digital Subscriber Line (DSL) connections, click the “IP” radio button.
For direct DSL connections without a DSL modem or any other DSL connection that requires the Mako to handle Point-to-Point Protocol over Ethernet (PPPoE) settings, click the “PPP” radio button.
Internet Service Provider
Use the Internet Service Provider selector to choose your ISP vendor from a list of ISP vendors grouped by country.
This is not needed for cable connections, since the Mako does not support direct access to cable and will always sit behind a cable modem. This is also not needed for DSL connections with a DSL modem.
For direct DSL connections without a DSL modem, you must make a selection for this field.
Plan
Use the Plan selector to choose your ISP plan from a list of ISP plans offered by the ISP vendor you chose above.
This is not needed for cable connections, since the Mako does not support direct access to cable and will always sit behind a cable modem. This is also not needed for DSL connections with a DSL modem.
For direct DSL connections without a DSL modem, you must make a selection for this field.
Plan Bandwidth
Plan Bandwidth consists of a Down field and an Up field. Enter numerical values for Down and Up if you use Quality of Service (QoS) traffic/resource management.
If you are setting up a direct DSL connection without a DSL modem, you can leave these fields blank (or enter “auto”) to allow the Mako to detect the bandwidth automatically.
ISP Username & ISP Password
This set of fields is only available if you have selected “PPP” for Connection Type.
Provide your ISP Username and ISP Password values to allow the Mako to connect directly to your ISP without a modem.
Use DHCP
This set of fields is only available if you have selected “IP” for Connection Type.
Dynamic Host Configuration Protocol (DHCP) lets you centrally manage and automate the assignment of IP addresses on your network. You are probably using a DHCP server provided by your ISP. Alternatively, you may be using your own DHCP server or you may not be using DHCP at all. Set the Use DHCP checkbox accordingly.
If the Use DHCP checkbox IS checked, then the following field will be available:
DHCP Client Hostname
Enter a unique DHCP Client Hostname that the DHCP server will use to identify the Mako on this network.
If the Use DHCP checkbox IS NOT checked, then the following fields will be available:
IP Address
Enter the external IP address that will be allocated to the Mako on this network.
Network Mask
Enter the Network Mask that will be associated with the Mako on this network.
Default Gateway
Enter the Default Gateway that will be associated with the Mako on this network.
Set Alternate DNS Servers
A Domain Name System (DNS) server is used to map domain names to IP addresses.
If the Set Alternate DNS Servers checkbox IS NOT checked, then a standard DNS server will handle your DNS queries, which is the default behavior.
If the Set Alternate DNS Servers checkbox IS checked, then the following fields will be available:
Primary DNS
Enter a primary DNS server to handle your DNS queries.
Secondary DNS
Enter a secondary DNS server to handle your DNS queries in the event the primary DNS server is unavailable.
These two values are used by the Mako to query external DNS servers, which is only useful if you are using the Mako as a DNS server or have Mako Guardian enabled. Do not use DNS servers that are only reachable from a specific ISP or IP range.
Billing Cycle and Traffic Threshold Levels
Your selected ISP plan may trigger a set of optional fields here that allow you to further refine the behavior of your Mako based on the details of the plan. Below are some examples of these fields. This is not a comprehensive list.
Warning Threshold
Choose a percentage of your ISP plan data limit (from 50% to 100%) as the Warning Threshold. If data usage of the current billing cycle exceeds this threshold, it will trigger an alert.
Absolute Threshold and Absolute Threshold Status
Choose a percentage of your ISP plan data limit (from 50% to 410%) as the Absolute Threshold.
If data usage of the current billing cycle exceeds this threshold, the Absolute Threshold Status will be changed from “Monitoring” to “Blocking” automatically. This will block Internet access until either you set the status to “Ignoring” manually or the next billing cycle begins, which sets the status back to “Monitoring” automatically.
- Monitoring – data usage of current billing cycle HAS NOT exceeded Absolute Threshold.
- Blocking – data usage of current billing cycle HAS exceeded Absolute Threshold and Internet access is currently blocked.
- Ignoring – Internet access will not be blocked for the remainder of the current billing cycle, even if data usage exceeds Absolute Threshold.
Extraordinary Usage Alert When ___ of Average Daily Usage Is Used in a Single Day
If you want to receive an alert when data usage for a single day exceeds a certain percentage of the average daily data usage from the previous month, choose a percentage here.
Extraordinary Usage Alert When ___ of Free Usage Is Used in a Single Day
If you want to receive an alert when data usage for a single day exceeds a certain percentage of your free data usage for a billing cycle, choose a percentage here.
Billing Cycle Start Date
Choose the day of the month on which the billing cycle for your plan begins.
Failover Properties
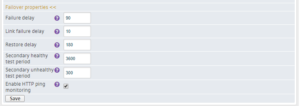
Figure 4. Failover Properties
Clicking the “Failover properties” link (Fig. 4) will show/hide the following fields:
Failure Delay
Enter the time (seconds) to wait after communication with the connection has failed before switching to the failover connection (the next connection in the priority list). The minimum value is 35 seconds.
Link Failure Delay
Enter the time (seconds) to wait after the physical connection has failed before trying to reconnect, e.g. the cable has been removed or an upstream device has failed.
Restore Delay
Enter the time (seconds) that the WAN must be up and stable before it can be used. The minimum value is 35 seconds.
Secondary Healthy Test Period
Enter the time (seconds) between tests when the failover connection is healthy. The minimum value is 30 seconds.
Secondary Unhealthy Test Period
Enter the time (seconds) between tests when the failover connection is unhealthy. The minimum value is 30 seconds.
Enable HTTP Ping Monitoring
Check the Enable HTTP Ping Monitoring checkbox if you want to monitor connection health by periodically testing that a basic HTTP connection can be made. This may result in data usage and is not recommended for ISP plans with low data limits.
Save Button
To save any ISP Setup tab changes, click the “Save” button.
Deallocate Button
Certain Mako models allow you to convert the last LAN port into an additional WAN port, if desired. See the Summary documentation for details.
If you have converted LAN 4 into WAN 2, a “Deallocate” button will appear next to the “Save” button that will allow you to reverse this conversion.
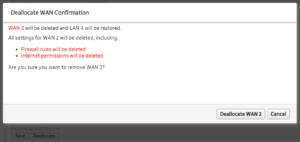
Figure 5. Deallocate WAN Confirmation
Click the “Deallocate” button to open the Deallocate WAN Confirmation (Fig. 5), then click the “Deallocate WAN 2” button if you are certain that you want to continue. WAN 2 will no longer appear in the left navigation or on the Summary page.
IP Range Tab
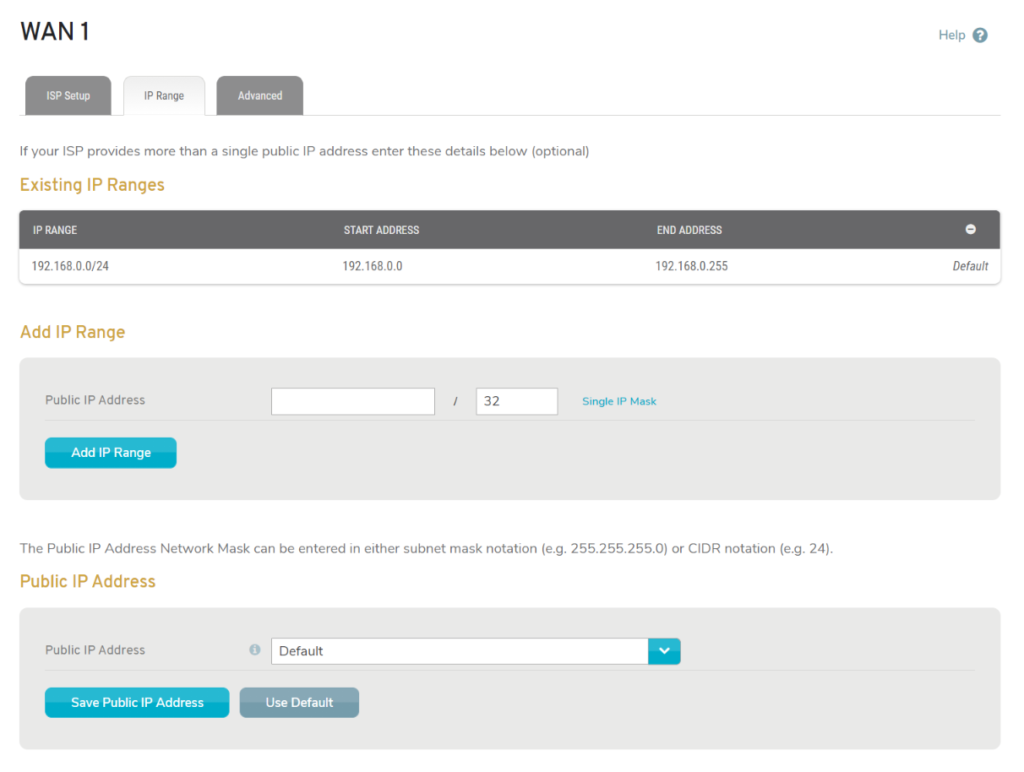
Figure 6. Example IP Range Tab
The IP Range tab (Fig. 6) is available for managing IP ranges for this connection if your ISP provides you with more than a single public IP address. You probably do not use more than one public IP address.

Figure 7. Example Existing IP Ranges List
Existing IP Ranges
The Existing IP Ranges list (Fig. 7) displays previously added IP ranges with the following columns.
- IP Range – the IP range in Classless Inter-Domain Routing (CIDR) notation, which consists of the start address followed by a slash (“/”) and the number of leading 1 bits in the subnet mask.
- Start Address – the start address of the IP range.
- End Address – the end address of the IP range as determined by the subnet mask.
- Delete – click the minus icon button to remove the IP range.
Add IP Range
The Add IP Range form (Fig. 6) allows you to add IP ranges to the Existing IP Ranges list.
Public IP Address consists of two fields that define the IP range to add. Enter the Start Address of the IP range in the first field. In the second field, enter the Network Mask using either subnet mask notation (e.g. “255.255.255.0”) or CIDR notation (e.g. “24”).
Click the “Single IP Mask” link if you want to populate Network Mask with “255.255.255.255” as the subnet mask. That value allows only a single IP address (the Start Address) in the IP range.
Click the “Add” button to add the IP range.
Public IP Address
The Public IP Address form (Fig. 6) allows you to choose from your existing IP ranges and several other IP addresses to specify the address the Mako uses when performing Network Address Translation (NAT) functions from LAN to WAN. It is set to “Default” unless you change it. Only change this setting if you have a publicly routable range terminating on the Mako’s external address.
To choose an IP address as the value, click the field and scroll through the options until you find the IP address that you want to use.
To choose “Default” as the value, either click the field and scroll through the options until you find “Default” or click the “Use Default” button.
Click the “Save” button to save your choice.
Advanced Settings Tab
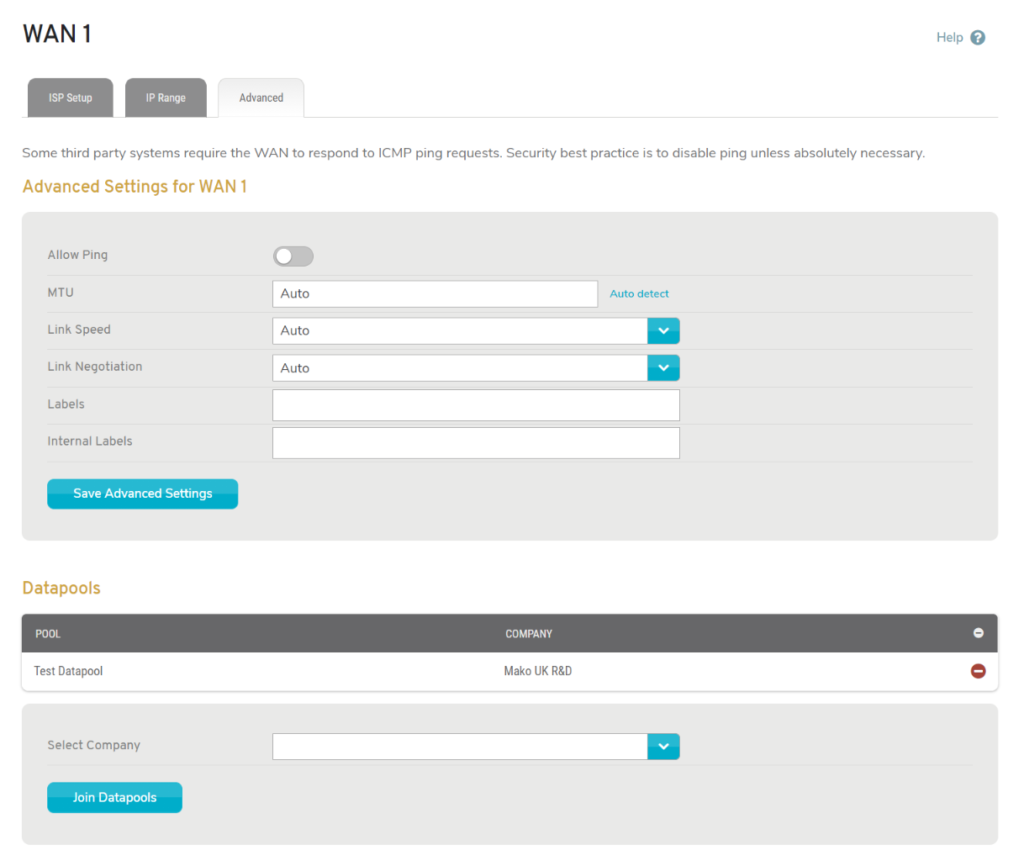
Figure 8. Example Advanced Settings Tab
The Advanced Settings tab (Fig. 8) allows for several options that you are less likely to need but may prove useful in some cases.
Allow Ping
The Allow Ping setting is disabled by default. If enabled, it allows the WAN to respond to Internet Control Message Protocol (ICMP) ping requests. Security best practice is to leave this disabled, however some third party systems require the WAN to respond to ICMP ping requests.
Click the gray checkmark icon or the red prohibition icon to enable Allow Ping. Click the gray prohibition icon or the green checkmark icon to disable Allow Ping.
MTU
Here you can specify a Max Transmission Unit (MTU), which will limit the largest packet or frame size the selected Mako is able to send using the WAN. To set it, enter a numerical value. Alternatively, click the “Auto Detect” link to have the selected Mako use the MTU specified by the connected network.
Labels
The Labels field allows you to manage label values assigned to the WAN. A label can be added by typing a label value in the field and then pressing the Space bar on your keyboard. A label can be removed by clicking the “X” next to the label.
Labels provide a way to apply firewall templates to WANs. There are also special labels that alter behavior when applied. For example, the “no-guardian” label will disable the Mako Guardian service for the selected Mako when this WAN is the default route. See the Firewall documentation for more details.
Save Button
To save any Advanced Settings tab changes, click the “Save” button.