This topic is ONLY relevant to security gateways. It is NOT relevant to managed switches.
Overview
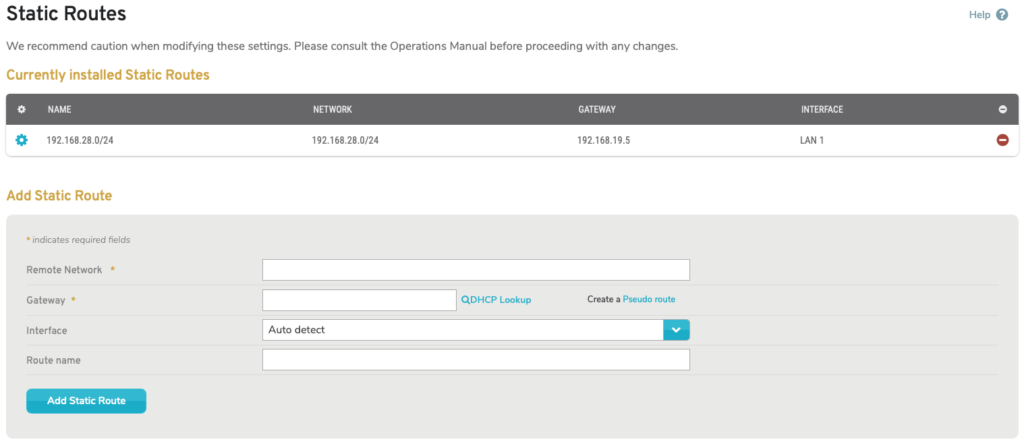
Figure 1. Example Static Routes Page
The Static Routes page (Fig. 1) allows you to manage static routes in your networks. Static routes can be used to explicitly define paths for traffic from one network to take to reach another network.
View Static Routes

Figure 2. Example Currently Installed Static Routes List
The Currently Installed Static Routes list (Fig. 2) is where you can view your static routes.
- [Edit] – edit button
- Name – name of the static route (or the destination network, if name is not provided)
- Network – IP address and mask of the destination network
- Gateway – IP address of the gateway device on the source network
- Interface – LAN or WAN of the gateway device, i.e. the source network
- [Delete] – delete button
Edit Static Route
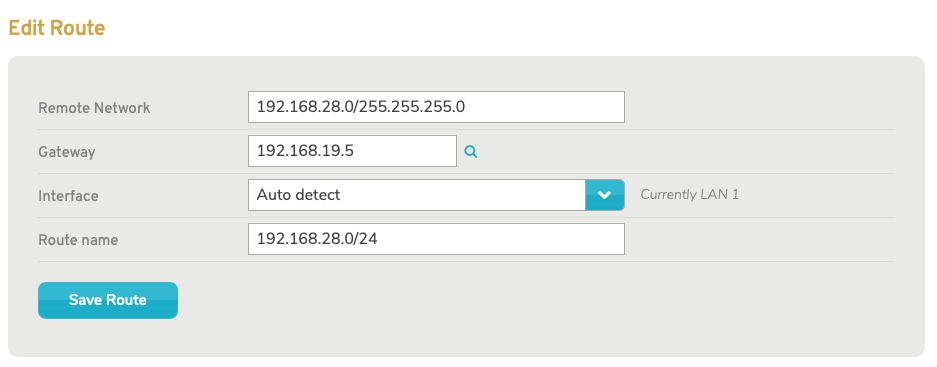
Figure 3. Edit Static Route Form
To edit a static route, click its gear icon button (Fig. 2). This will open the Edit Static Route form (Fig. 3).
Here you can make any desired changes.
To save your changes, click the “Save Route” button.
Delete Static Route
To delete a static route, click its minus icon button (Fig. 2). This will open a confirmation panel asking you to confirm the deletion. If you are certain you want to delete the static route, click the “OK” button.
Add Static Route
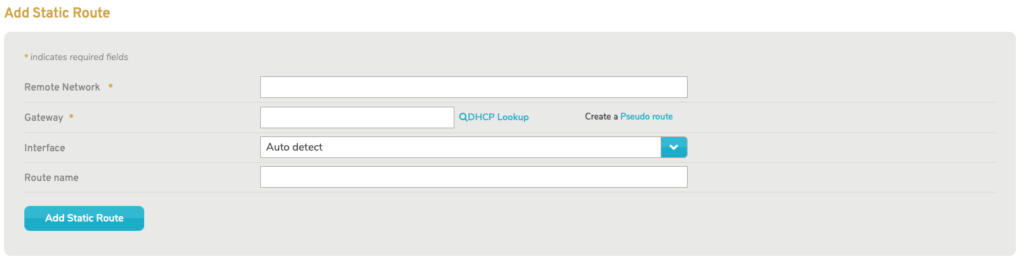
Figure 4. Add Static Route Form
To create a static route, use the Add Static Route form (Fig. 4).
Remote Network
Enter the IP address and mask of the destination network for the static route.
Gateway
Enter the IP address of the gateway device on the source network for the static route.
You can click the magnifying glass icon button to open a new window where you can search for the gateway device using current DHCP leases.
You can click the “Pseudo route” link to use the default route value (“0.0.0.0”). This will hide the Gateway field and make the Interface field required, i.e. “Auto detect” will no longer be an option (see below).
Pseudo routes exist only in the CMS and are used to make networks available for use elsewhere in the CMS, such as for VPNs and firewall rules. A common example is to select a Mako VPN concentrator and create a pseudo route that encompasses all remote Makos that have a VPN to the concentrator. Each remote Mako could have a 10.x.x.x/24 LAN with a VPN to the concentrator, then the concentrator could have an IPsec VPN from 10.0.0.0/8 to a third party service provider who needs to see those remote Makos.
Interface
Choose the Interface of the gateway device, i.e. the source network. You can use the default selection of “Auto detect” to automatically detect this value from the Gateway specified above.
Route Name (Optional)
Enter an informative, memorable, and unique name for the static route. This is restricted to a maximum of 32 characters. If you do not provide a Route Name, the Remote Network value will be used as the name.
Add static route Button
Click the “Add Static Route” button to create the static route.