Overview
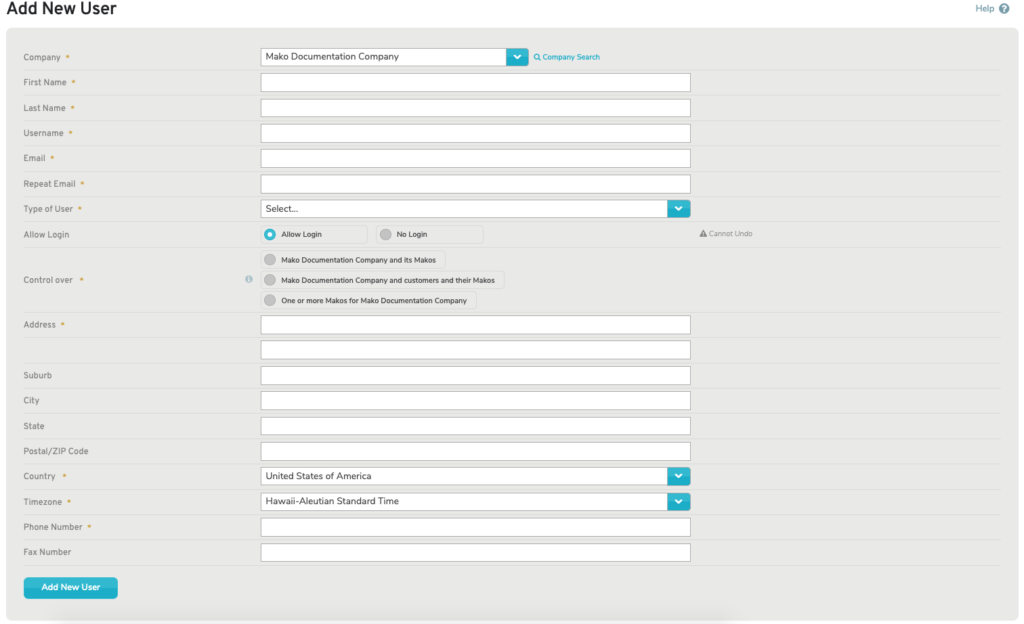
Figure 1. Example Add New User Page
The Add New User page (Fig. 1) allows you to add a new user.
Company
Choose the company to which this user will be added.
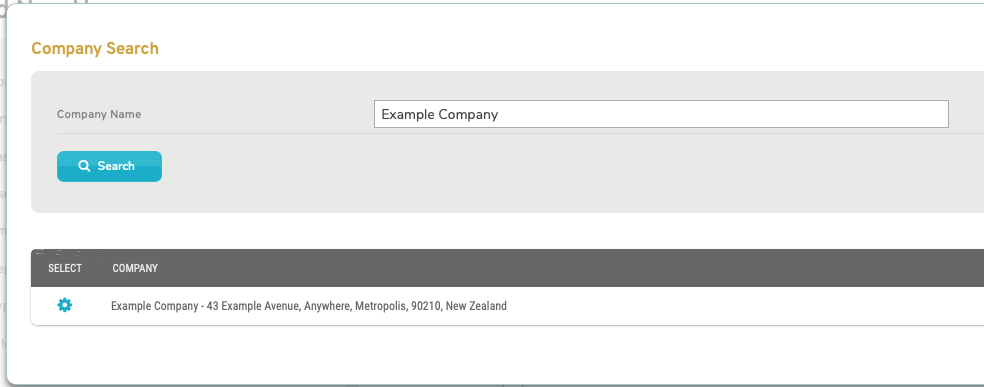
Figure 2. Company Search Page with Company Search Form and Company Search Results
Alternatively, choose “Search” or click the “Company Search” (Fig. 1) to open the Company Search page in a new window (Fig. 2). Enter a search string for Company Name and click the “Search” button to view company search results. Then click the “Select” button for the desired company to select that company in the New User form.
User Information
First Name
Enter the user’s first name.
Last Name
Enter the user’s last name.
Username
Enter a unique username for the user. The best practice is to use the user’s email address as their username.
Email and Repeat Email
Enter and confirm the user’s unique email address.
Type of User
Choose from the available user types. The user types available here depend on the user type of your own user account, so you may not see all of these user types as available.
-
- Configure Client – can set up profile but cannot set up Mako ID. Can run most interruptive and non-interruptive diagnostics.
- Deploy Client – can set up profiles, add/change Mako ID, and download configuration files. Can run most interruptive and non-interruptive diagnostics.
- Read-Only Deploy Client – Deploy Client without modify capabilities. Can run a limited set of non-interruptive diagnostics.
- Diagnostics Client – can view and run a limited set of diagnostics.
- Read-Only Diagnostics Client – can only view settings, cannot make changes. Can run only non-interruptive diagnostics.
- Reports Client – can only run/get items from the Reports section. No diagnostics.
- Reports and Alerts Client – can only run/get items from the Reports section and site alerts. No diagnostics.
- Reports and Diagnostics Client – can only run/get items from the Reports section and run a limited set of non-interruptive diagnostics.
- VPN User – can only access selected networks on this Mako via a compatible remote VPN client.
- Full Distributor – can see all child reseller companies, clients, and Makos. Can set up profiles, add/change Mako IDs, and download configuration files for all Makos under child entities.
- Read-Only Distributor – Full Distributor without modify capabilities. Can run a limited set of non-interruptive diagnostics.
- Full Reseller – can see all child reseller companies, clients, and Makos. Can set up profiles, add/change Mako IDs, and download configuration files for all Makos under child entities. Can run interruptive and non-interruptive diagnostics.
- Read-Only Reseller – Full Reseller without modify capabilities. Can run a limited set of non-interruptive diagnostics.
Allow Login
Choose whether or not the user will be allowed to login to the Central Management System (CMS). After a user has been set to “No Login,” this setting cannot be changed.
Control Over
Choose to grant access to either all of the company’s Makos (including any new Makos in the future) or a specific set of the company’s existing Makos.
The Control Over field defines the SCOPE of access the user has to the company and its Makos. The Type of User field above determines what TYPE of access the user will have to the company and its Makos.

Figure 3. Initial Makos to Control List
If you choose the “One or more Makos…” option (Fig. 3), the Makos to Control list (Fig. 4) will appear.
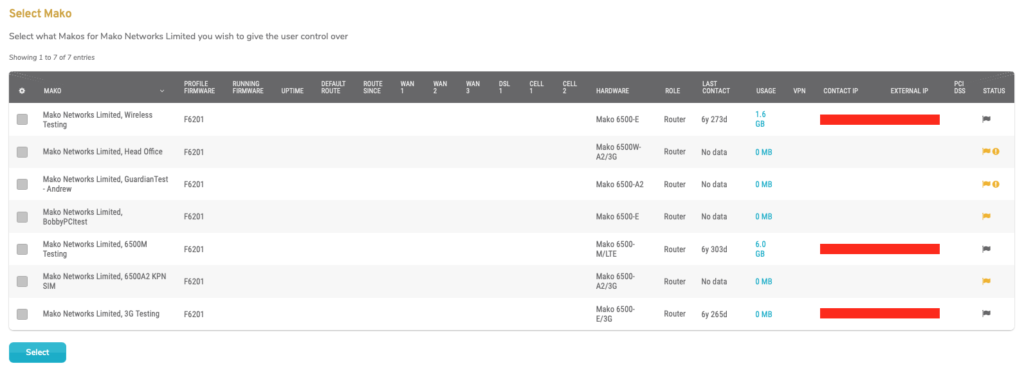
Figure 4. Makos to Control Page
Check the checkbox for each Mako to which you want to grant access to the user, then click the “Select” button. You will see a success message “Makos successfully selected”. Click the “X” icon in the header to exit the window.
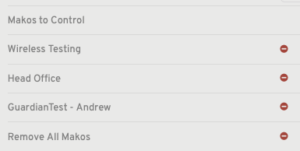
Figure 5. Makos to Control List with Makos Added
The Makos to Control list will now display the Makos you selected (Fig. 5).
To remove a Mako, click its red delete button. You can also use the “Remove all Makos” link to remove all Makos at once, if desired.
User Address
Address (Line 1 and Optional Line 2)
Enter a street address in the first field and related information, such as an apartment number, in the optional second field.
Suburb (Optional)
If desired, enter the suburb of the user address.
City (Optional)
Enter the city or metro area of the user address. This is optional but recommended.
State (Optional)
Enter the state or region of the user address. This is optional but recommended.
Postal/ZIP Code (Optional)
Enter the postal code (ZIP Code in the US) of the user address. This is optional but recommended.
Country
Choose the country of the user address.
Timezone
Choose the timezone of the user address.
Phone Number
Enter the phone number of the user address.
Fax Number (Optional)
If desired, enter the fax number of the user address.
Add New User Button
Click the “Add New User” button to create a new user with these settings.