Overview
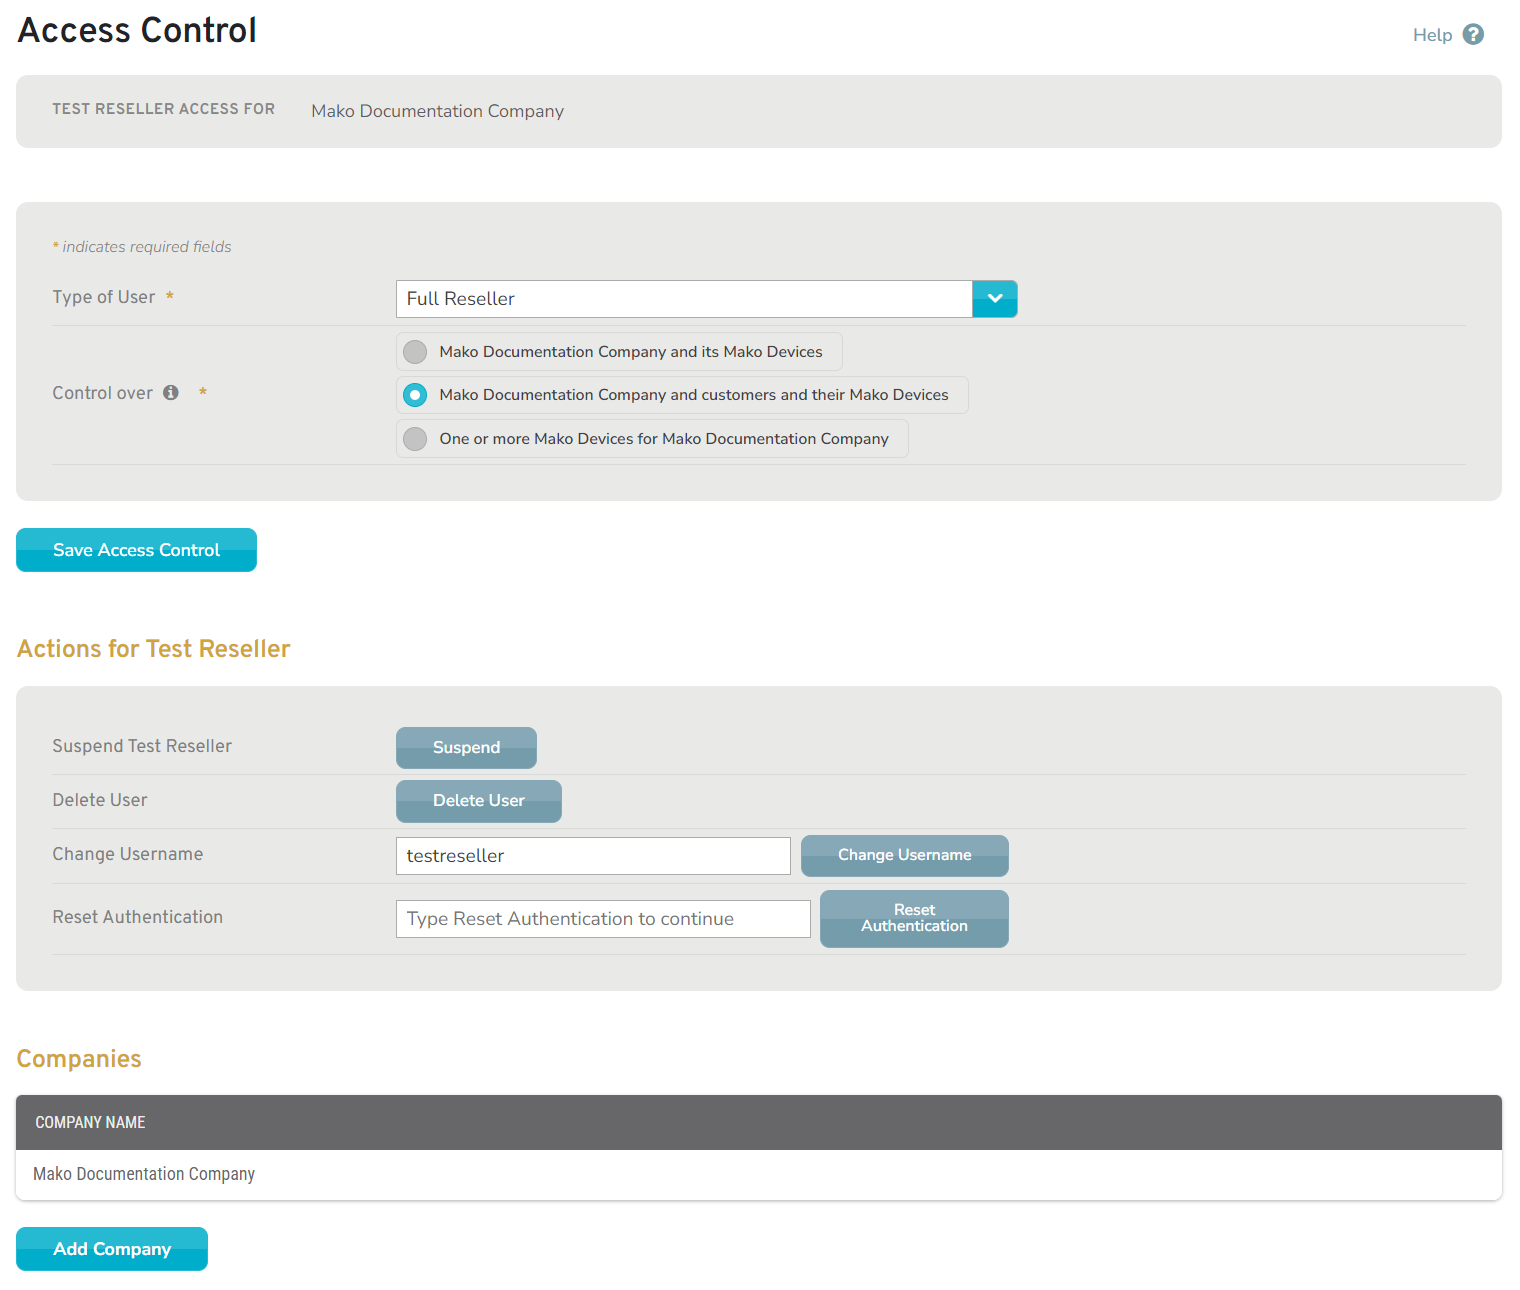
Figure 1. Example Access Control Page
The Access Control page (Fig. 1) allows you to view and manage access control settings for the selected user. This includes the user’s access to the Mako Central Management System (CMS), the type of access the user has to Mako CMS features and the companies to which the user has access. This is also where you can manage aspects of your own user account, such as changing your account credentials and resetting your authentication method.
The Mako CMS offers a variety of user account security options that impact access control.
Single Sign-On
Single Sign-On (SSO) allows certain users to access the Mako CMS using an existing third-party account created for another system via an SSO identity provider (IdP). Your company determines which providers, such as Microsoft or Okta, are available to you, if any.
For Mako CMS accounts without SSO, your account credentials are managed via the Mako CMS. For Mako CMS accounts with SSO, your account credentials are managed via the SSO identity provider.
Multi-Factor Authentication
Multi-Factor Authentication (MFA) adds an extra layer of security to your account by requesting a new access code each time you log in. MFA is recommended for any user, but it is required for those maintaining PCI DSS compliance.
Companies that require PCI DSS compliance must enforce MFA for all users. For Mako CMS accounts without SSO, MFA is managed via the Mako CMS. For Mako CMS accounts with SSO, MFA is managed via the SSO identity provider.
Access Control
Access Control Form
The section at the top of the page is the Access Control form. Your relationship to the user and the companies associated with the user control the options available here.
Company Filter
Single Company Access

Figure 2. Example User With Single Company Access
For users with access to a single company, the Company filter is read-only (Fig. 2).
If additional companies are available to the selected user, you can add access to these companies using the Companies section at the bottom of the page.
Multiple Company Access

Figure 3. Example User With Multiple Company Access
For users with access to multiple companies, the Company filter is a dropdown (Fig. 3). Use this filter to choose the company for which you want to change the user’s access control settings.
Form Fields
Restricted User Account

Figure 4. Example Read-Only Access Form
For user accounts whose access control settings you do not have permission to modify, including your own user account, the settings are displayed as read-only values (Fig. 4).
Managed User Account
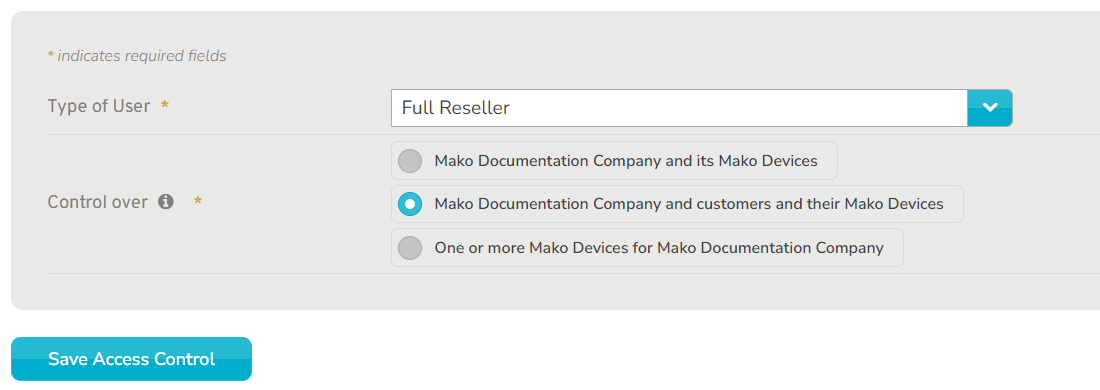
Figure 5. Example Editable Access Form
For user accounts whose access control settings you do have permission to modify, the settings are displayed as editable fields (Fig. 5).
Type of User
Choose the type of access the user will have to the selected company and its Mako devices.
Control Over
Choose whether or not the user has access to the selected company’s customers (child companies) and their Mako devices, as well.
See the New User documentation for more details regarding the Type of User and Control Over fields.
Save Access Control Button
If you make any changes here, click the “Save Access Control” button to save your changes.
Access Actions
Access Actions Form
The section in the middle of the page is the Access Actions form. A variety of conditions control the options available here, including the user’s MFA and SSO settings.
Change Password

Figure 6. Example Access Actions Form for Your User Account
When viewing your own user account, the “Change Password” button will display (Fig. 6).
To change your password, click the “Change Password” button. You will be redirected to the User Authentication page. Follow the instructions there.
This is only for Mako CMS accounts without SSO.
Multi-Factor Authentication Setup
When viewing your own user account, the “Multi-Factor Authentication Setup” button will display.
To set up MFA, click the “Multi-Factor Authentication Setup” button. You will be redirected to the Multi-Factor Authentication page. Follow the instructions there.
This is only for Mako CMS accounts without SSO.
Suspend User
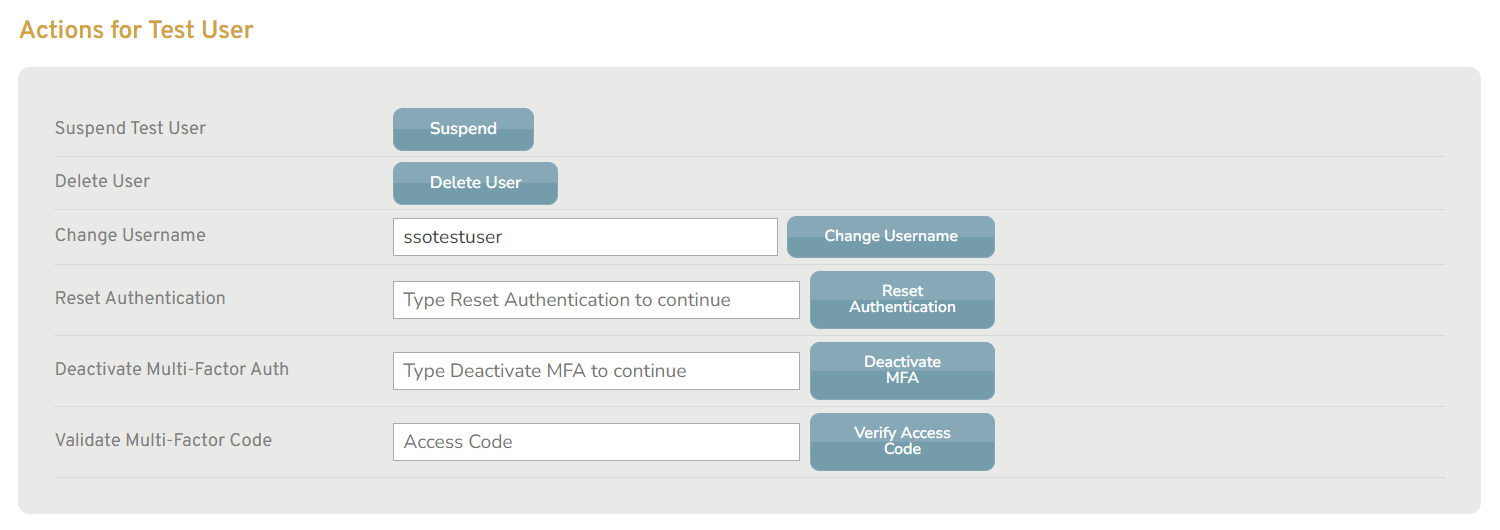
Figure 7. Example Access Actions Form for a Managed User Account
When viewing a user account that you manage, the “Suspend” button will display (Fig. 7).
To suspend this user account, click the “Suspend” button. You will be redirected to the Suspend User page. Follow the instructions there.
User accounts that remain suspended for six months are automatically deleted.
Unsuspend User
![]()
Figure 8. Example Access Actions Form “Unsuspend” Button
If this user account has been suspended, either manually or by an automated process, the “Suspend” button is replaced by the “Unsuspend” button (Fig. 8).
To unsuspend this user account, click the “Unsuspend” button.
Delete User
When viewing a user account that you manage, the “Delete” button will display.
To delete this user account, click the “Delete User” button. You will be redirected to the Delete User page. Follow the instructions there.
Deleted user accounts cannot be restored.
Change Username
To change the username for this user account, enter a new username, then click the “Change Username” button.
Reset Authentication
If multiple authentication methods are available to this user account, the “Reset Authentication” button will display.
To reset the authentication method for this user account, enter “Reset Authentication” (case-insensitive), then click the “Reset Authentication” button.
This will force the user to choose a new authentication method the next time they log in.
See the Reset Password documentation for details regarding this process.
Deactivate Multi-Factor Authentication
If MFA is configured for this user account, the “Deactivate MFA” button will display.
To deactivate MFA for this user account, enter “Deactivate MFA” (case-insensitive), then click the “Deactivate MFA” button.
This is only for Mako CMS accounts without SSO.
You can repeat the MFA setup process to continue using MFA.
Companies that require PCI DSS compliance must enforce MFA for all users. In this case, repeating the MFA setup process will be mandatory for Mako CMS accounts without SSO.
Account Multi-Factor Authentication Disabled Email
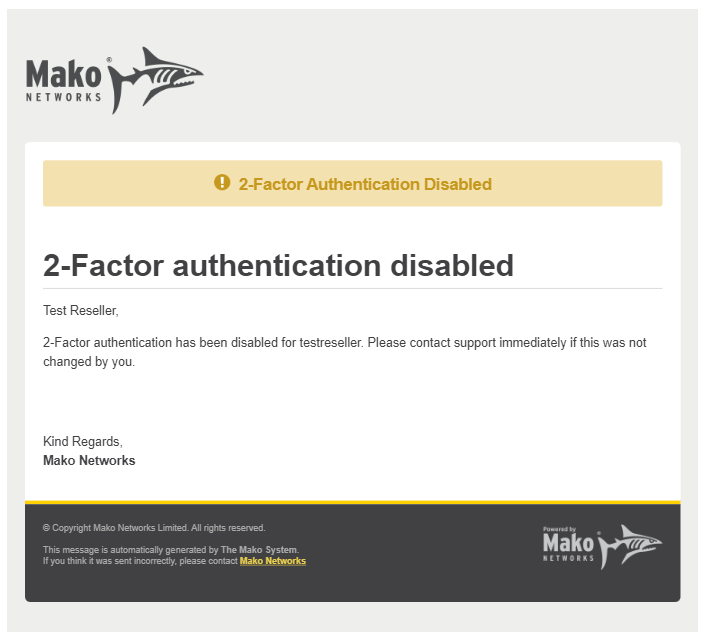
Figure 9. Example Account Multi-Factor Authentication Disabled Email
After MFA is deactivated, the user will receive an Account Multi-Factor Authentication Disabled email (Fig. 9) as an added security measure.
If you receive an unexpected Account Multi-Factor Authentication Disabled email, contact Mako Support immediately.
Validate Multi-Factor Authentication Access Code
If MFA is configured for this user account, the “Verify Access Code” button will display.
This is a tool for checking that the user’s authenticator app is generating valid access codes for this user account. Enter the current access code provided by the user’s authenticator app, then click the “Verify Access Code” button. This will display a message stating whether or not the access code is valid.
This is only for Mako CMS accounts without SSO.
Companies
Companies List

Figure 10. Example Companies List
Use the Companies list (Fig. 10) at the bottom of the page to manage which companies the selected user can access. Users can have access to more than one company and different access control settings can be specified for each of these companies.
Remove Company / Revoke Access
Click a company’s minus icon button to remove it from this list, which will revoke the selected user’s access to the company.
Add Company / Grant Access
Click the “Add Company” button to open the Company Search form, where you can grant access to any additional companies available to the selected user.
Company Search Form
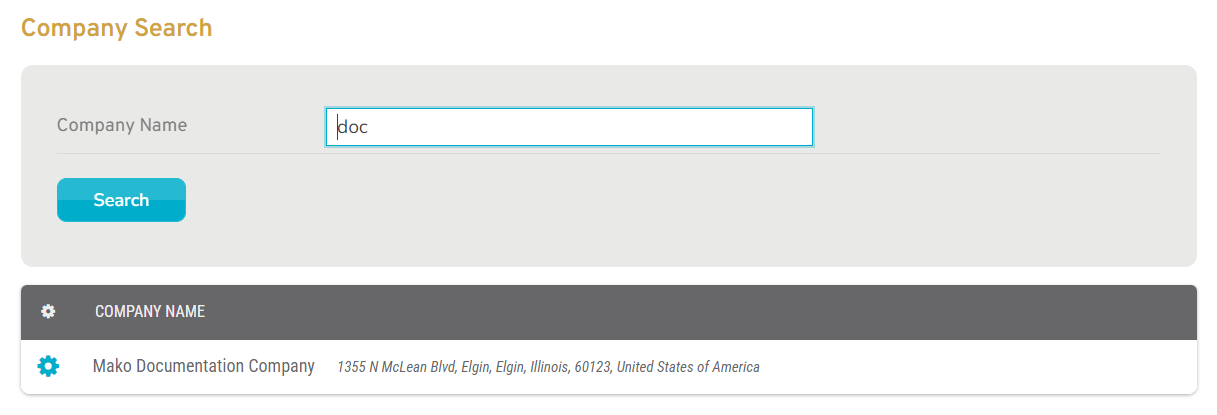
Figure 11. Example Company Search Form And Company Search Results List
Use the Company Search form (Fig. 11) to search for companies available to the selected user.
Company Name
Enter a search string.
Search Button
Click the “Search” button to view the Company Search Results list.
Company Search Results List
Use the Company Search Results list (Fig. 11) to grant the selected user access to any additional companies available.
Add Company / Grant Access
Click a company’s gear icon button to add it to the Companies list, which will grant the selected user access to the company.
