Overview
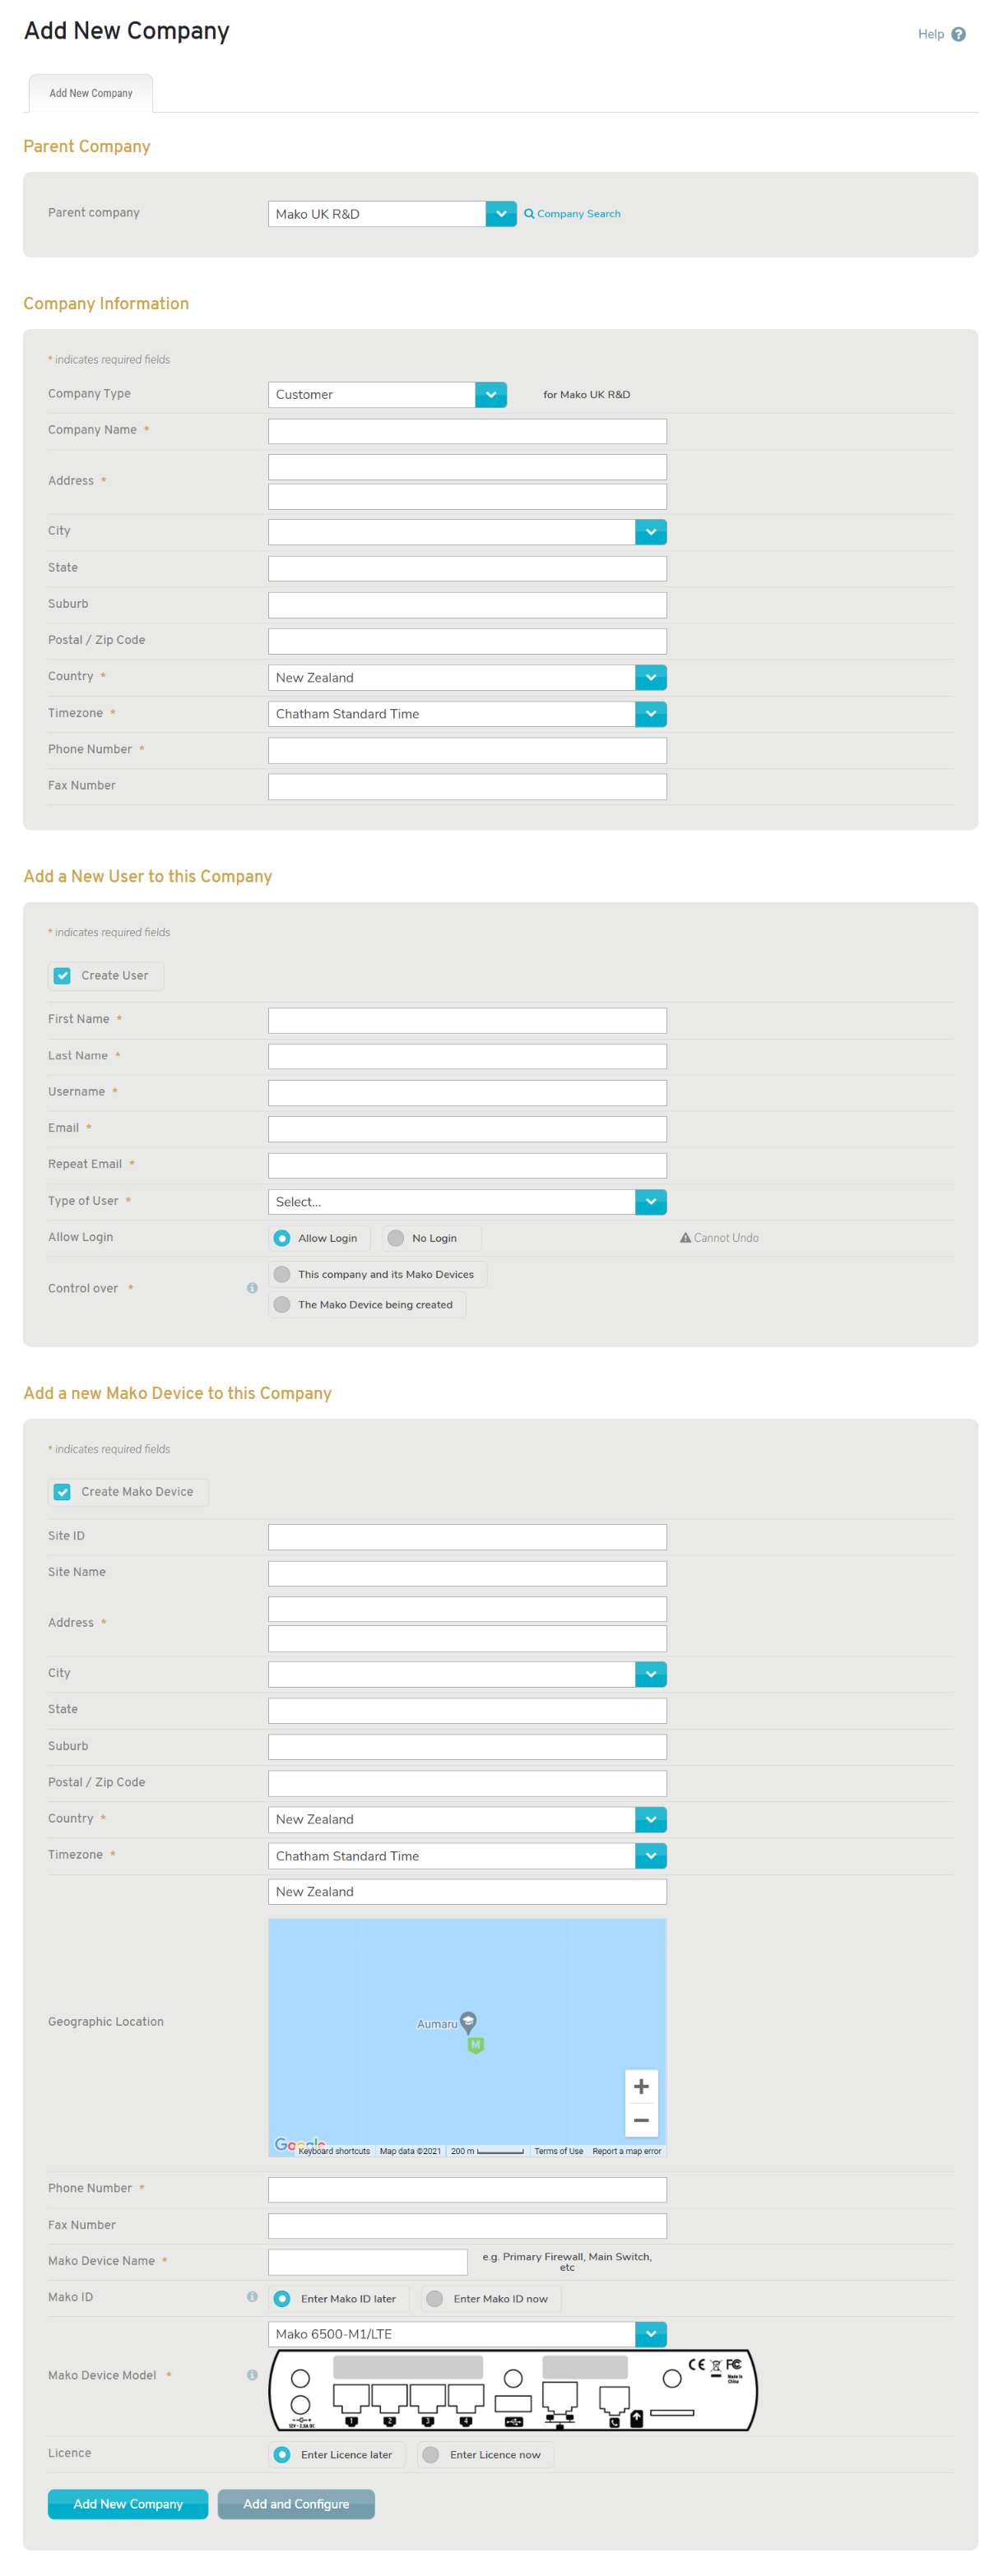
Figure 1. Example Add New Company Page
The Add New Company page (Fig. 1) allows you to add a new company.
You must have a Distributor or Reseller account to access this page.
Parent Company
Choose the parent company of the new company.
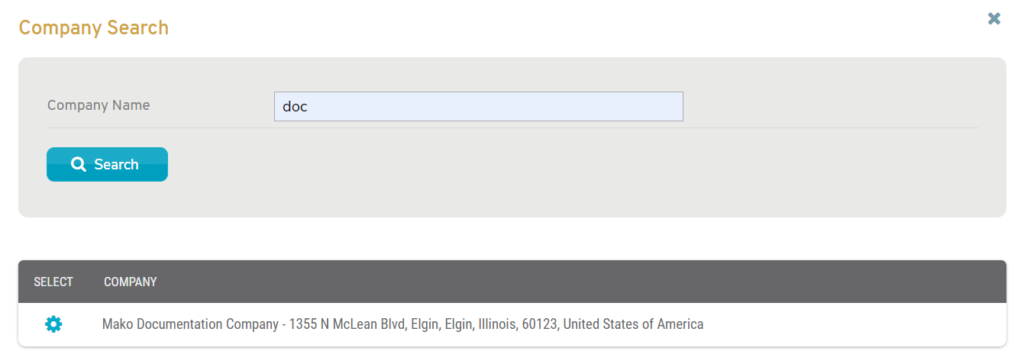
Figure 2. Parent Company Search Page with Company Search Form and Company Search Results
Alternatively, click the “Company Search” link (Fig. 1) to open the Company Search page in a new window (Fig. 2). Enter a search string for Company Name and click the “Search” button to view company search results. Then click the gear icon button for the desired company to select that company in the Add New Company form.
Company Information
Company Type
This automatically displays the type of company you are authorized to create for the selected parent company, which will be applied to the new company.
Company Name
Enter an informative, memorable, and unique name for the new company.
Address (Line 1 and Optional Line 2)
Enter a street address in the first field and related information, such as an apartment number, in the optional second field.
Suburb (Optional)
If desired, enter the suburb of the company address.
City (Optional)
Enter the city or metro area of the company address. This is optional but recommended.
State (Optional)
Enter the state or region of the company address. This is optional but recommended.
Postal/ZIP Code (Optional)
Enter the postal code (ZIP Code in the US) of the company address. This is optional but recommended.
Country
Choose the country of the company address.
Timezone
Choose the timezone of the company address.
Phone Number
Enter the phone number of the company address.
Fax Number (Optional)
If desired, enter the fax number of the company address.
Create User
Use these fields to add a new user to the new company. If you do not want to create a user at this time, uncheck the Create User checkbox.
First Name
Enter the user’s first name.
Last Name
Enter the user’s last name.
Username
Enter a unique username for the user. The best practice is to use the user’s email address as their username.
Email and Repeat Email
Enter and confirm the user’s unique email address.
Type of User
Choose from the available user types. The user types available here depend on the user type of your own user account, so this is not a complete list.
- Configure Client – can set up profile but cannot set up Mako ID
- Deploy Client – can set up profiles, add/change Mako ID, and download configuration files
- Diagnostics Client – can view and run a limited set of diagnostics
- Read Only Deploy Client – can only view settings, cannot make changes
- Reports Client – can only run/get items from the Reports section
- VPN User – can only access selected networks on this Mako device via a compatible remote VPN client
Allow Login
Choose whether or not the user will be allowed to login to the Mako Central Management System (CMS). After a user has been set to “No Login,” this setting cannot be changed.
Control Over
Choose to grant access to either all of the company’s Mako devices (including any new Mako devices in the future) or only the new Mako device to be created now.
The Control Over field defines the SCOPE of access the user has to the company and its Mako devices. The Type of User field above determines what TYPE of access the user will have to the company and its Mako devices.
Create Mako Device
Use these fields to add a new Mako device to the new company. For a new Mako device, you must either choose an existing Site or create a new Site here. If you do not want to create a Mako device at this time, uncheck the Create Mako Device checkbox.
Site Name
Choose an existing Site or enter an informative, memorable, and unique name for a new Site.
Site ID (Optional)
If you are adding a new Site and your company uses unique Site IDs for each Site, enter a unique value here for the new Site. If you choose to enter it later, you can do so using the Edit Site form on the Sites >> Manage Site >> Home page. Once a value has been entered for Site ID, it cannot be changed.
Location Details (Optional)
If you are adding a new Site, you must provide an address.
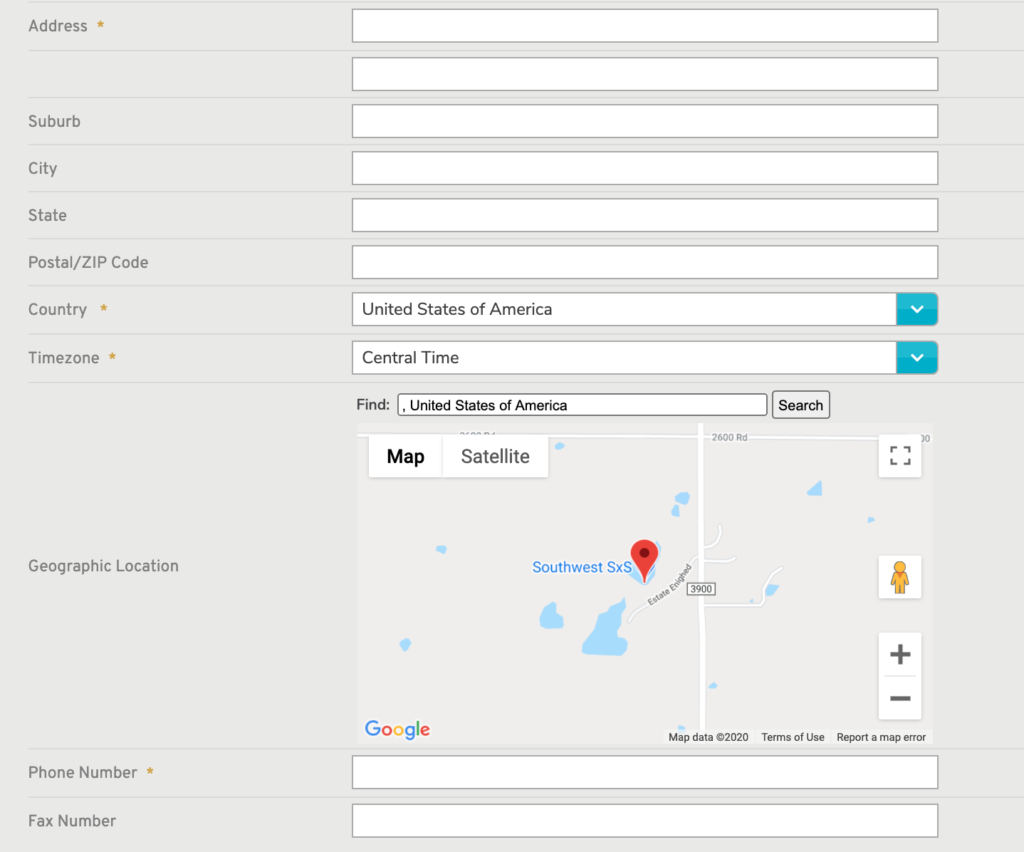
Figure 4. Location Fields
If you choose to enter new information, additional fields are provided (Fig. 4).
Address (Line 1 and Optional Line 2)
Enter a street address in the first field and related information, such as an apartment number, in the optional second field.
Suburb (Optional)
If desired, enter the suburb of the Site address.
City (Optional)
Enter the city or metro area of the Site address. This is optional but recommended.
State (Optional)
Enter the state or region of the Site address. This is optional but recommended.
Postal/ZIP Code (Optional)
Enter the postal code (ZIP Code in the US) of the Site address. This is optional but recommended.
Country
Choose the country of the Site address.
Timezone
Choose the timezone of the Site address.
Geographic Location
Enter the Site address for an exact map of your location.
Phone Number
Enter the phone number of the Site address.
Fax Number (Optional)
If desired, enter the fax number of the Site address.
Mako Device Name
Enter an informative, memorable, and unique name for the Mako device. The Mako Name often includes the location of the Mako device.
Mako ID (Optional)
The Mako ID is a unique 12-digit identification printed on the back of every Mako device.
You can choose to enter it later or to enter it now.
If you choose to enter it later, you can do so using the Configure >> Deployment >> Deployment page.
If you choose to enter it now, a field is provided.
While it is optional here, you must eventually specify the Mako ID for the Mako device.
Mako Device Model
Choose the appropriate model number of the new Mako device.
You can find the model number of a 6000 series Mako in the top line of the serial number sticker on the back of the Mako device.
For other Mako devices, you can compare the back panel configuration with the illustrations that display as you change the selected model number in the dropdown.
The Mako device will be rendered inoperable if the selection you choose here does not match its physical configuration. This may result in a significant delay in service enablement.
License (Optional)
You can choose to enter Licenses later or to enter Licenses now.
If you choose to enter Licenses later, you can do so using the Reports >> Licenses page.
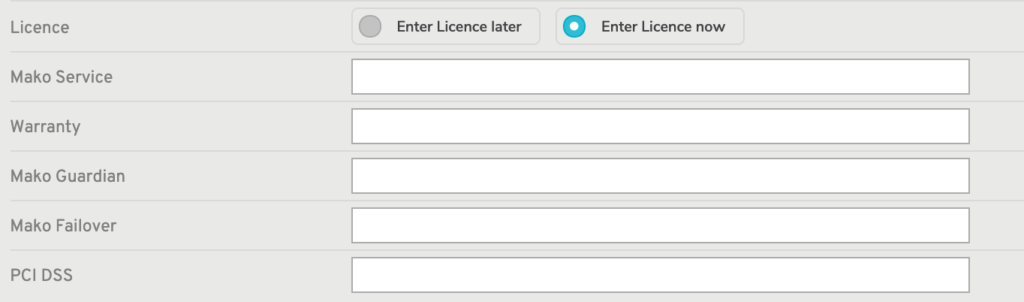
Figure 4. License Fields
If you choose to enter one or more Licenses now, additional fields are provided (Fig. 4). Enter each of your license keys in the field that matches the License Type of the license key:
- Mako Service
- Warranty
- Mako Guardian
- Mako Failover
- PCI DSS
While it is optional here, you must eventually apply at least a service license to the Mako device.
Add Button
Click the “Add New Company” button to create a new company with these settings and remain on this page. If details have been provided for a new user, a new Mako device, or a new site, those profiles will be created, as well.
Add and Configure Button
If details have been provided for a new Mako device, this button will be available. Click the “Add and Configure” button to create a new company and a new Mako device with these settings and then continue the configuration process for the new Mako in the Configure section. If details have been provided for a new user or a new site, those profiles will be created, as well.