This topic is ONLY relevant to security gateways. It is NOT relevant to managed switches.
Overview
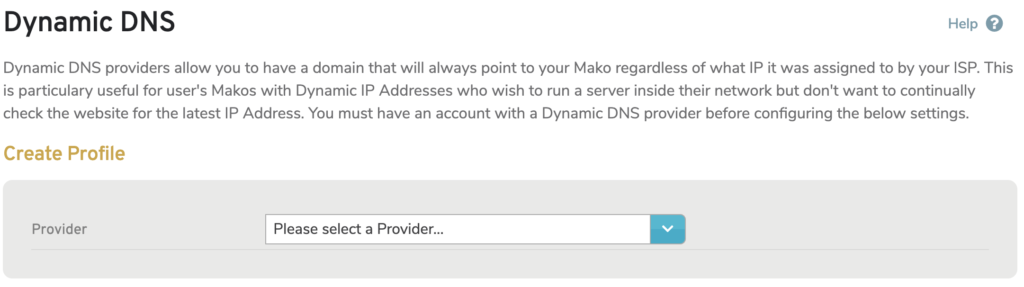
Figure 1. Dynamic DNS Page
The Dynamic DNS page (Fig. 1) is where you can view and manage profiles for connecting to third-party Dynamic DNS providers.
Dynamic DNS providers allow you to have a domain that will always point to your Mako regardless of its current IP address. This is particularly useful if you have Makos with Dynamic IP Addresses and want to run a server inside your network but do not want to continually check the website for the latest IP Address.
You must have an account with an approved Dynamic DNS provider before creating a profile here.
Existing Profiles

Figure 2. Example Existing Profiles List
You can view and manage existing profiles in the Existing Profiles list (Fig. 2).
Columns
- [Edit] – edit button
- Provider – provider of Dynamic DNS services
- Username – username of account registered with provider
- Last Update – date profile was last updated
- Needs Update – whether or not profile needs to be updated
- [Delete] – delete button
Actions
Edit Profile

Figure 3. Example Edit Profile Form
To edit a profile, click its gear icon button in the Options column. This will open the Edit Profile form (Fig. 3) in a new window.
The provider you have chosen determines the fields that are available in the form.
The Active field allows you to control whether or not a profile is active without having to delete and recreate the profile.
When you create a profile, it is active by default. It can be deactivated by unchecking the Active checkbox.
An inactive profile remains registered in the system but is not in use. It can be reactivated by checking the Active checkbox.
Make any other desired changes, then click the “Save” button.
Delete Profile
To delete a profile, click its “X” icon button in the Options column. This will open a confirmation panel asking you to confirm the deletion. If you are certain you want to delete the profile, click the “OK” button.
Create Profile
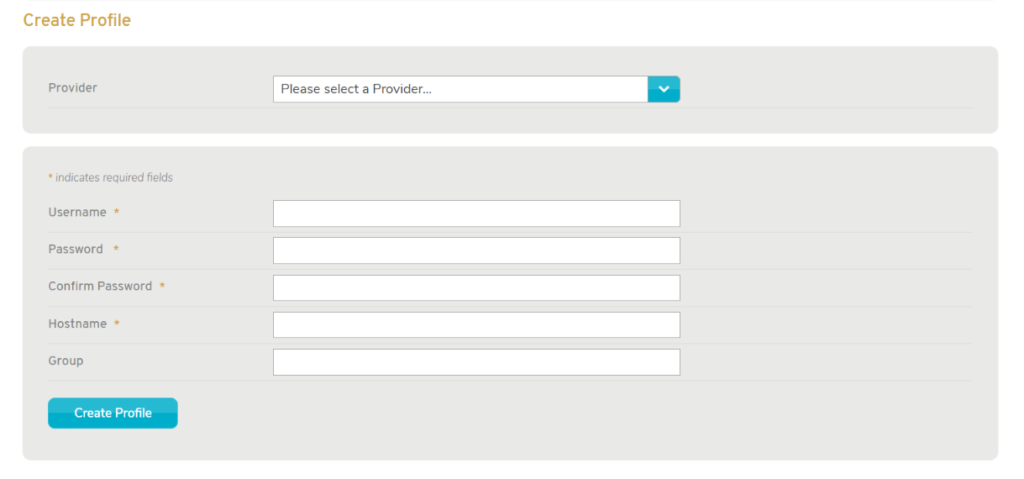
Figure 4. Create Profile Form
Use the Create Profile form (Fig. 4) to create a new Dynamic DNS profile.
Provider
Choose an approved third-party provider of Dynamic DNS services. The provider you choose will determine the other fields that will be available in the form.
No-ip.com
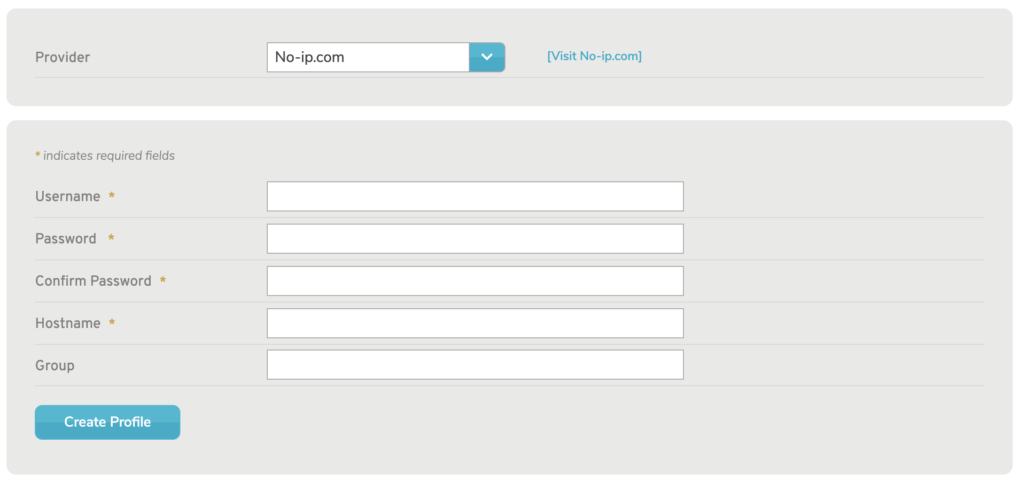
Figure 5. Create Profile Form with No-ip.com as Provider
If you choose “No-ip.com” as Provider (Fig. 5), the following fields will be available:
Username
Enter the username of the account you registered with the provider.
Password and Confirm Password
Enter and confirm the password of the account you registered with the provider.
Hostname (Optional if you provide a Group)
Enter the hostname that will be used to identify the selected Mako.
Group (Optional if you provide a Hostname)
Enter the group that will be used to identify the selected Mako. Refer to the provider’s documentation for details.
DynDNS.org
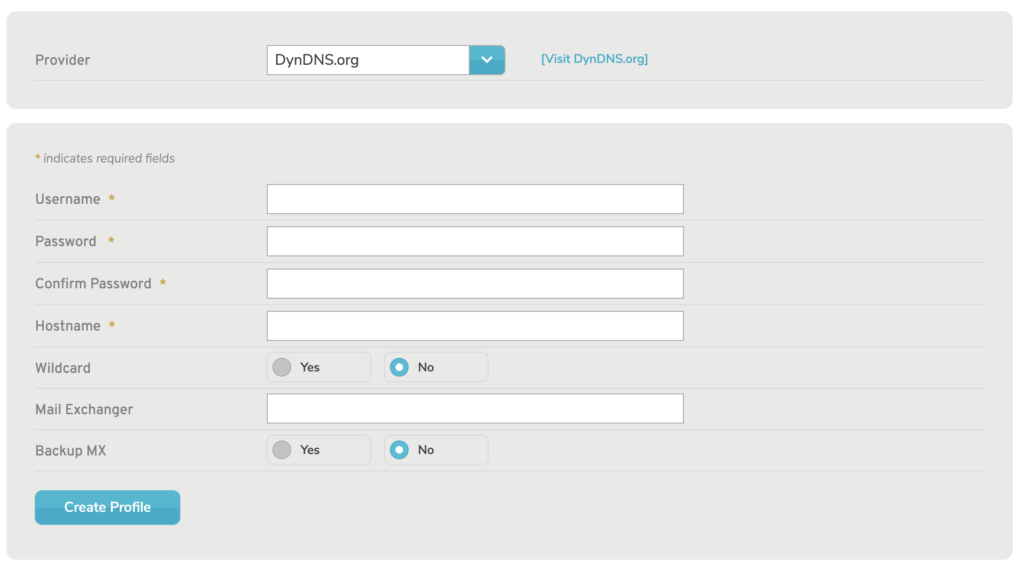
Figure 6. Create Profile Form with DynDNS.org as Provider
If you choose “DynDNS.org” as Provider (Fig. 6), the following fields will be available:
Username
Enter the username of the account you registered with the provider.
Password and Confirm Password
Enter and confirm the password of the account you registered with the provider.
Hostname
Enter the hostname that will be used to identify the selected Mako.
Wildcard (Optional)
The default value is “No.” Refer to the provider’s documentation for details.
Mail Exchanger (Optional)
Refer to the provider’s documentation for details.
Backup MX (Optional)
The default value is “No.” Refer to the provider’s documentation for details.
Create Profile Button
To create a new Dynamic DNS profile with these settings, click the “Create Profile” button.