This topic is ONLY relevant to security gateways. It is NOT relevant to managed switches.
Overview
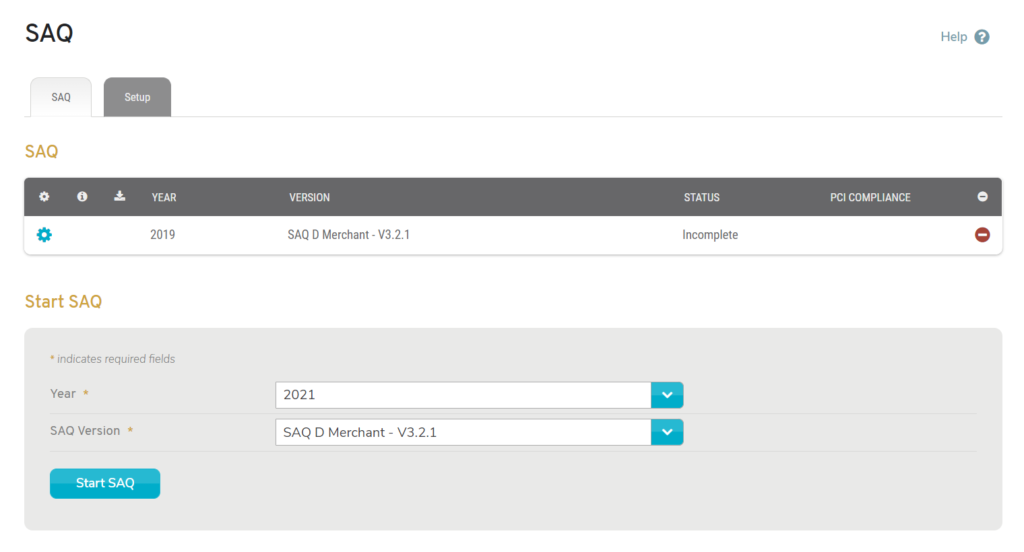
Figure 1. Example SAQ Page
The SAQ page (Fig. 1) allows you to create and submit your annual Self-Assessment Questionnaire (SAQ) to demonstrate PCI DSS compliance. You can use SAQ settings, SAQ Templates, and SAQ Groups to encourage consistent responses and reduce repetitive entry.
You must have passing network vulnerability scans and recent configuration reviews to be PCI-compliant. You will see notifications related to the status of these activities at the top of the page.
You must submit an annual SAQ to be PCI-compliant.
This feature is only available with Mako’s Merchant PCI services. See the PCI DSS Summary documentation for details regarding Merchant PCI services. You must have both an active PCI DSS License and an active PCI Enhanced Services License in order to access Merchant PCI services.
Merchant PCI services require installation of a dedicated scanning appliance in your network and application of firewall settings that allow it to scan restricted zones.
Setup Tab
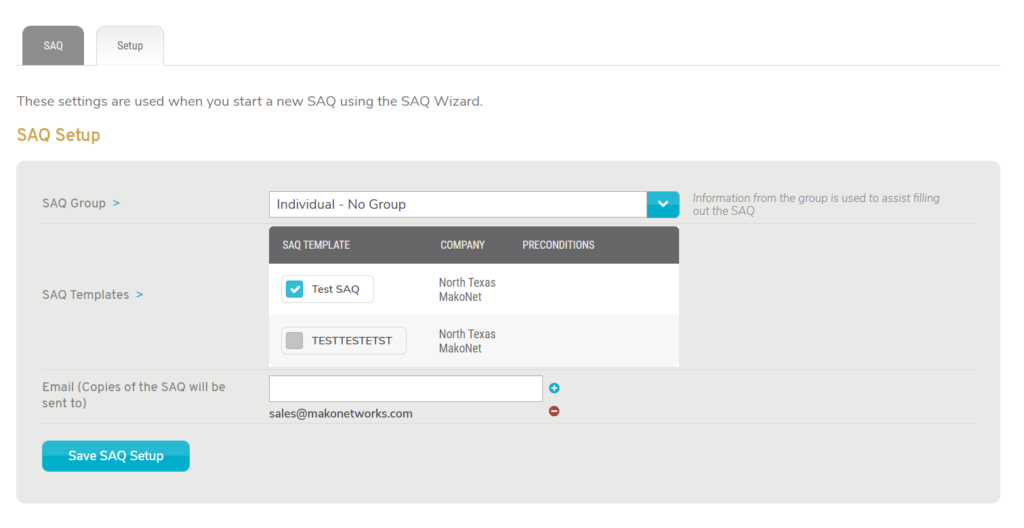
Figure 2. Example SAQ Setup Form on Setup Tab
If you have not already done so, you must use the SAQ Setup form on the Setup tab (Fig. 2) to configure SAQ settings before creating an SAQ. These settings are used as default values whenever you start a new SAQ using the SAQ Wizard.
SAQ Settings
SAQ Group
An SAQ Group is a set of related SAQ Templates and default settings for submitting SAQs. See the Company PCI DSS page documentation for details regarding SAQ Groups.
Choose an SAQ Group from the dropdown list of your company’s groups, if desired. The default option is “Individual – No Group.”
SAQ Templates
An SAQ Template is a set of pre-filled settings and answers that reduce the need to repeat responses every time you create an SAQ. See the Company PCI DSS page documentation for details regarding SAQ Templates.
To apply an SAQ Template to the SAQ, check the checkbox next to its name in the list of your company’s templates. You may choose more than one template.
When multiple SAQ Templates apply to a single SAQ, the pre-filled information will be combined. In cases of conflicting values (excluding blanks), the least compliant value will be used. For example, if the first template specifies “Yes” for a requirement, and the second template specifies “Yes with CCW” for the same requirement, then the value used will be “Yes with CCW.”
This is a list of email addresses that will be copied whenever an SAQ is submitted.
Enter the first email address, then click the plus icon button. Repeat, as needed.
To remove an email address from the list, click its minus icon button.
Save Button
Click the “Save SAQ Setup” button to save these settings.
SAQ Tab
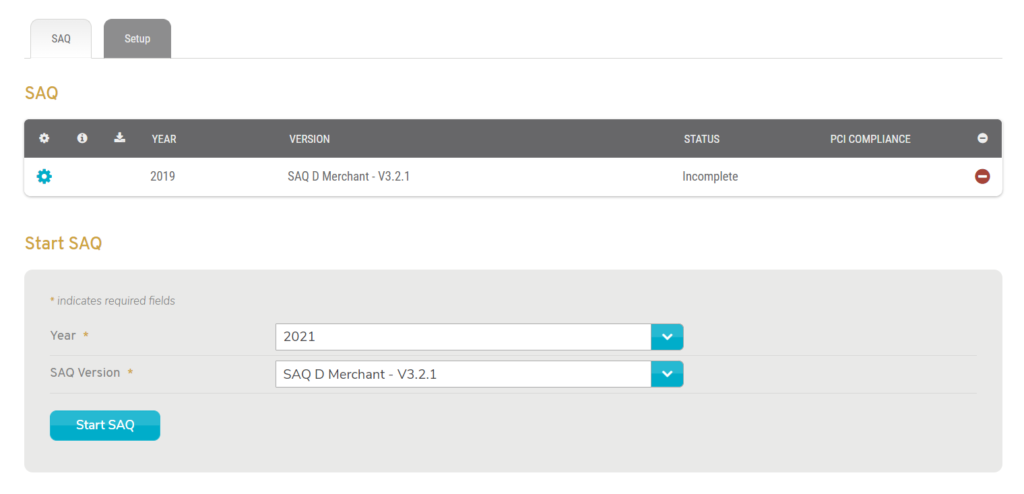
Figure 3. Example SAQ Tab After Completing Setup
After completing setup, the full functionality of the SAQ tab will be available (Fig. 3).
View SAQs

Figure 4. Example SAQ List
The SAQ list (Fig. 4) displays the selected Mako’s existing SAQs.
Columns
- [Edit] – edit button
- Year – unique year identifier
- Version – version of PCI DSS used to check compliance
- Status – completion status
- PCI Compliance – compliance status
- [Delete] – delete button
Actions
Edit SAQ (SAQ Wizard)
To edit an existing SAQ, click its gear icon button. This will open the SAQ Wizard in a new window. Use the wizard to make and save changes to the SAQ. See the SAQ Wizard documentation below for details.
Delete SAQ
To delete an existing SAQ, click its minus icon button. This will open a confirmation panel asking you to confirm the deletion. If you are certain you want to delete the SAQ, click the “OK” button.
Create SAQ
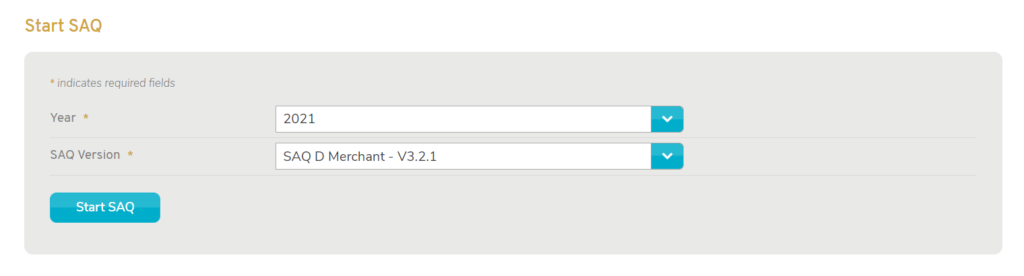
Figure 5. Example Start SAQ Form on SAQ Tab
Use the Start SAQ form on the SAQ tab (Fig. 5) to create a new SAQ for the selected Mako.
Year
Choose a year for this SAQ. Only one SAQ can be created per year, so if the year you need is not available here, check the SAQ list to see if it has already been started.
SAQ Version
Choose the version of PCI DSS to use when checking compliance for this SAQ.
Start SAQ Button
Click the “Start SAQ” button to create a new SAQ with these settings.
After creating an SAQ, you will need to manually launch the wizard that allows you to enter and save answers to SAQ questions. See Edit SAQ above and SAQ Wizard below.
SAQ Wizard
To edit an existing SAQ, click its gear icon button in the SAQ list. This will open the SAQ Wizard in a new window. Use the wizard to make and save changes to the SAQ.
Single Page View
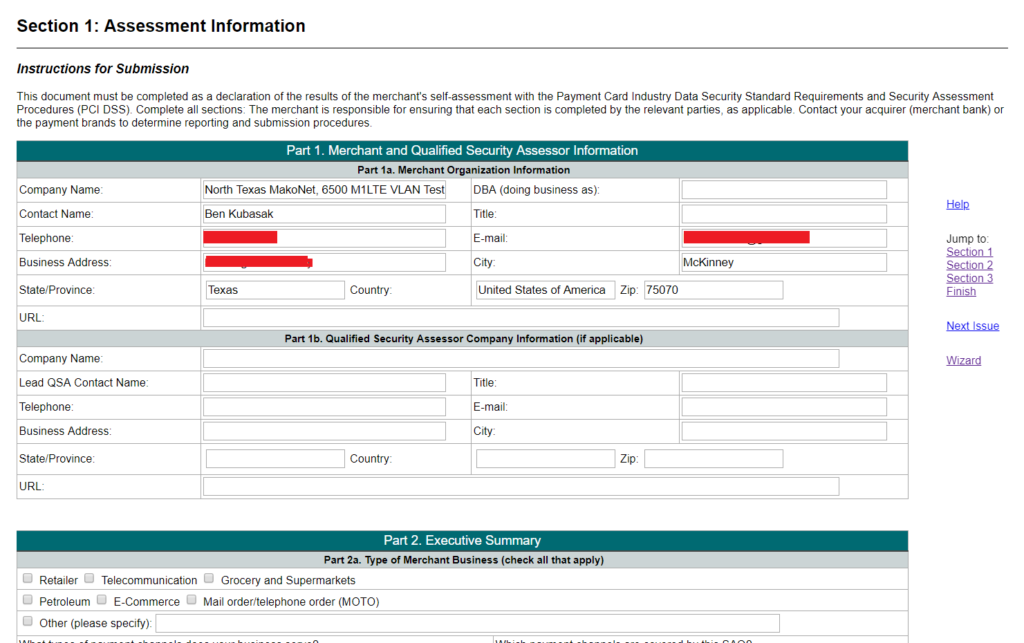
Figure 6. Example SAQ Wizard Single Page View
Upon opening the SAQ Wizard, you will see the single page view (Fig. 6). Single page view presents the full SAQ in one step. Here you can review any pre-filled information from SAQ Templates and manually enter or adjust any responses prior to submitting the SAQ.
You can click the “Wizard” link in the right navigation menu to switch to wizard view, if desired. In wizard view, you will be asked a series of questions in order to help you fill out the SAQ.
Help
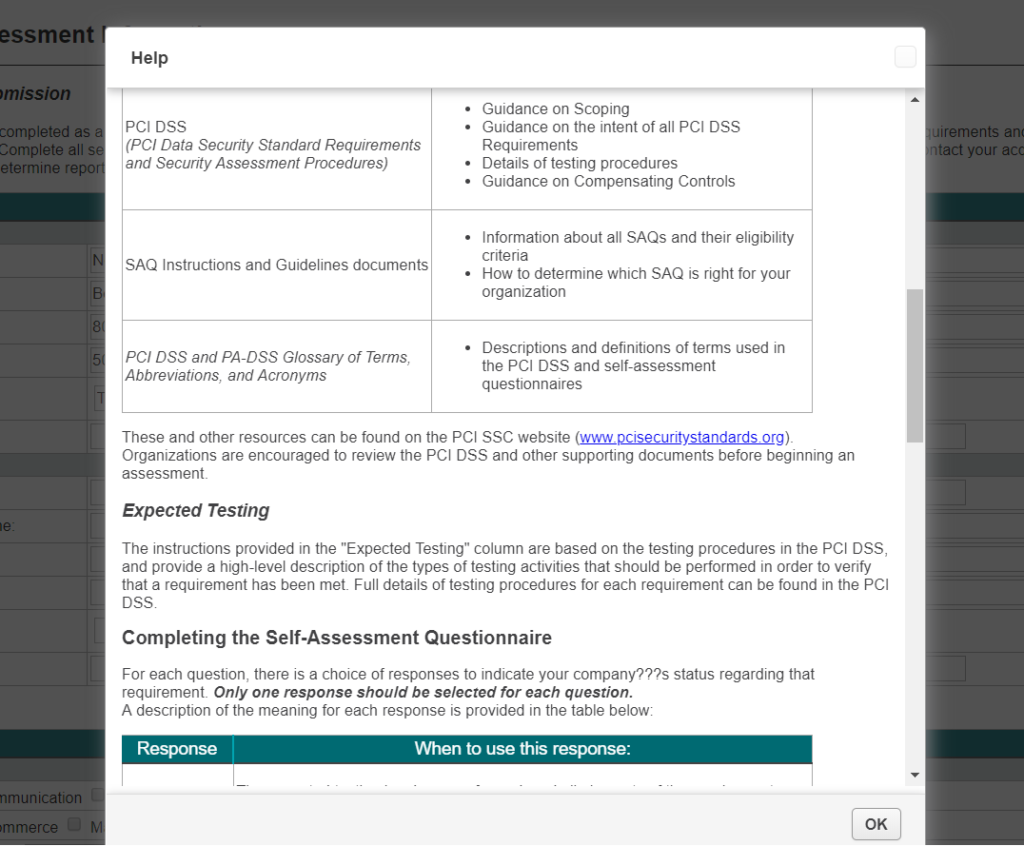
Figure 7. Example SAQ Wizard Help Content
You can click the “Help” link in the right navigation menu to view detailed help content (Fig. 7) that can assist you as you complete the SAQ.
The specific help content that appears here will depend on the SAQ’s PCI DSS version.
Numbered Sections
The numbered section links in the right navigation menu can be used to jump to a particular numbered section of the SAQ.
The numbered sections available and the content within them will depend on the SAQ’s PCI DSS version.
Finish Section
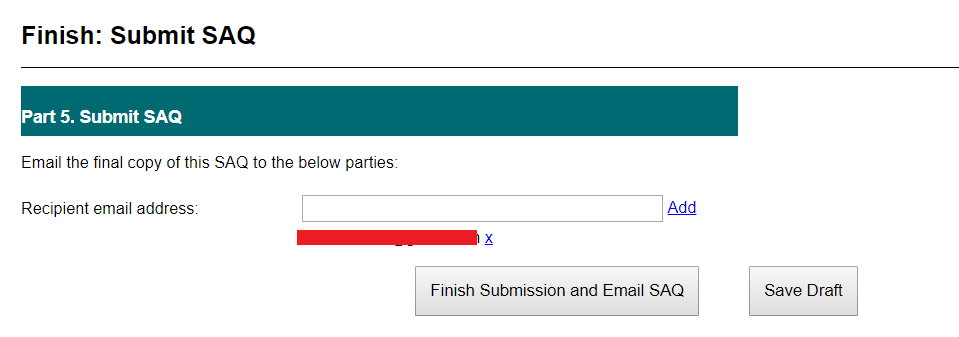
Figure 8. Example SAQ Wizard Finish Section
Click the “Finish” link in the right navigation menu to jump to the Finish section (Fig. 8). Here you can save or submit the SAQ.
This is a list of email addresses that will be copied when the SAQ is submitted.
Enter the first email address, then click the “Add” link. Repeat, as needed.
To remove an email address from the list, click its “X” link.
Finish Submission and Email SAQ Button
Click the “Finish Submission and Email SAQ” button when you are ready to submit the SAQ and email the listed parties. This cannot be undone. Proceed with caution.
Save Draft Button
You can click the “Save Draft” button to save the SAQ without submitting it or sending any emails. Then you can return to finish the SAQ at a later date without losing your progress.
Next Issue
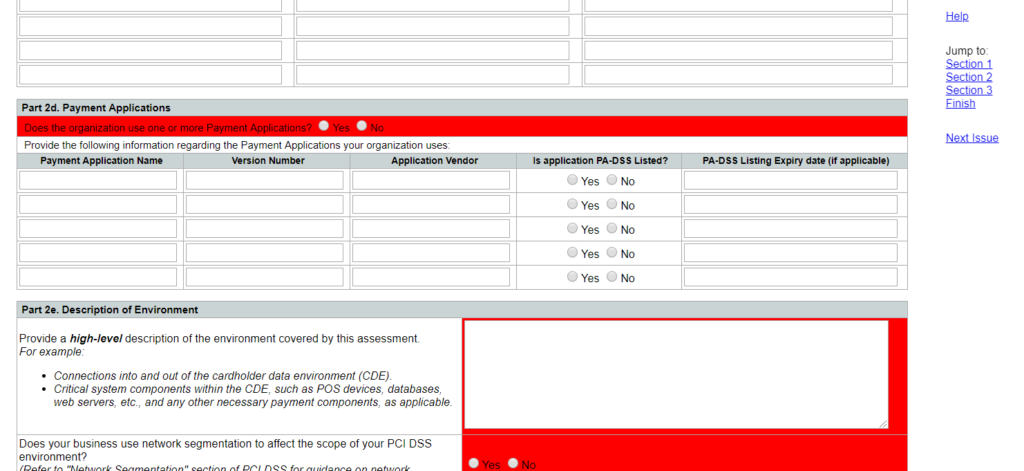
Figure 9. Example SAQ Wizard Next Issue Functionality
Click the “Next Issue” link to be taken to the next open issue in the SAQ (Fig. 9).
Open issues are highlighted in red. These are items that must be addressed before the SAQ can be submitted.
Continue clicking the “Next Issue” link to cycle through all open issues.
Wizard View
Step 1: SAQ Wizard Introduction
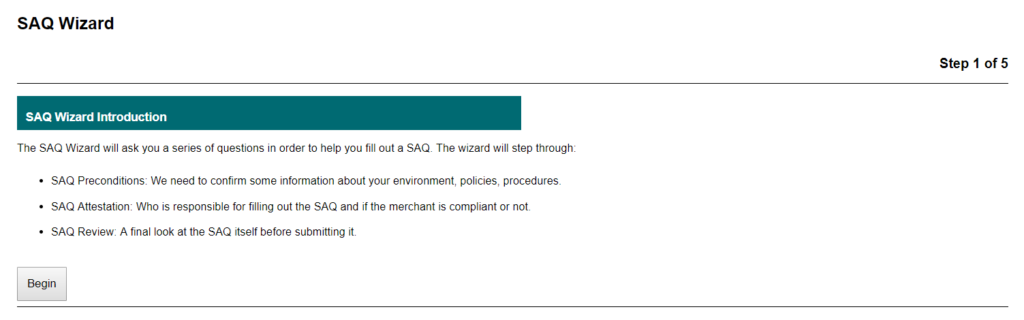
Figure 10. Example SAQ Wizard Step 1
Click the “Wizard” link in the right navigation menu to switch to wizard view (Fig. 10).
In wizard view, the SAQ Wizard will ask you a series of questions in order to help you fill out the SAQ.
The wizard will step through:
SAQ Preconditions: confirm some information about your environment, policies, procedures
SAQ Attestation: who is responsible for filling out the SAQ? Is the merchant compliant or not?
SAQ Review: a final look at the SAQ before submitting it
Click the “Begin” button to proceed to the next step when ready.
Step 2: SAQ Preconditions Survey
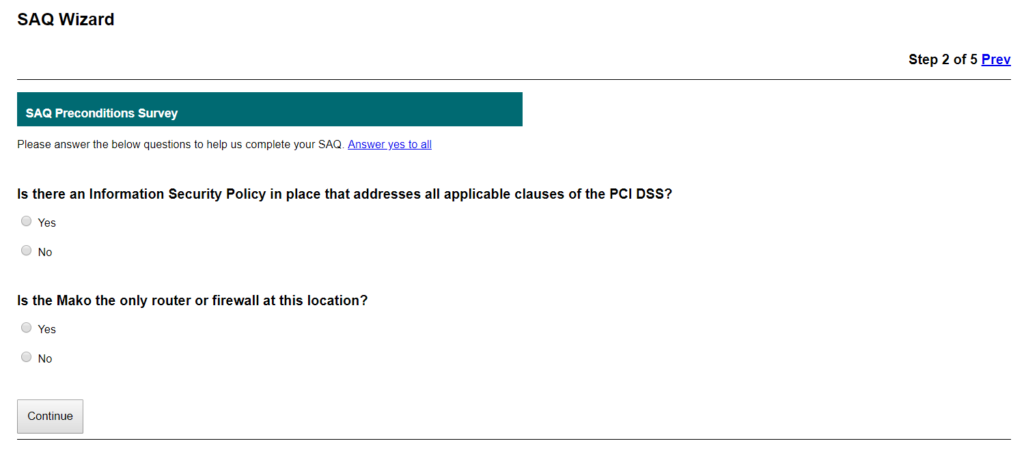
Figure 11. Example SAQ Wizard Step 2
Step 2 poses some questions related to SAQ preconditions (Fig. 11). You can answer each question individually, or if appropriate, you can use the “Answer yes to all” link to check “Yes” for each answer and to proceed to the next step automatically.
The specific questions that appear here will depend on the SAQ’s PCI DSS version.
Click the “Continue” button to proceed to the next step when ready.
You can also use the “Prev” link to return to the previous step, if needed.
Step 3: SAQ Attestation
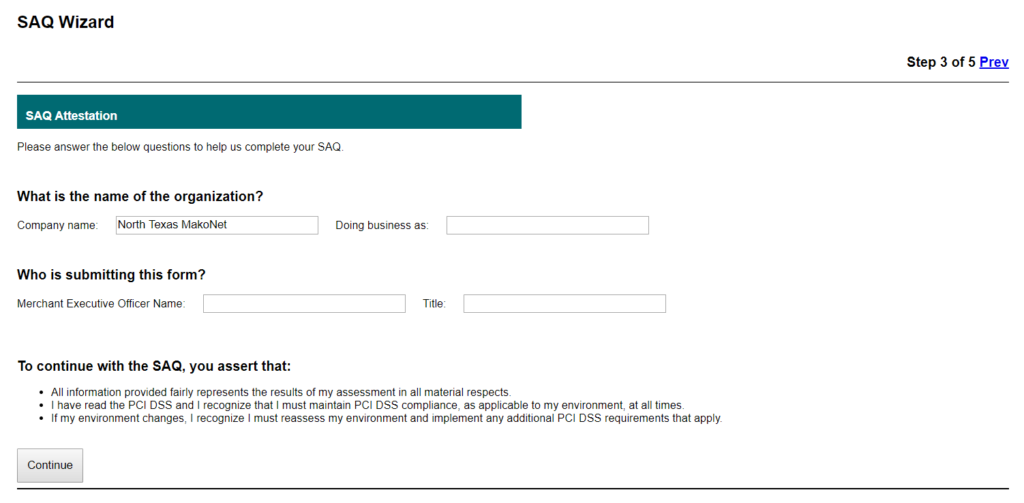
Figure 12. Example SAQ Wizard Step 3
Step 3 presents a streamlined version of the SAQ attestation (Fig. 12). Enter the values requested and review the assertions you will be making by submitting the SAQ. You are accountable for these assertions, so review them carefully.
The specific questions and assertions that appear here will depend on the PCI DSS version and SAQ Templates that have been selected for the SAQ.
Click the “Continue” button to proceed to the next step when ready.
You can also use the “Prev” link to return to the previous step, if needed.
Step 4: SAQ Review

Figure 13. Example SAQ Wizard Step 4
Step 4 displays the compliance status of your entity based on the answers you have provided and the configuration of the Makos in question (Fig. 13). If your entity is non-compliant, a list of issues to resolve will be provided. You should address this list before continuing, if possible.
Click the “Create and Review SAQ” button to proceed to the next step when ready.
You can also use the “Prev” link to return to the previous step, if needed.
Step 5: Submit SAQ
Step 5 returns you to the single page view and asks that you review the SAQ and then submit it when ready. You are accountable for the content of the SAQ, so review it carefully.
See the Finish section documentation above for details regarding saving or submitting the SAQ.
This is the final step in the wizard.