Overview
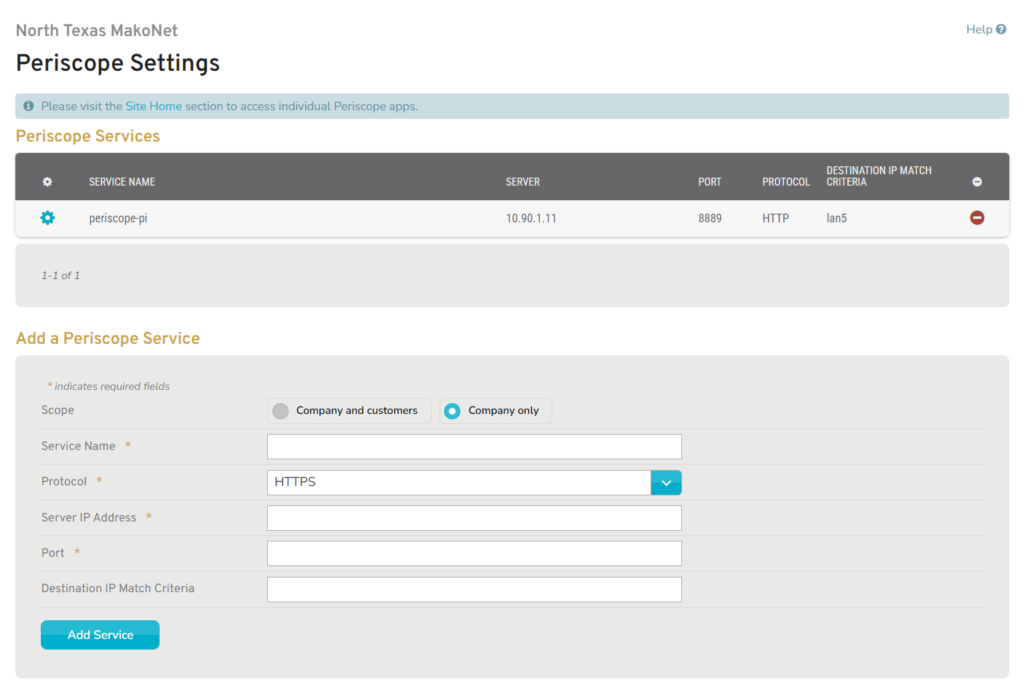
Figure 1. Example Company Periscope Page
The Company Periscope page allows you to view and manage Periscope Services for the selected company. Company services can be used to manage Periscope settings for multiple sites at once, while allowing for custom configuration of individual sites.
Visit the Enterprise Template Periscope page to manage Periscope Services for specific groups of sites instead of for the entire selected company.
Visit the Site Periscope page to manage Periscope Services for the selected site.
Visit the Site Home page to open a connection to a Periscope Service.
About Periscope
Periscope is the fast and secure way to access on-premise web-based services remotely, simplifying operations such as POS management, CCTV monitoring, and more. It eliminates the need for local equipment dedicated to accessing these services and further reduces the need for site visits.
By keeping these services behind a Mako device and only accessing them via the Mako CMS, Periscope leverages the security advantages of the PCI-certified Mako System, such as multi-factor authentication (MFA), strong 256-bit encryption, and centralized logging and auditing.
Users must have MFA enabled and an appropriate user type to access Periscope.
Periscope requires a Mako 6600-M or newer security gateway updated to firmware release CPE F6550 or later.
Subscribe to Periscope
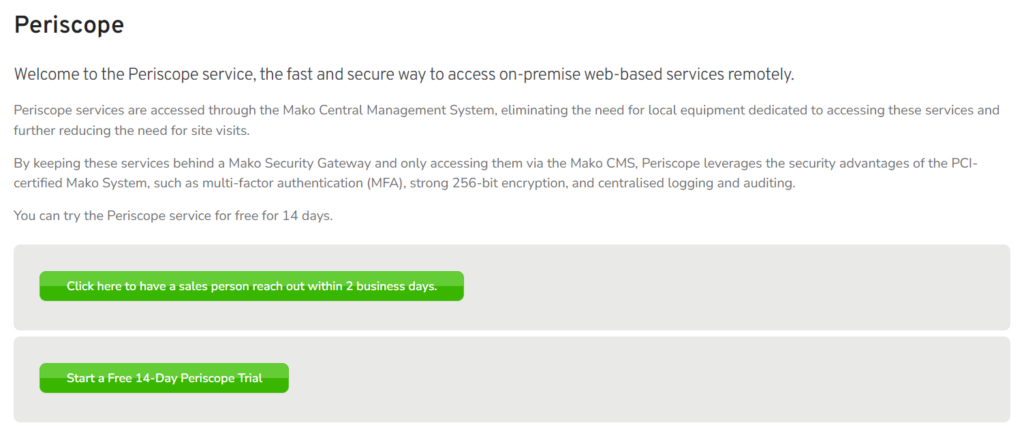
Figure 2. Example Subscribe to Periscope Form
The Subscribe to Periscope form appears if the selected company is not subscribed to Periscope. If you are interested in adding Periscope, click the button to have a salesperson contact you within two business days.
Alternatively, you can click “Start a Free 14-Day Periscope Trial” to evaluate Periscope.
Add a Periscope Service
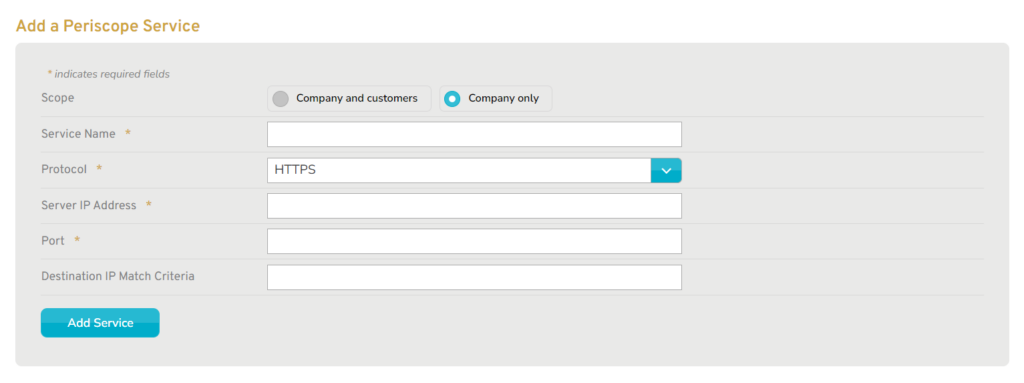
Figure 3. Example Add a Periscope Service Form
Use the Add a Periscope Service form to create a new Periscope Service that is available to the selected company’s sites.
Fields
Scope
Choose whether or not this service will be available to customers of the selected company. Using the default setting will NOT make the group available to these customers.
Service Name
Enter an informative, memorable, and unique name for this service.
Protocol
Choose “HTTPS” or “HTTP” as the protocol for accessing this service.
For security purposes, always use VLAN to isolate HTTP services, regardless of Periscope use.
Server IP Address
Enter the IP address for accessing this service.
Port
Enter the port for accessing this service.
Start Page (Optional)
Enter the page to request when accessing this service.
Destination IP Match Criteria (Optional)
Enter match criteria to restrict which networks can be used for accessing this service.
See the Enterprise Template Firewall documentation for match criteria formatting details.
Add Button
Click the “Add Service” button to create a new Periscope Service with these settings.
View Periscope Services

Figure 4. Example Periscope Services List
Use the Periscope Services list to view, edit, and delete existing Periscope Services for the selected company.
Columns
- [Edit] – edit button
- Service Name – unique name of the service
- Server – IP address for accessing the service
- Port – port for accessing the service
- Protocol – protocol for accessing the service
- Start Page – page to request when accessing the service
- Destination IP Match Criteria – network restrictions for accessing the service
- [Delete] – delete button
Actions
Edit a Periscope Service
To edit a Periscope Service, click its gear icon button. This will open the Edit Periscope Service form. Make any desired changes, then click the “Save Service” button.
Delete a Periscope Service
To delete a Periscope Service, click its minus icon button. This will open a confirmation panel. If you are certain you want to delete the Periscope Service, click the “Delete” button.