Overview
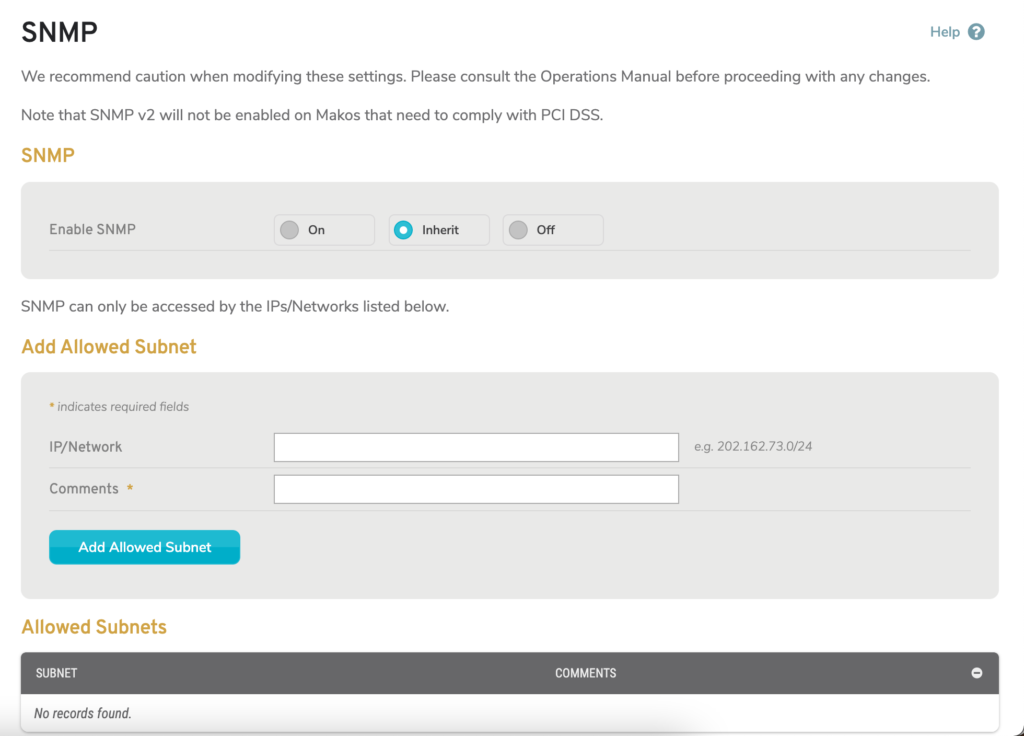
Figure 1. Example SNMP Page
The SNMP page (Fig. 1) allows you to enable and configure Simple Network Management Protocol (SNMP) service for Makos using the selected Enterprise Template.
You can also manage SNMP settings in the Configure section.
SNMP Settings
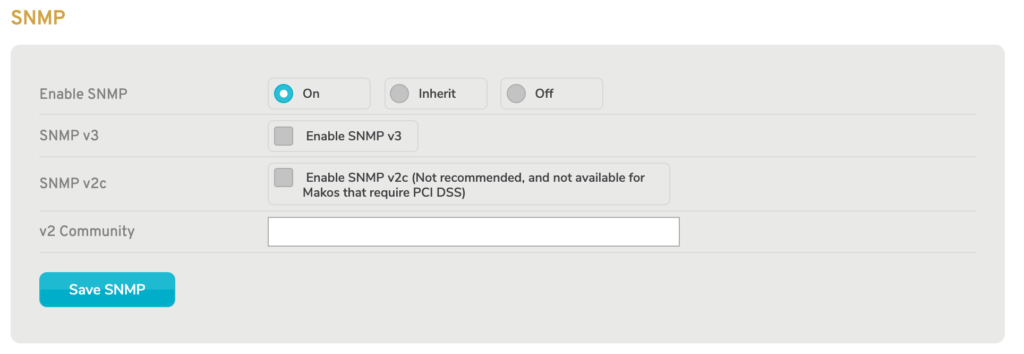
Figure 2. SNMP Form with “On” Selected
Use the SNMP form (Fig. 2) to manage SNMP settings.
Enable SNMP
Choose one of three options described below: “On,” “Inherit,” and “Off.”
Enable SNMP: On
Choosing the “On” option (Fig. 2) enables the Remote Syslog feature and makes the following fields available:
SNMP v3
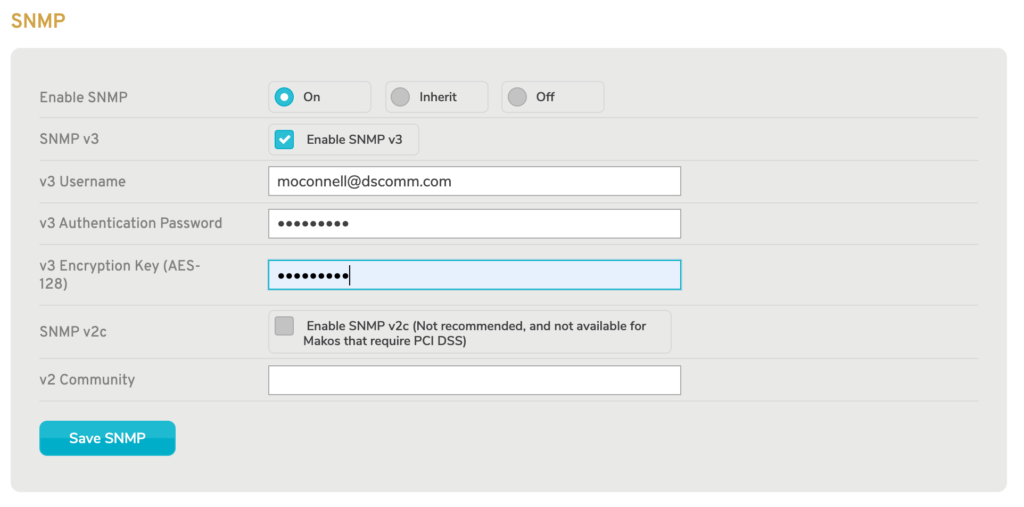
Figure 3. SNMP v3 Fields
To enable SNMP Version 3 (SNMP v3), which is the latest and most secure version of SNMP, check the “Enable SNMP v3” checkbox.
If enabled, the following additional fields will be available:
v3 Username
Enter the username to send with secure SNMP requests. There is a minimum requirement of eight characters.
v3 Authentication Password
Enter the related password to send with secure SNMP requests. There is a minimum requirement of eight characters.
v3 Encryption Key (AES-128)
Enter an encryption key to be used for securing SNMP requests. The encryption key must use the AES-128 encryption standard. There is a minimum requirement of eight characters, however a valid key will have 32 characters.
SNMP v2c
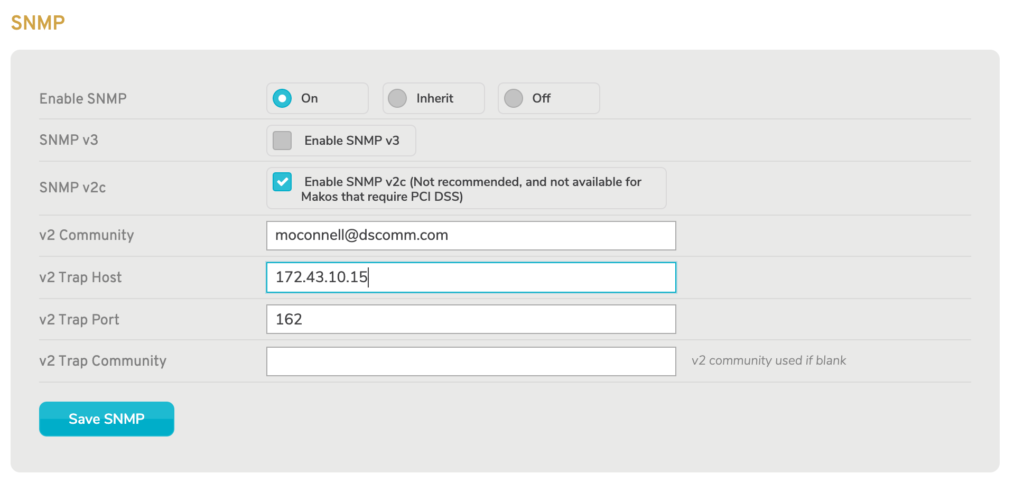
Figure 4. SNMP v2c Fields
To enable Community-Based SNMP Version 2 (SNMP v2c), check the “Enable SNMP v2c” checkbox. Enabling SNMP v2c is NOT recommended because it is obsolete and may cause compatibility and security issues.
If enabled, the following additional fields will be available:
v2 Community
Enter the name of the v2 Community, which acts like username/password credentials attached to SNMP requests. There is a minimum requirement of eight characters.
v2 Trap Host (Optional)
Enter the IP address of the v2 Trap Host, which is a server that handles notifications (traps). Leave this empty to disable trap hosting.
v2 Trap Port (Optional)
Enter the port of the v2 Trap Host.
v2 Trap Community (Optional)
Enter the name of the v2 Trap Community, which acts like username/password credentials attached to SNMP traps. There is a minimum requirement of eight characters. The v2 Community value will be used if this is left blank.
Enable SNMP: Inherit

Figure 5. SNMP Form with “Inherit” Selected
Choosing the “Inherit” option (Fig. 5) enables the SNMP service with default settings. This is the default setting for Enterprise Templates.
Enable SNMP: Off

Figure 6. SNMP Form with “Off” Selected
Choosing the “Off” option (Fig. 6) disables the SNMP service.
Save Button
To save any changes to these settings, click the “Save SNMP” button.
Add Allowed Subnet
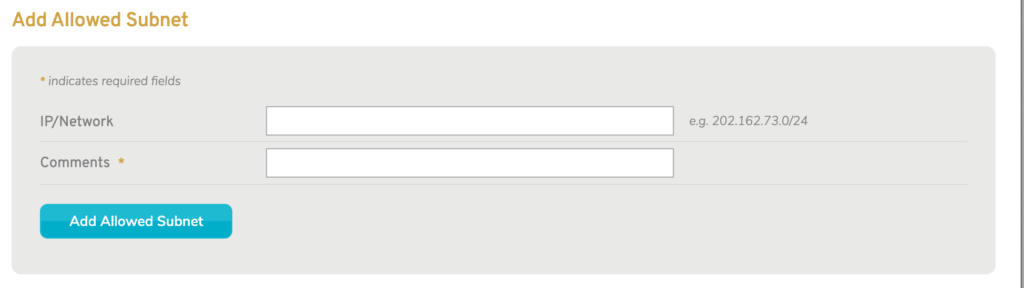
Figure 7. Add Allowed Subnet Form
Use the Add Allowed Subnets form (Fig. 7) to create new allowed subnets. Allowed subnets are parts of your network that are allowed to use the SNMP service.
IP/Network
Enter the IP address and network mask (in CIDR notation) of the subnet you would like to allow.
Comments
Enter comments to describe the allowed subnet.
Add Button
To create an allowed subnet with these settings, click the “Add Allowed Subnet” button.
View Allowed Subnets

Figure 8. Allowed Subnets List
Use the Allowed Subnets list (Fig. 8) to view and manage existing allowed subnets.
Columns
- Subnet – IP address and network mask of the allowed subnet
- Comments – comments describing the allowed subnet
- [Delete] – delete button
Actions
Delete Allowed Subnet
To delete an allowed subnet, click its minus icon button. This will open a confirmation panel asking you to confirm the deletion. If you are certain you want to delete the allowed subnet, click the “OK” button.