Overview

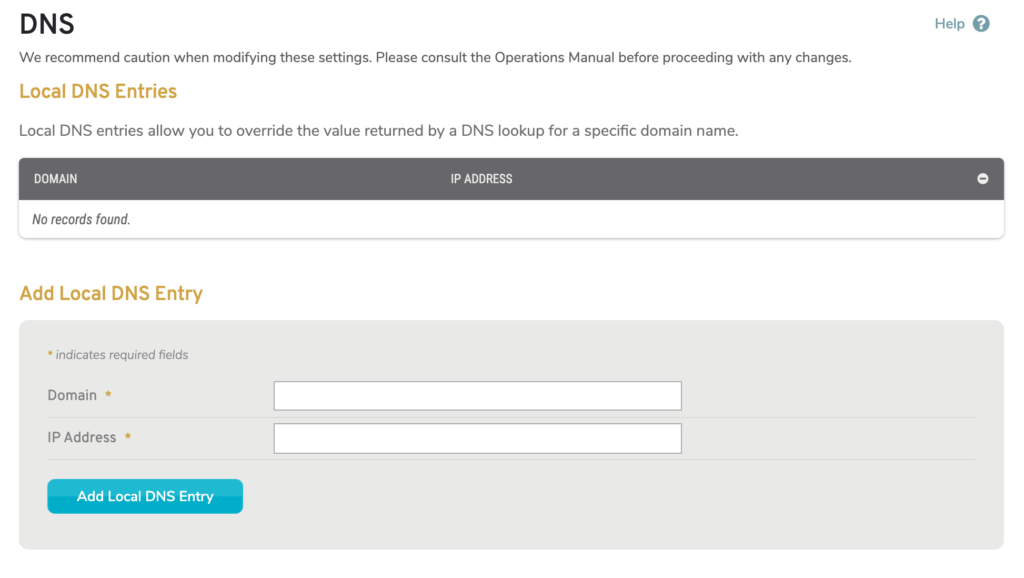
Figure 1. Example DNS Page
The DNS page (Fig. 1) allows you to customize how DNS queries from Makos using the selected Enterprise Template are handled.
Local DNS entries allow you to override the value returned by a DNS lookup for a specific domain name.
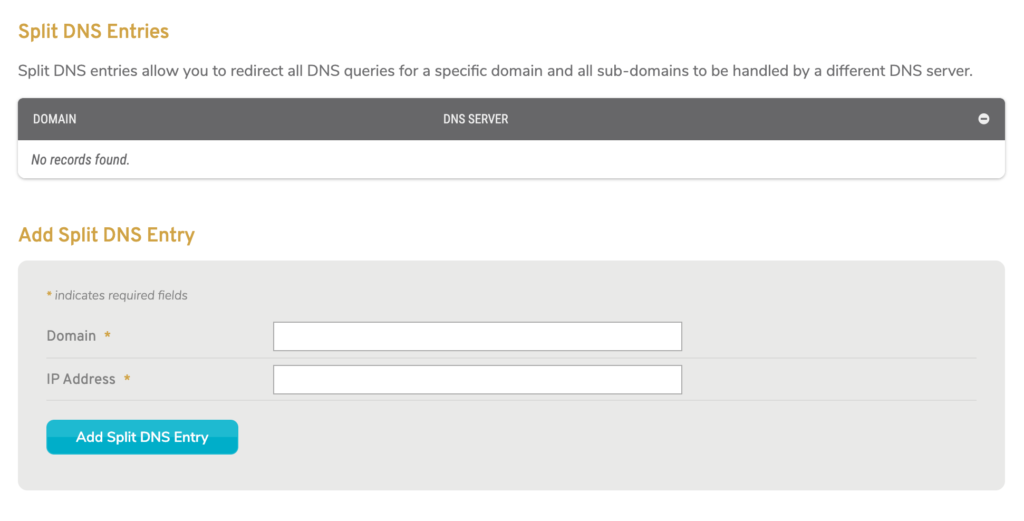
Split DNS entries allow you to redirect all DNS queries for a specific domain and all subdomains to be handled by a different DNS server.
You can also manage DNS settings in the Configure section.
Local DNS Entry Settings

Figure 2. Example Local DNS Entries List & Form
The Local DNS Entries list (Fig. 2) shows domains for which the IP address returned by a DNS query should be overwritten with a value you have provided, allowing you to deny access to those domains. This is useful for preventing access to malicious or off-limits websites, such as YouTube or Facebook.
To create a local DNS entry, use the form at the bottom of the list. Enter a Domain to which you would like to deny access, enter the IP Address you want to have overwrite the actual IP address of that domain, and then click the “Add Local DNS Entry” button.
You can route users to “127.0.0.1,“ which is the default local host IP address. A better solution is to host a page on your network that explains these restrictions to users, and use the IP address of that page for these entries.
To delete a local DNS entry, click its minus icon button.
Split DNS Entry Settings

Figure 3. Example Split DNS Entries List & Form
The Split DNS Entries list (Fig. 3) shows domains for which all DNS queries should be handled by a specific DNS server. This is useful if you want an internal DNS server to handle a DNS query that routes you to an internal domain, such as an Active Directory.
To create a split DNS entry, use the form at the bottom of the list. Enter a Domain you would like to split from the default DNS server, enter the DNS Server address that you would like to handle DNS queries for that domain, and then click the “Add Split DNS Entry” button.
To delete a split DNS entry, click its minus icon button.
