Overview
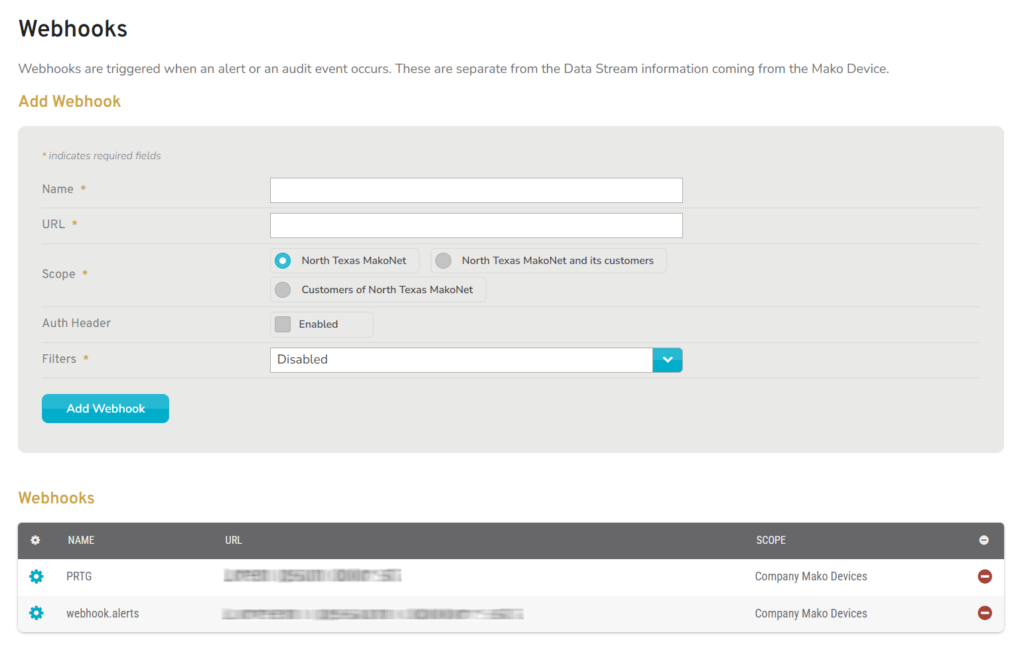
Figure 1. Example Webhooks Page
Mako Networks provides an Application Programming Interface (API) that can be used to integrate the Mako Central Management System (CMS) with external systems, such as data analytics platforms and custom business applications.
A detailed API specification for developers is available by request from Mako Support.
The Webhooks page allows you to manage webhook integrations for the selected company. Webhooks push event data from the Mako CMS to client application endpoints and are triggered when an alert or audit event occurs, such as a change to connectivity status.
Add Webhook
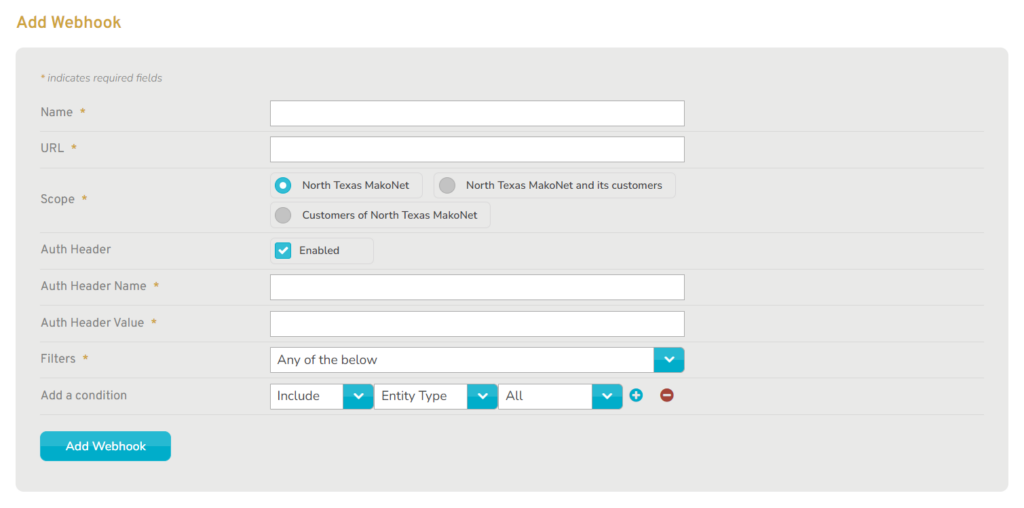
Figure 2. Example Add Webhook Form
Use the Add Webhook form to add a new webhook integration for the selected company.
Name
Enter an informative, memorable, and unique name for this webhook integration.
URL
Enter the client application endpoint that will receive data from the Mako CMS for this webhook integration.
The functionality at the client application endpoint must be designed to handle the data format provided by the API. Refer to the API specification.
Scope
Choose whether or not this webhook integration will be available to customers of the selected company.
Auth Header
Enable this feature if the client application endpoint requires a specific header on all requests. This can be used as an added security measure to identify legitimate pushes from the API, helping to protect the client application from illegitimate activity.
The functionality at the client application endpoint must be designed to require the appropriate header name and value for this feature to function properly.
Auth Header Name
Enter the unique name for the Auth Header. This is required if Auth Header is enabled.
Auth Header Value
Enter the corresponding value for the Auth Header. This is required if Auth Header is enabled.
Filters
Specify which events trigger a data push for this webhook integration.
Options
- “Disabled” – all available events trigger a data push
- “Any of the below” – events that match any “Include” conditions and do not match any “Exclude” conditions trigger a data push
- “All of the below” – events that match all “Include” conditions and do not match all “Exclude” conditions trigger a data push
Conditions
Choose whether the condition will “Include” or “Exclude” events.
Choose the condition type.
- Entity Type
- Event Type
- Specific Event
- Mako Label
- Metadata Key
- Metadata Value
- Critical Device
The selected type will provide dynamic fields that you can use for customizing the condition to meet your business requirements.
Use the “+” and “-” buttons to add or remove conditions from the list.
Add Button
Click the “Add Webhook” button to create a new webhook integration with these settings.
View Webhooks

Figure 3. Example Webhooks List
Use the Webhooks list to view and manage webhook integrations for the selected company.
Columns
- [Edit] – edit icon button
- Name – name of this webhook integration
- URL – client application endpoint for this webhook integration
- Scope – which companies can access this webhook integration
- [Delete] – delete icon button
Actions
Edit Webhook
Click an existing Webhook item’s plus icon button to edit the Webhook item. Make and save any desired changes using the Edit Webhook form.
Send Test Request
Click the “Send Test Request” button on the Edit Webhook form to push test data to the client application endpoint. This can help you determine whether the webhook integration is functioning as expected.
Delete Webhook
Click an existing Webhook item’s minus icon button to delete the Webhook item. You will be asked to confirm this action.