Overview
If you are new to the Mako System, welcome! You can follow this guide to familiarize yourself with some of the first and most common functions you will encounter in the Mako Central Management System (CMS). Let’s get started! You might not need to complete all of these steps in your implementation, so you can skip any steps that do not apply to you.
The Mako CMS is where all Mako Devices are controlled and managed. Mako Devices are not able to be configured locally (on-device). Instead, they are exclusively configured via the CMS. Before you physically connect a Mako Device, it must be set up in the CMS.
Out of the box, Mako Devices are preconfigured to request an IP address via DHCP on their primary WAN interface (or port 1 on managed switches). Most Mako Devices with built-in cellular WANs will also try to connect via the cellular network. Once a Mako Device establishes an internet connection, it will communicate with the Mako CMS to retrieve its configuration profile. It will also create an encrypted connection to the CMS so any changes are applied securely within seconds. None of your data flows through the CMS; it’s there for command and control only.
Should your Mako Device require a specific WAN configuration to enable internet connectivity, this is still achieved via the Mako CMS. You can download the device’s configuration profile from the CMS and copy it onto a USB flash drive which is inserted into your Mako Device. The device will then load that config, connect to the Internet and begin communicating with the CMS.
Major Entity Types
There are four major entity types controlled via the Mako CMS:
 Companies
 Users
Users Sites
Sites Mako Devices
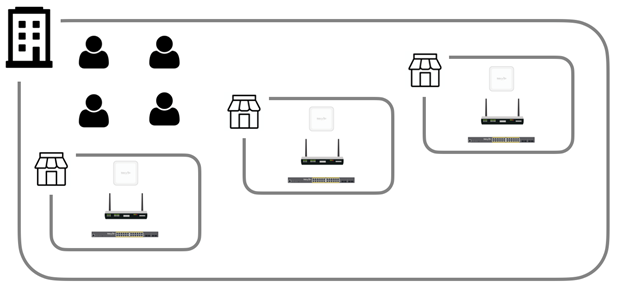
Figure 1. Major Entity Type Relationships
The diagram above (Fig. 1) illustrates how these four entity types relate to one another.
Certain types of Companies (such as resellers and distributors) can have other Companies within them, each with their own Users, Sites, and Mako Devices.
Additionally, a User can belong to more than one Company and may be able to view and configure multiple Companies’ Sites and Mako Devices.
Different types of Users have varying levels of access. Users may have access to all of a Company’s Sites and Mako Devices or just a selection. Different types of Users may have complete control of Mako Devices, access only to reports, or whatever level of access is deemed appropriate.
Getting Started
Step 1. Register Your Mako CMS User Account
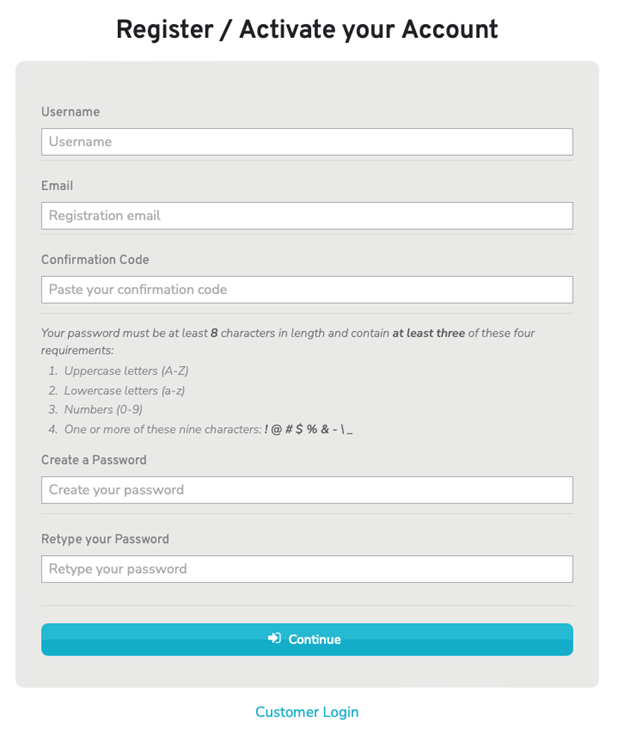
Figure 2. New User Registration Form
If you do not already have a Mako CMS User account, your first task is to request that an account be created for you. You will need to identify the person at your Company who is responsible for managing Mako CMS User accounts and make this request.
Once a User account has been created for you, you will receive a New User Registration email. Follow the instructions in the email to complete the registration process. See the Registration Process documentation for details.
Step 2. Log In to the Mako CMS
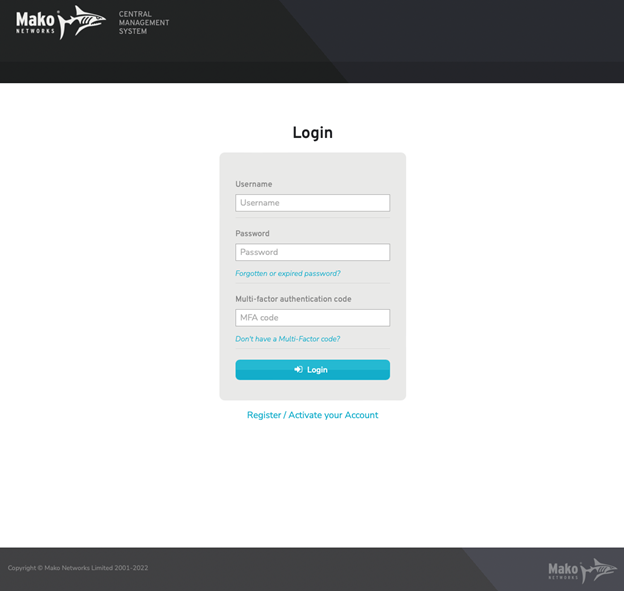
Figure 3. Login Page
Once you have a User account, you can log in to the Mako CMS. Browse to https://comp.makonetworks.com. See the Login Process documentation for details, including what to do if you have forgotten your password.
Step 3. Explore the Home Page and the Mako CMS Layout
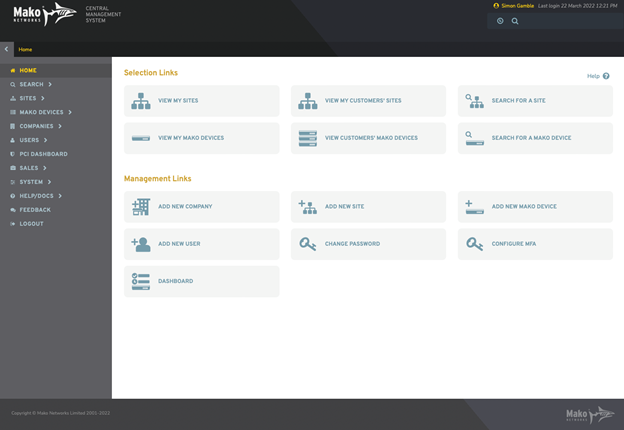
Figure 4. Example Home Page
Upon successfully logging in to the Mako CMS you will arrive at the Home page. What displays here depends in part on your specific User account. See the Home documentation for details, including all aspects of the CMS layout. Familiarize yourself with the navigation, search, and and selection features, as you will be using them throughout the CMS.
Step 4. Manage Your User Account
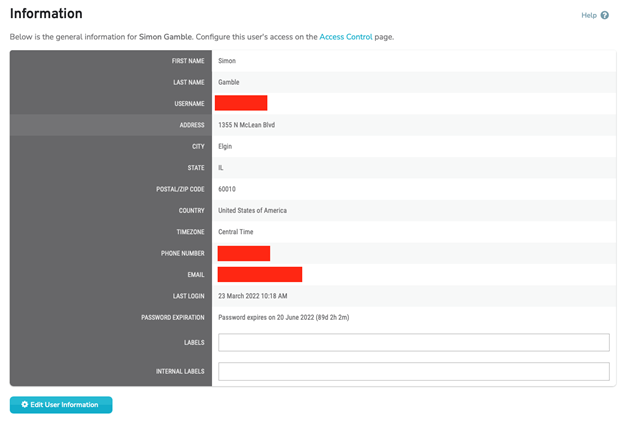
Figure 5. Example User Information Page
The Users section contains tools for managing your Users. Your Company and your User account have already been created for you, and at least one Site and one Mako Device have probably been registered for your Company, as well.
A common first use of this section is to update your User account. Select your User account to access each of the related settings pages. See the Users documentation for details.
Step 5. Search for a Site or Mako Device
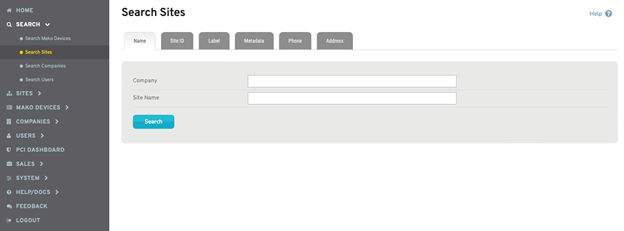
Figure 6. Example Site Search Page
To interact with a Site or Mako Device via the Mako CMS, you’ll need to select one that you can access. The Search menu in the left navigation allows you to search for Mako Devices, Sites, Companies, and Users.
Once you select one of these entity types, the tabs across the top of the page allow you to search by name, address, phone number, and other criteria. See the Search documentation for details.
Select your Mako Device by clicking on the blue gear icon next to its name. Then you can view or manage its configuration settings, reports, or diagnostics.
Step 6. Configure the Selected Mako Device

Figure 7. Example Mako Device Home Page
The Configure section contains tools for configuring a selected Mako Device. See the Configure documentation for details.
Step 7. Apply a License to the Selected Mako Device
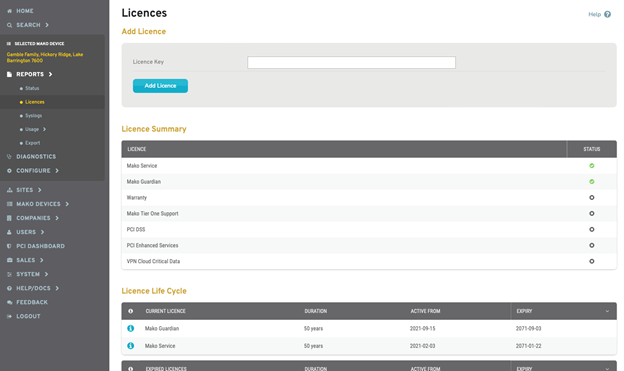
Figure 8. Example Licenses Page
Mako Devices arrive with a 14-day temporary service license, so you are not required to apply a paid license during installation. If you have a paid license key for a Mako service license, or any other Mako license, you can apply it to the selected Mako Device in the Reports section. See the Licenses documentation for details.
Step 8. View Reports for the Selected Mako Device
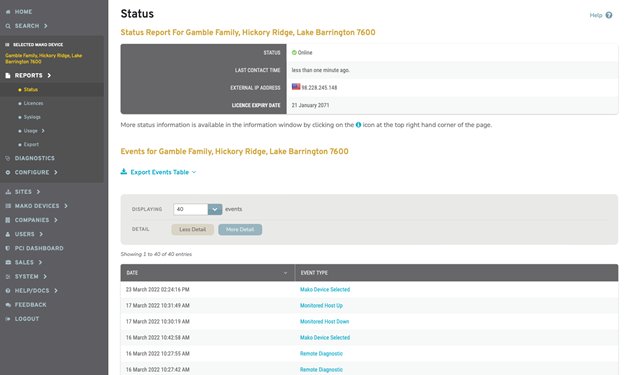
Figure 9. Example Status Page
The Reports section contains tools for viewing and generating reports for the selected Mako Device. See the Reports documentation for details. The most basic report is the Status report, so that is a good place to start.
Step 9. Run Diagnostics on the Selected Mako Device
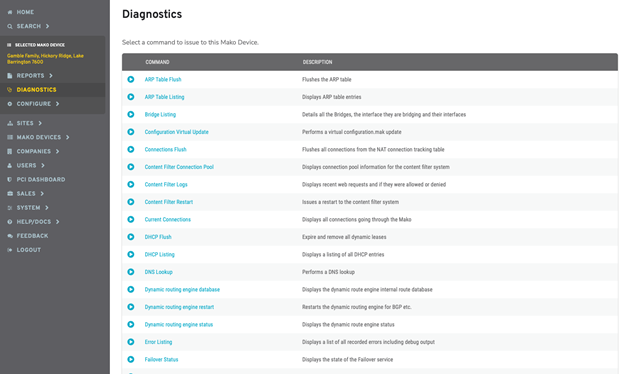
Figure 10. Example Diagnostics Page
The Diagnostics section allows you to issue commands to the selected Mako Device in order to view and evaluate its current status. See the Diagnostics documentation for details.
Step 10. Log Out of the Mako CMS
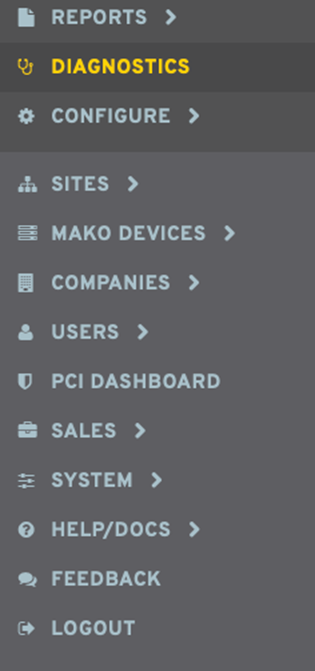
Figure 11. Example Left Navigation
To log out of the Mako CMS, use the “Logout” link in the left navigation of any page. For security purposes, it is best to log out of the Mako CMS after every browsing session.