Overview
The Mako Central Management System (CMS) now supports Single Sign-On (SSO). With SSO, you can allow users to access the Mako CMS using third-party accounts created via an SSO identity provider (IdP).
For Mako CMS accounts without SSO, account credentials are managed via the Mako CMS. For Mako CMS accounts with SSO, account credentials are managed via the SSO identity provider.
This document guides you through the steps to configure SSO integration with Microsoft Entra ID as the IdP. See below for guides to other currently supported IdPs.
Currently Supported IdPs
- Microsoft Entra ID (formerly Azure Active Directory)
- Okta
General IdP Configuration Process
- Step 1: Register App Profile in IdP Manager
- Step 2: Register Provider Profile in Mako CMS
- Step 3: Register Redirect URI in IdP Manager
For detailed information regarding your specific SSO identity provider, your account with them, and your use of their products and services, please refer to the identity provider’s documentation and support. Mako Support can assist you with this, but the identity provider should have the most up-to-date information.
Multi-Factor Authentication
Multi-Factor Authentication (MFA) adds an extra layer of security to user accounts by requesting a new access code each time the user logs in. MFA is recommended for any user, but it is required for those maintaining PCI DSS compliance.
Companies that require PCI DSS compliance must enforce MFA for all users. For Mako CMS accounts without SSO, MFA is managed via the Mako CMS. For Mako CMS accounts with SSO, MFA is managed via the SSO identity provider.
Microsoft Entra ID
Step 1: Register App Profile in IdP Manager
- Go to Microsoft’s Azure Admin Portal: https://portal.azure.com.
- Navigate to Microsoft Entra ID > App Registrations.
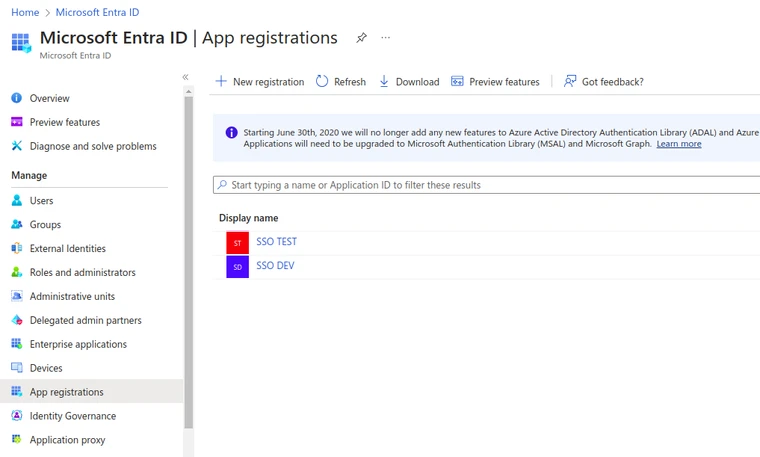
Figure 1. Example Microsoft Entra ID App Registrations Page
- Click “New registration” at the top of the App Registrations page (Fig. 1).
- Enter the following values in the form.
| App name | Enter an informative name, such as “Mako-Entra App”. You will need this in Step 2. |
|---|---|
| Account type | Choose the appropriate option for your organization. |
| Redirect URI | Leave this empty for now. You will update this in Step 3. |
- Click the button to create a new app profile with these settings.
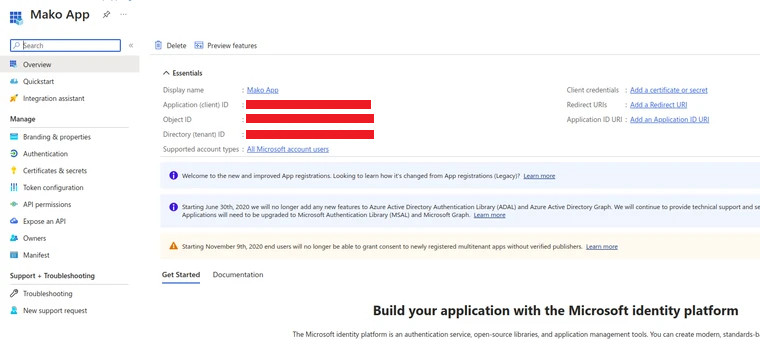
Figure 2. Example Microsoft Entra ID App Profile Page
- On the App Profile page (Fig. 2), copy and save the Application (client) ID.
You will need this in Step 2. - Click the “Add a certificate or secret” link, then copy and save the Secret value (not the Secret ID).
You will need this in Step 2.
Step 2: Register Provider Profile in Mako CMS
- Go to the Mako CMS and select the appropriate company.
- Navigate to Companies > Manage Company > Security.
See the Company Security documentation for more details.
- In the Add a New SSO Provider form, choose “Azure” for SSO Mode, then click the “Add Provider” button.
- Enter the following values in the Add SSO Provider form.
| SSO Display Name | Enter the App name from Step 1. |
|---|---|
| Client ID | Enter the Application (client) ID from Step 1. |
| Client Secret | Enter the Secret from Step 1. |
| Provider Auth URI | https://login.microsoftonline.com/TENANT_ID/oauth2/v2.0/authorize (Replace TENANT_ID with your Client ID.) |
| Provider Token URI | https://login.microsoftonline.com/TENANT_ID/oauth2/v2.0/token (Replace TENANT_ID with your Client ID.) |
| Provider Public Key URI | https://login.microsoftonline.com/TENANT_ID/discovery/v2.0/keys (Replace TENANT_ID with your Client ID.) |
| Shared | Choose the appropriate option for this company. |
You should verify the URI values with your IdP. For example, the current version number may have changed after this document was created.
- Click the “Save Provider” button to create a new provider profile with these settings for the selected company.
- Copy and save your new provider’s Mako Redirect URI from the SSO Providers list.
You will need this in Step 3.
Step 3: Register Redirect URI in IdP Manager
- Return to the App Profile page (Fig. 2) in Microsoft’s Azure Admin Portal.
- Click the “Add a Redirect URI” link, then click “Add a platform” and choose the “Web” option.
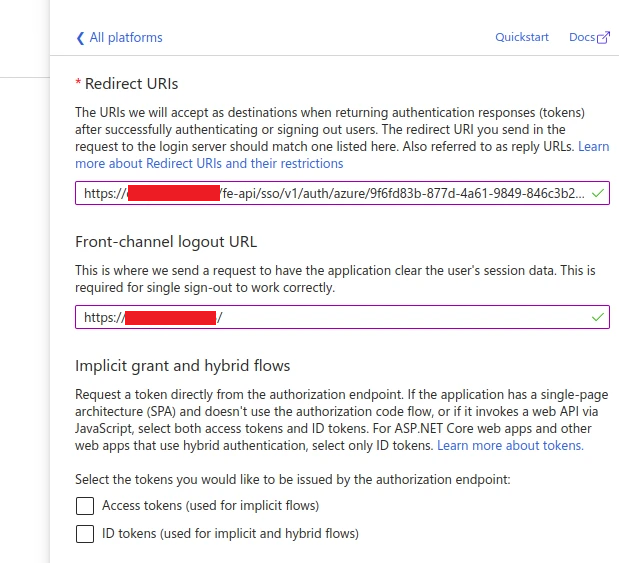
Figure 3. Example Microsoft Entra ID Add a Redirect URI Form
- Enter the following values in the form (Fig. 3).
| Redirect URIs | Enter the Mako Redirect URI value from Step 2. |
|---|---|
| Front-channel logout URL | https://comp.makonetworks.com/ |
- These values will save automatically.
Next Steps
Congratulations! You have configured Microsoft Entra ID as the SSO IdP for your selected company. You may want to configure additional IdPs for this company or configure IdPs for other companies that you manage.
To complete your SSO deployment, you must configure which Mako CMS companies and users are allowed to use SSO. See the following documentation for details.